
Backtrace Blog
For the latest developments from our engineering team, head over to the Engineering Blog at engineering.backtrace.io.
Backtrace Improvements and New Features in 2023: Improved Jira Integration
The Backtrace team has worked to continuously make improvements and enhancements after listening to the feedback from our users. As a result, we are introducing two updates with respect to Jira’s integration with Backtrace: improved, streamlined Jira integration process for Jira Cloud and Jira Server and support for Jira with the ‘issue-based alerts’ feature.
What are the benefits of integrating Jira with Backtrace?
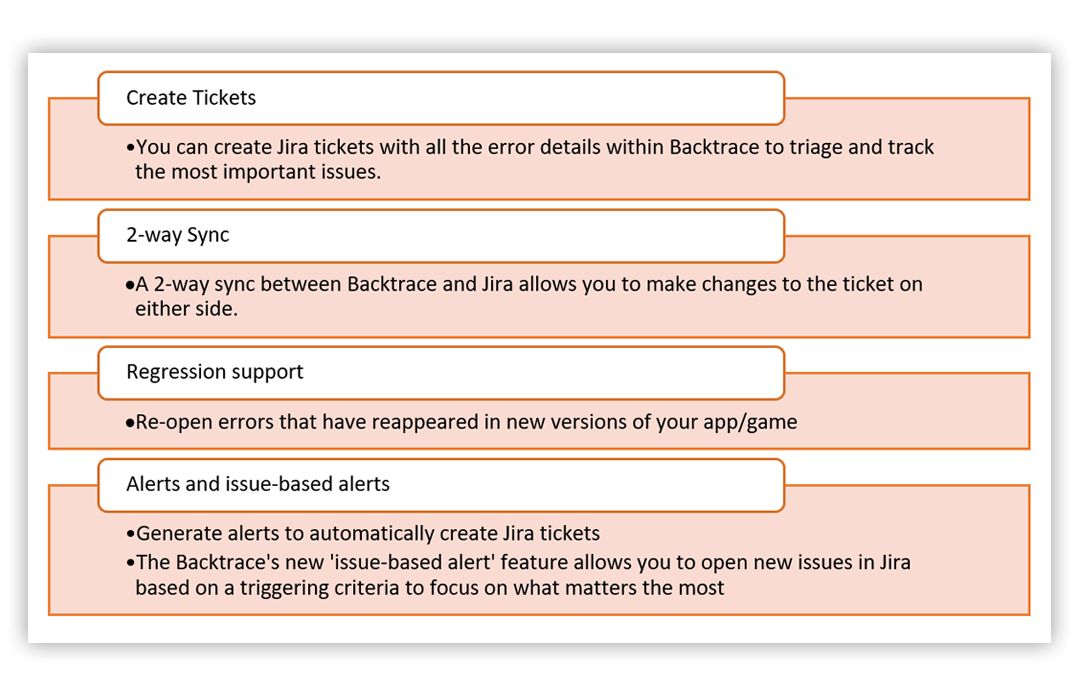
By integrating Jira with Backtrace, your team can quickly debug crashes and errors that directly impact your end users. The integration is free for all account types, including the free dev tier.
Improved Jira Integration Process
We have changed the way you integrate Jira with Backtrace. The new process separates ‘Jira Cloud’ and ‘Jira Server’ integration, and you can now integrate with a few steps via a simple and easy-to-follow setup wizard. Previously, both Jira Cloud and Jira Server had to be setup via a single integration page resulting in a confusing process to integrate and often required support from Backtrace to successfully integrate. With the new improvements, Backtrace users can integrate on their own without any complications.
In a few simple steps as outlined below, you will now be able to integrate your Jira cloud instance with Backtrace, create tickets and perform seamless actions to remove the hassle off your ticket and issue-tracking.
The Jira Cloud Integration Process
1. Select Jira Cloud
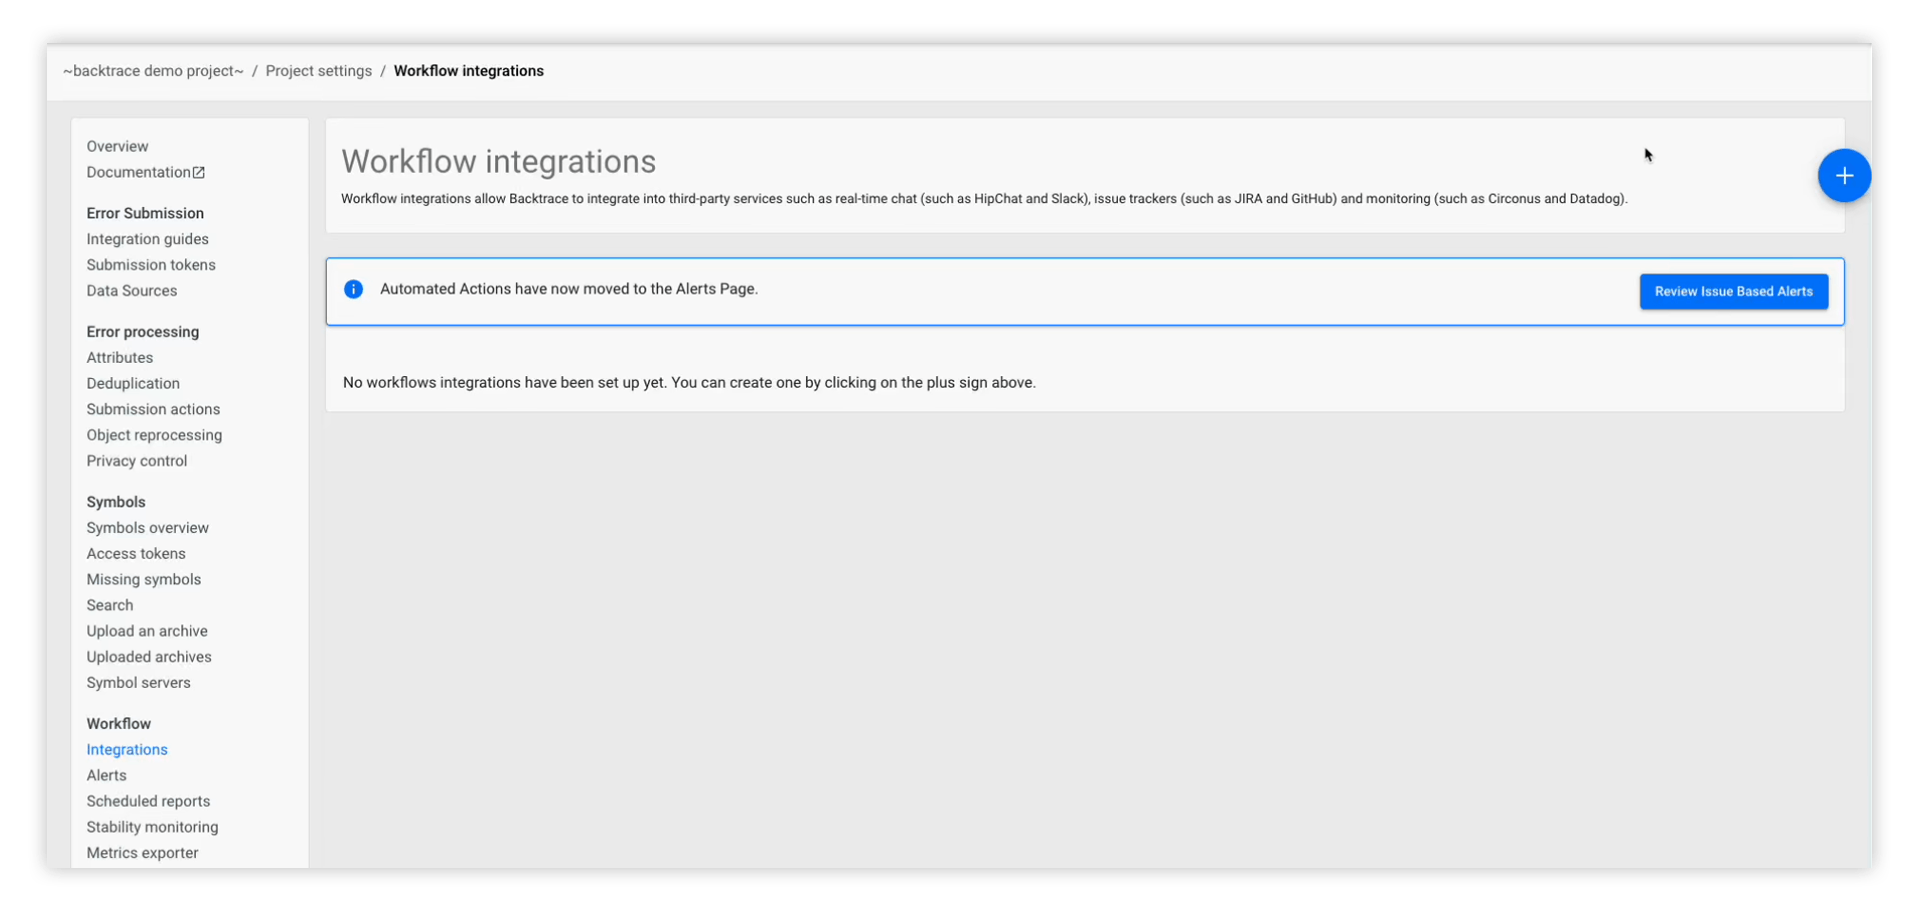
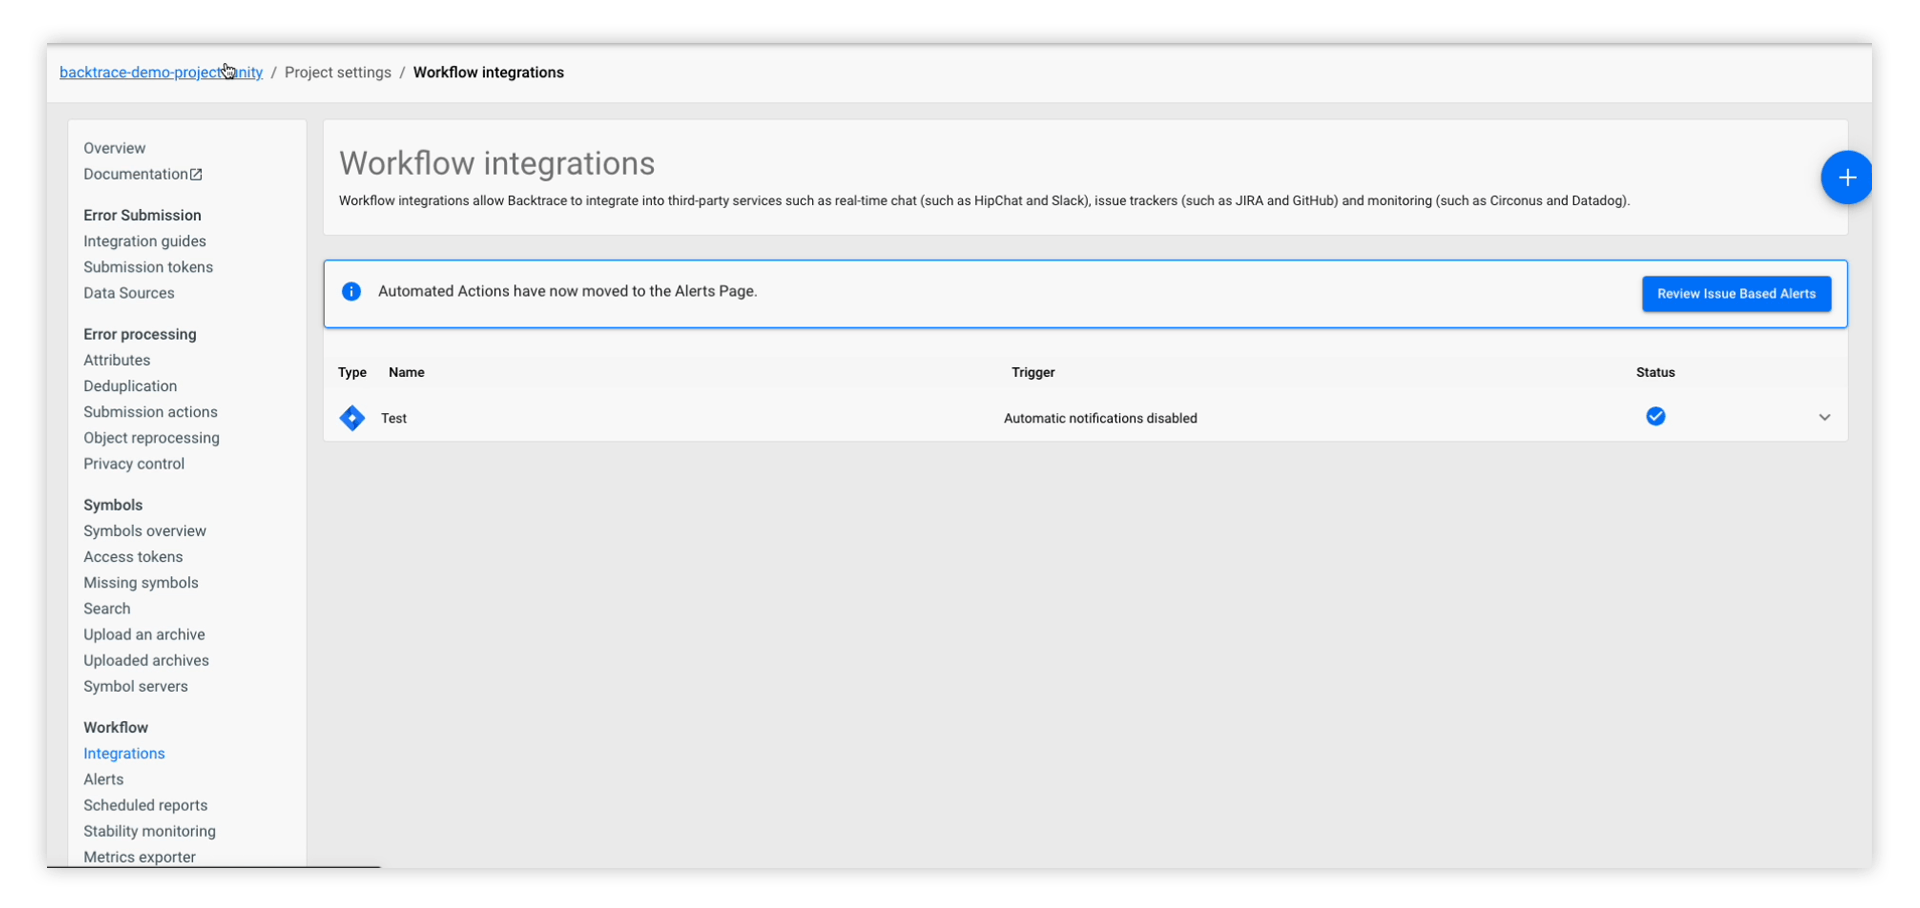
To get started, navigate to the Integrations page (via Project Settings > under Workflow). Then Click +
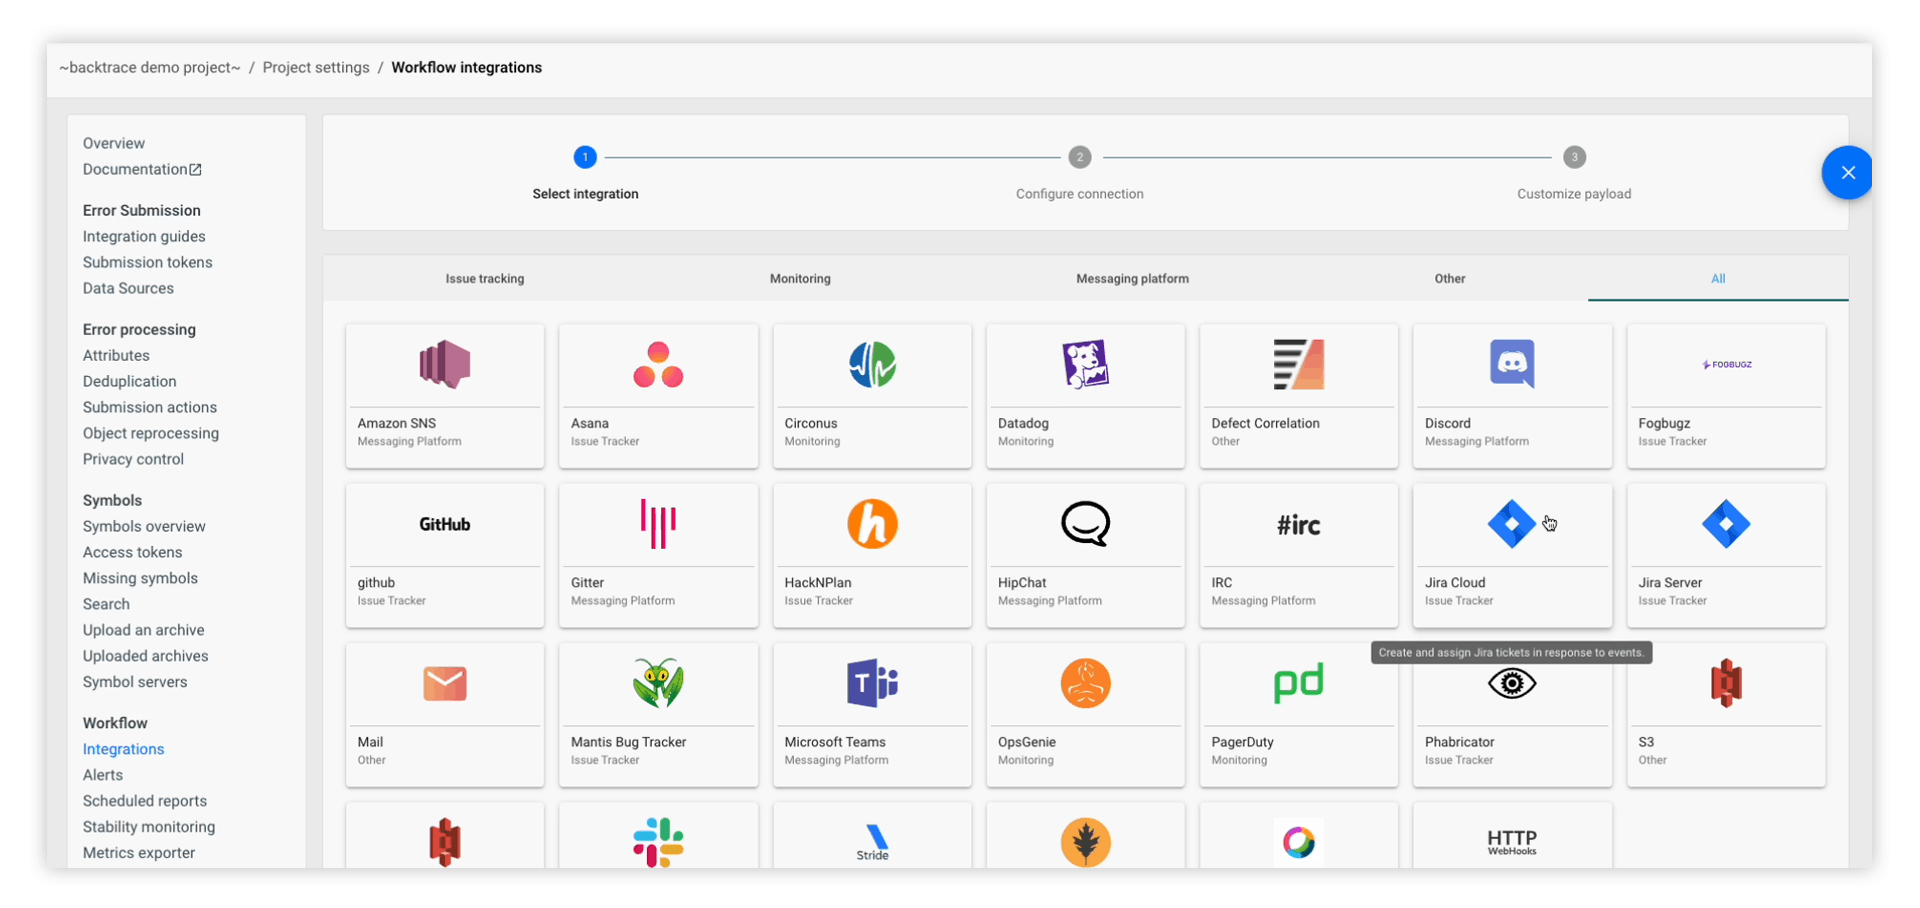
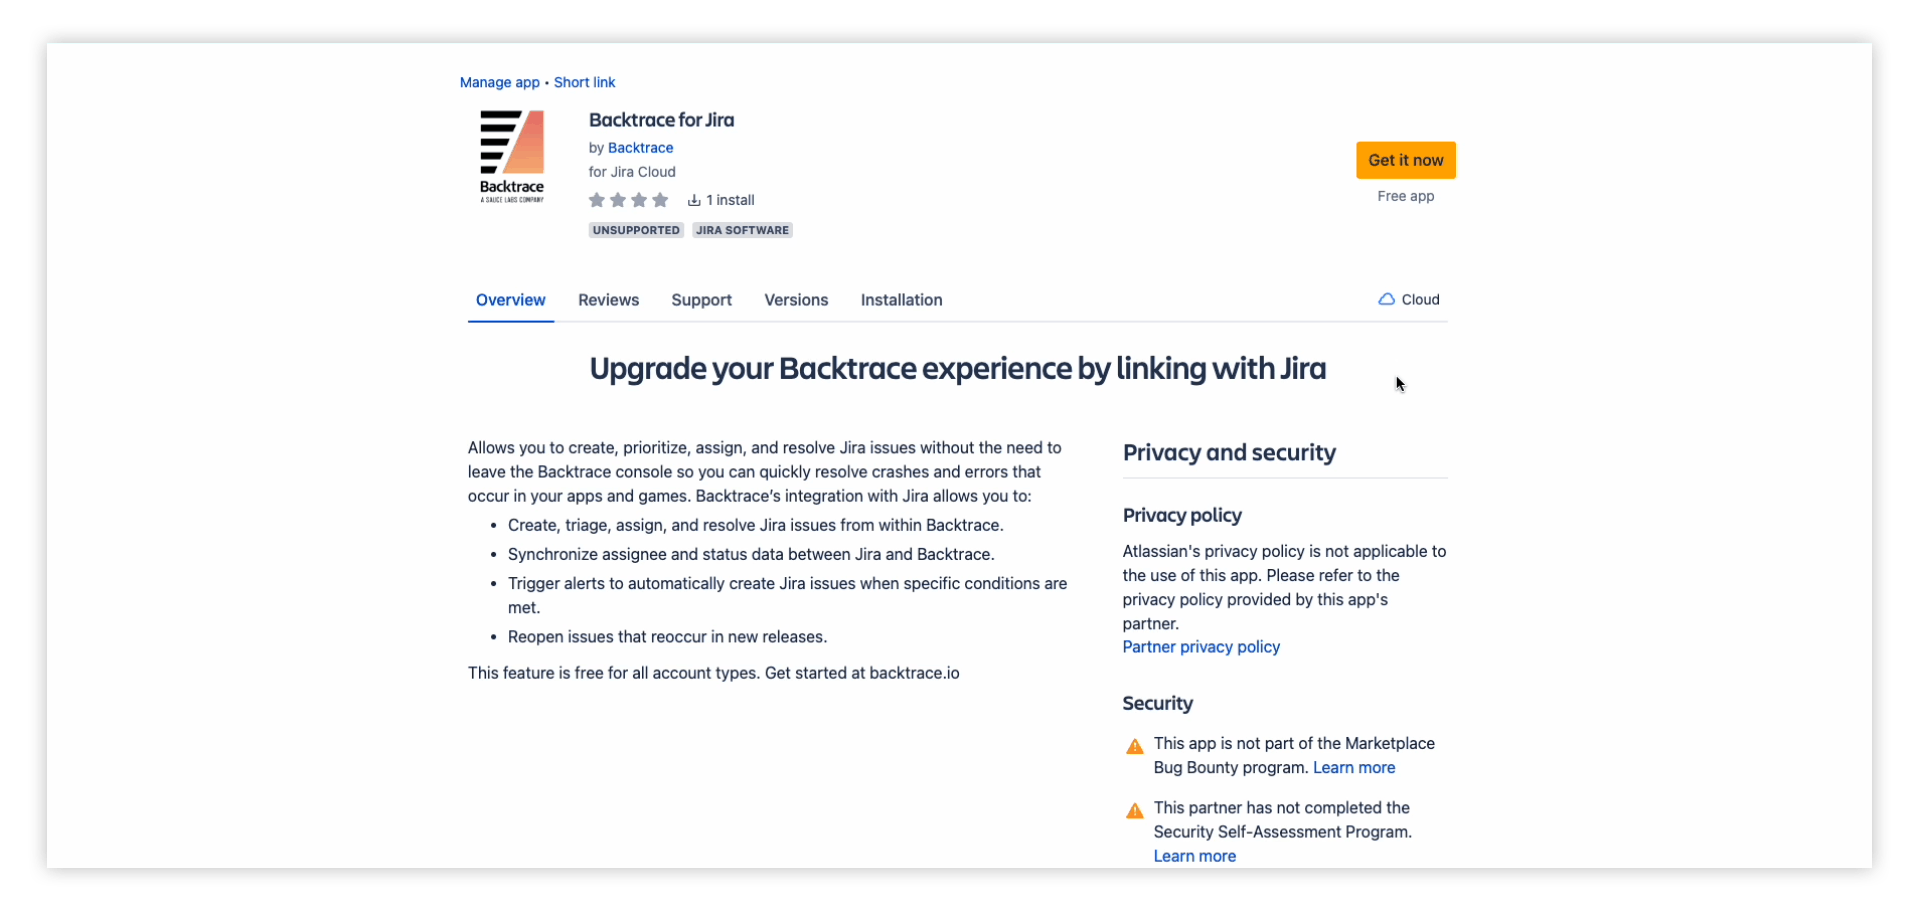
Once the integrations list gets loaded, select Jira Cloud (under Issue tracking)
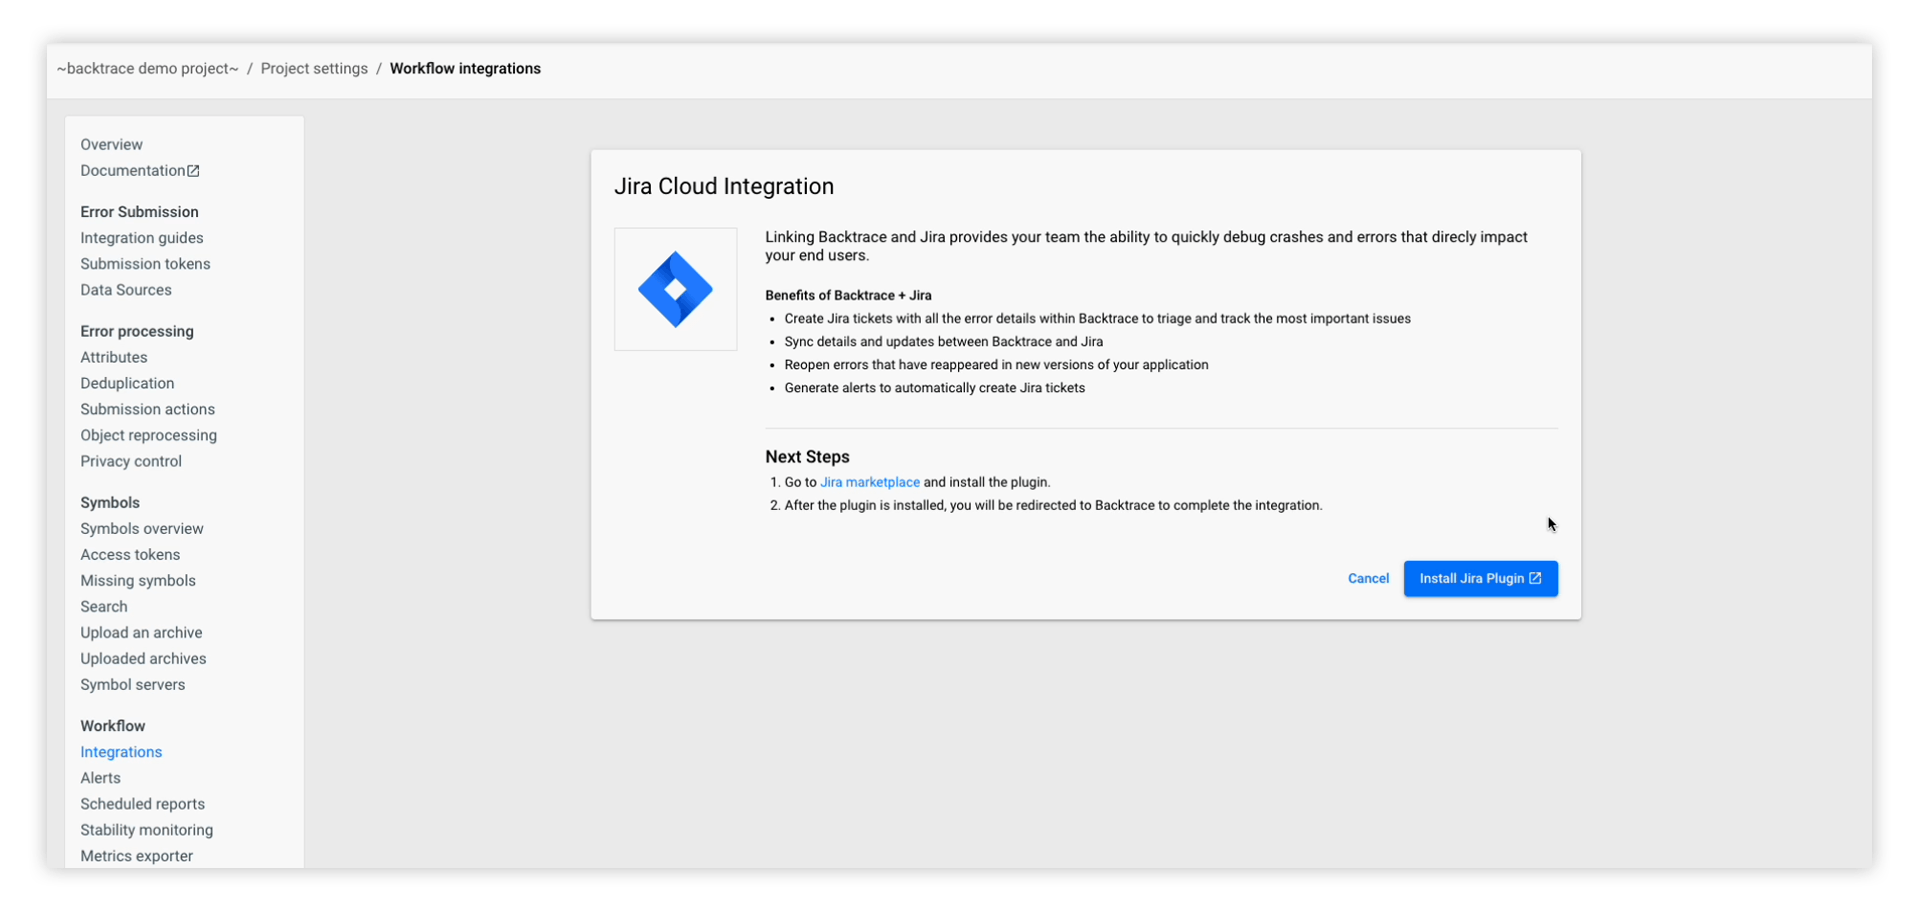
At this point, the webpage will check whether the Jira plugin is already installed. If it is not installed, it will redirect you to the following page:
2. Using Jira for the first time
If it is the first time you are integrating Jira with Backtrace, you will have to install the Jira plugin before you can connect your Jira Cloud Instance.
- Clicking on Install Jira Plugin in the above webpage will redirect you to the Jira marketplace where you will be asked to install the Backtrace plugin.
- Next, click on Get it now to install the plugin.
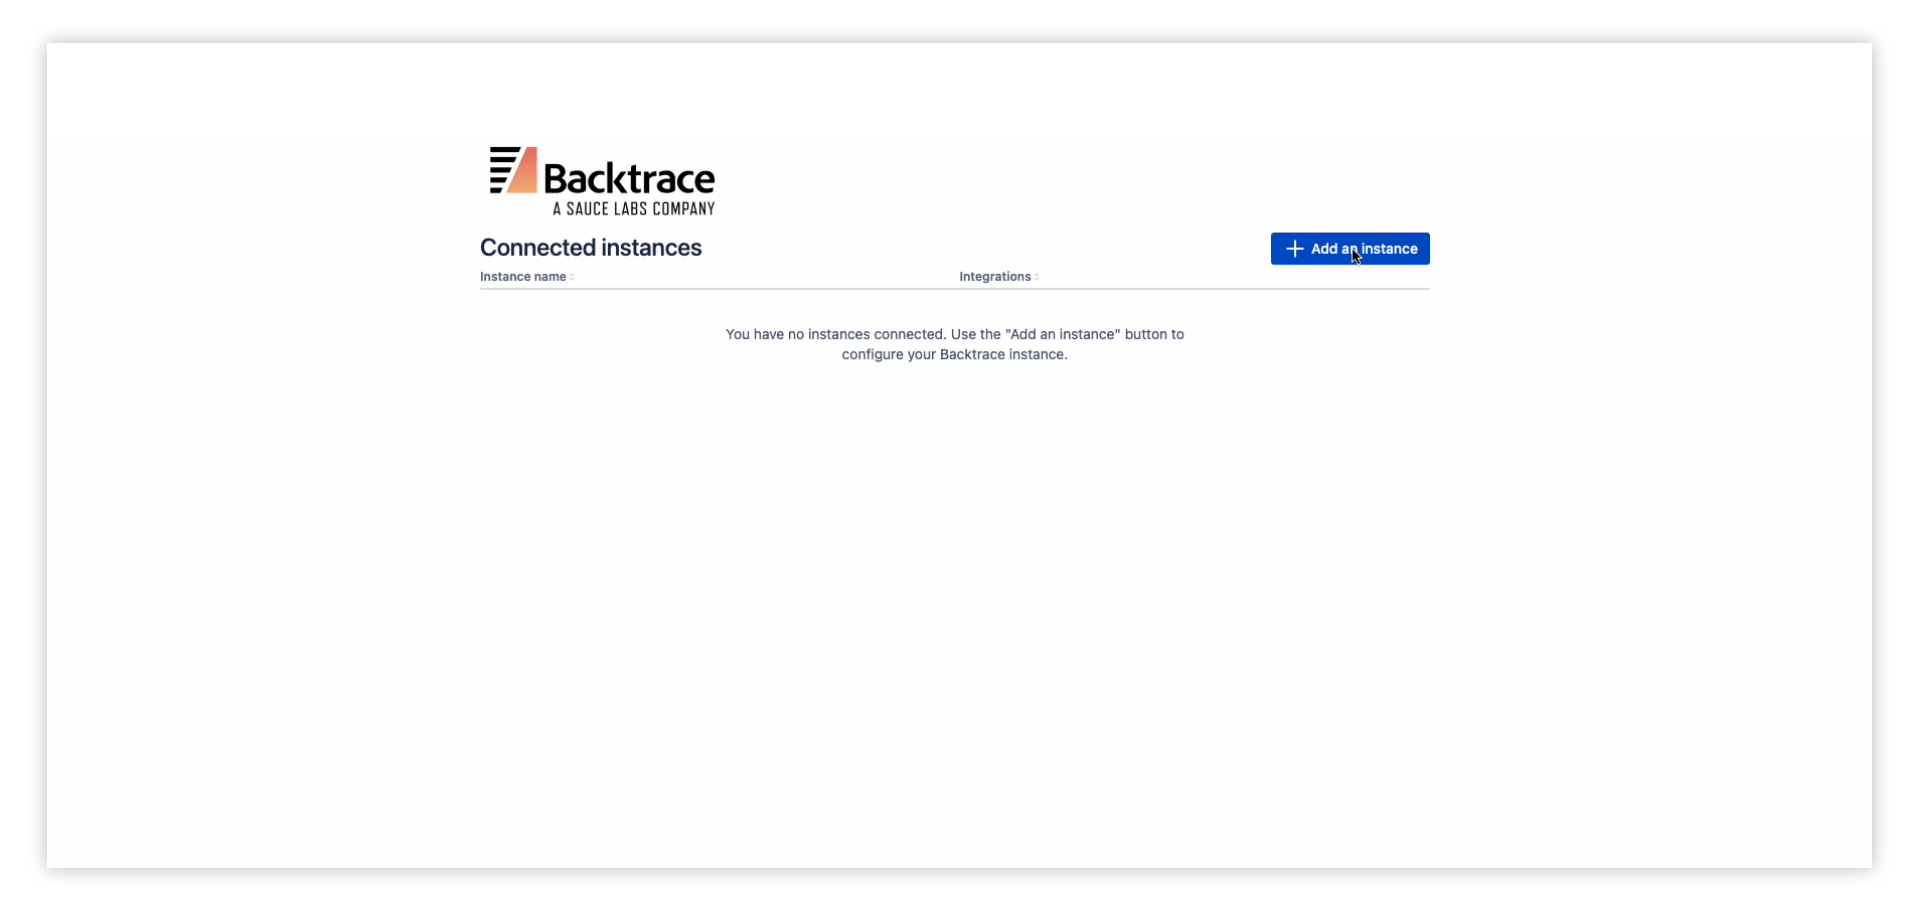
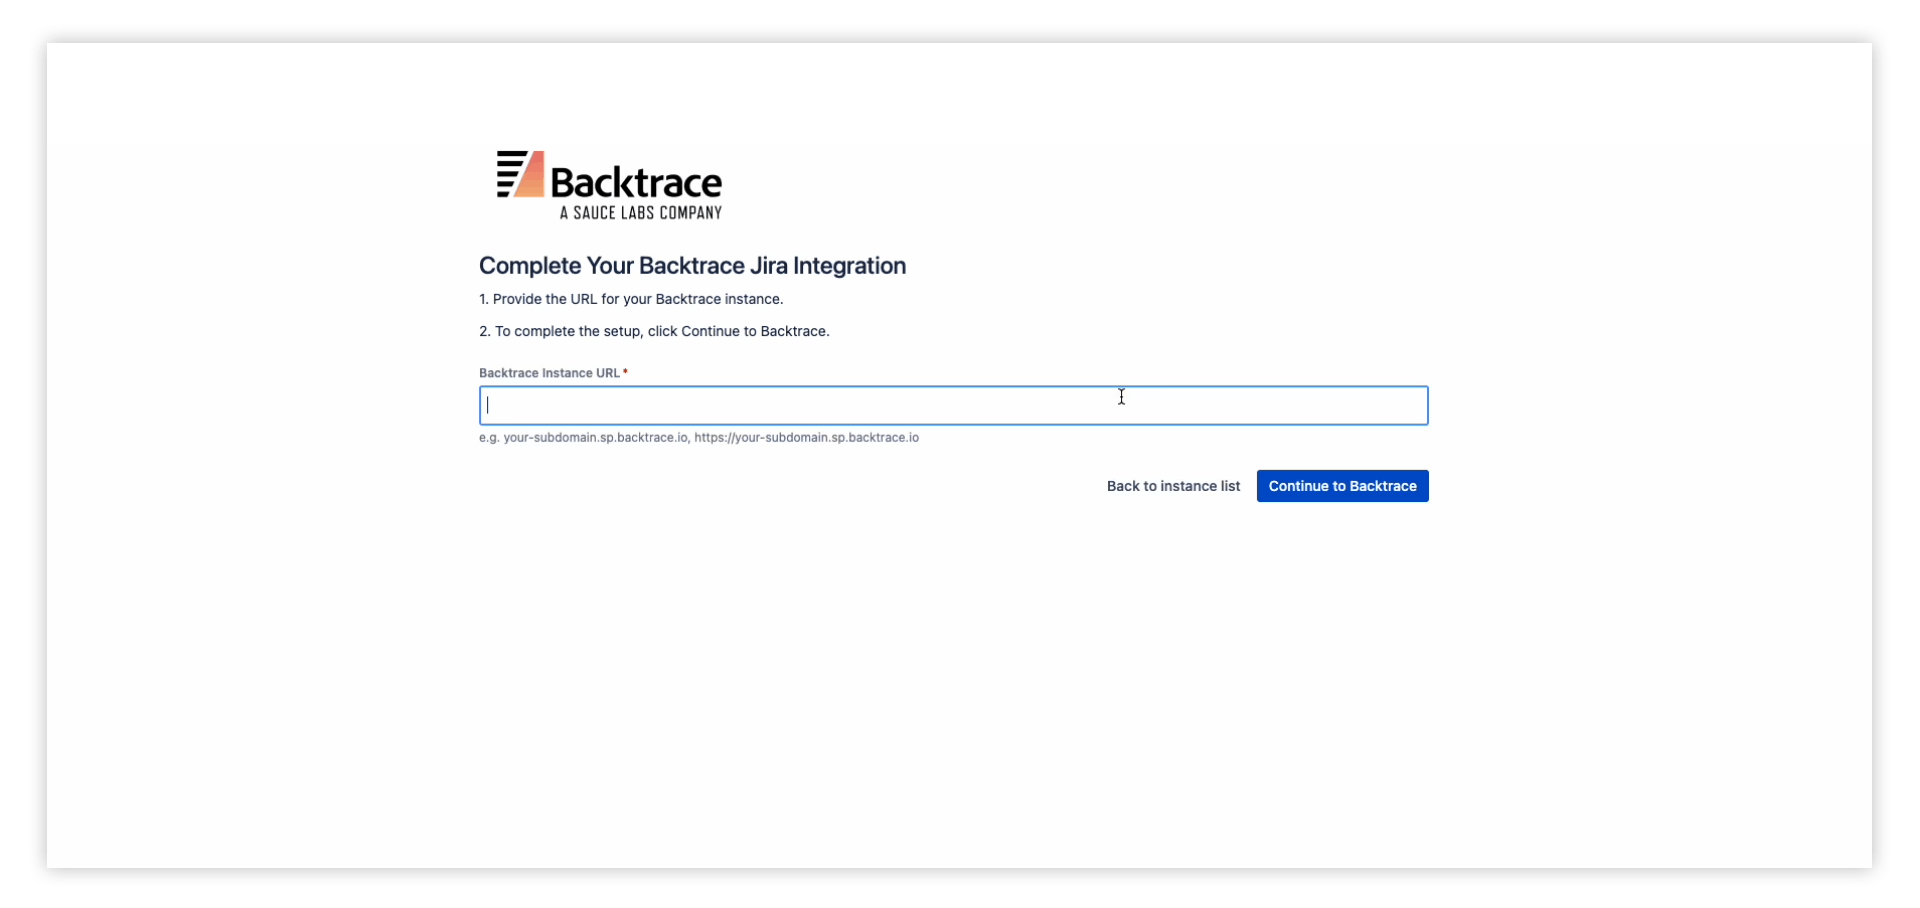
Next, connect the Backtrace instance to Jira by clicking on Add an Instance. Then enter your Backtrace Instance URL and click Continue to Backtrace
3. Complete the Integration
Once the above configuration is completed, you will be redirected to the Backtrace workflow integration page. Enter the Integration Name, select a Project Name and configure data synchronization options.
3.1 Data Synchronization
With data synchronization, Backtrace will sync resolution Status and Assignee fields with Jira issues. The following settings are available:
- Data synchronization from Backtrace to Jira: The Status and Assignee fields will be updated in Jira when issues are updated in Backtrace.
- Data synchronization from Jira to Backtrace: The Status and Assignee fields will be updated in Backtrace when issues are updated in Jira.
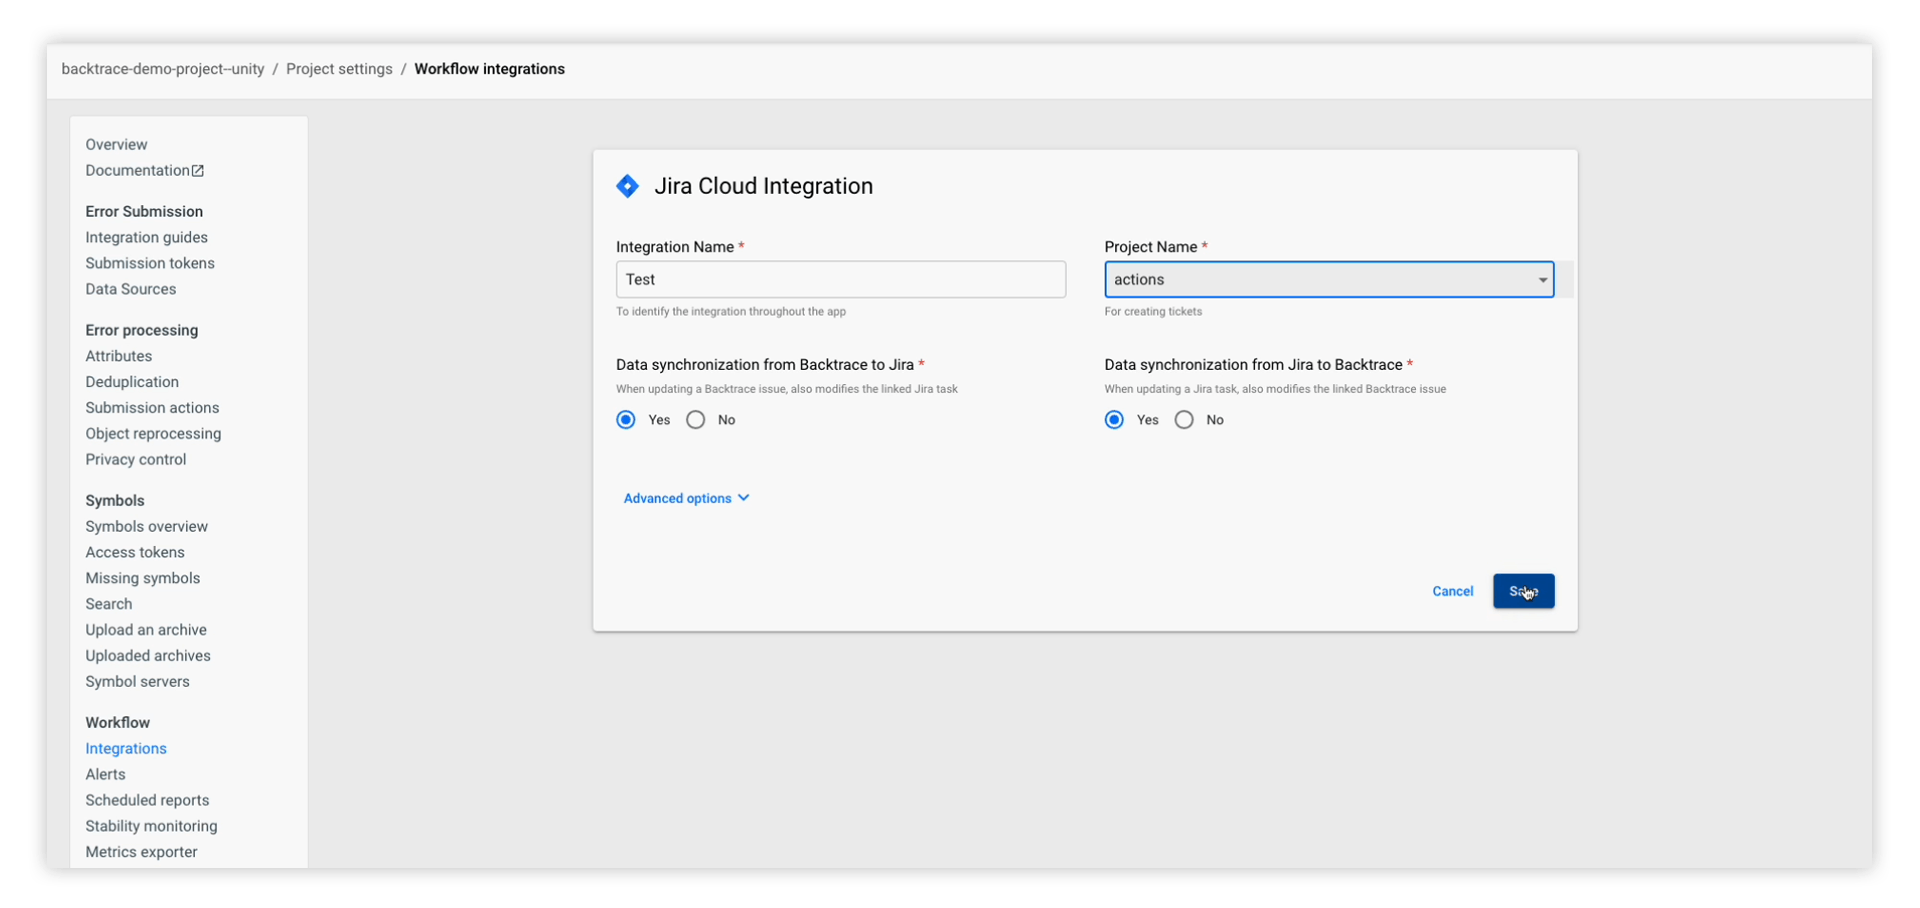
It is recommended that you enable both settings for two-way sync. After you have selected the above options, click Save to complete the integration.
Once the integration is successful, your new integration will be listed under the Workflow integrations page.
4. Create a new Jira ticket from the Backtrace dashboard
Backtrace makes it extremely easy for you to create a new Jira ticket.
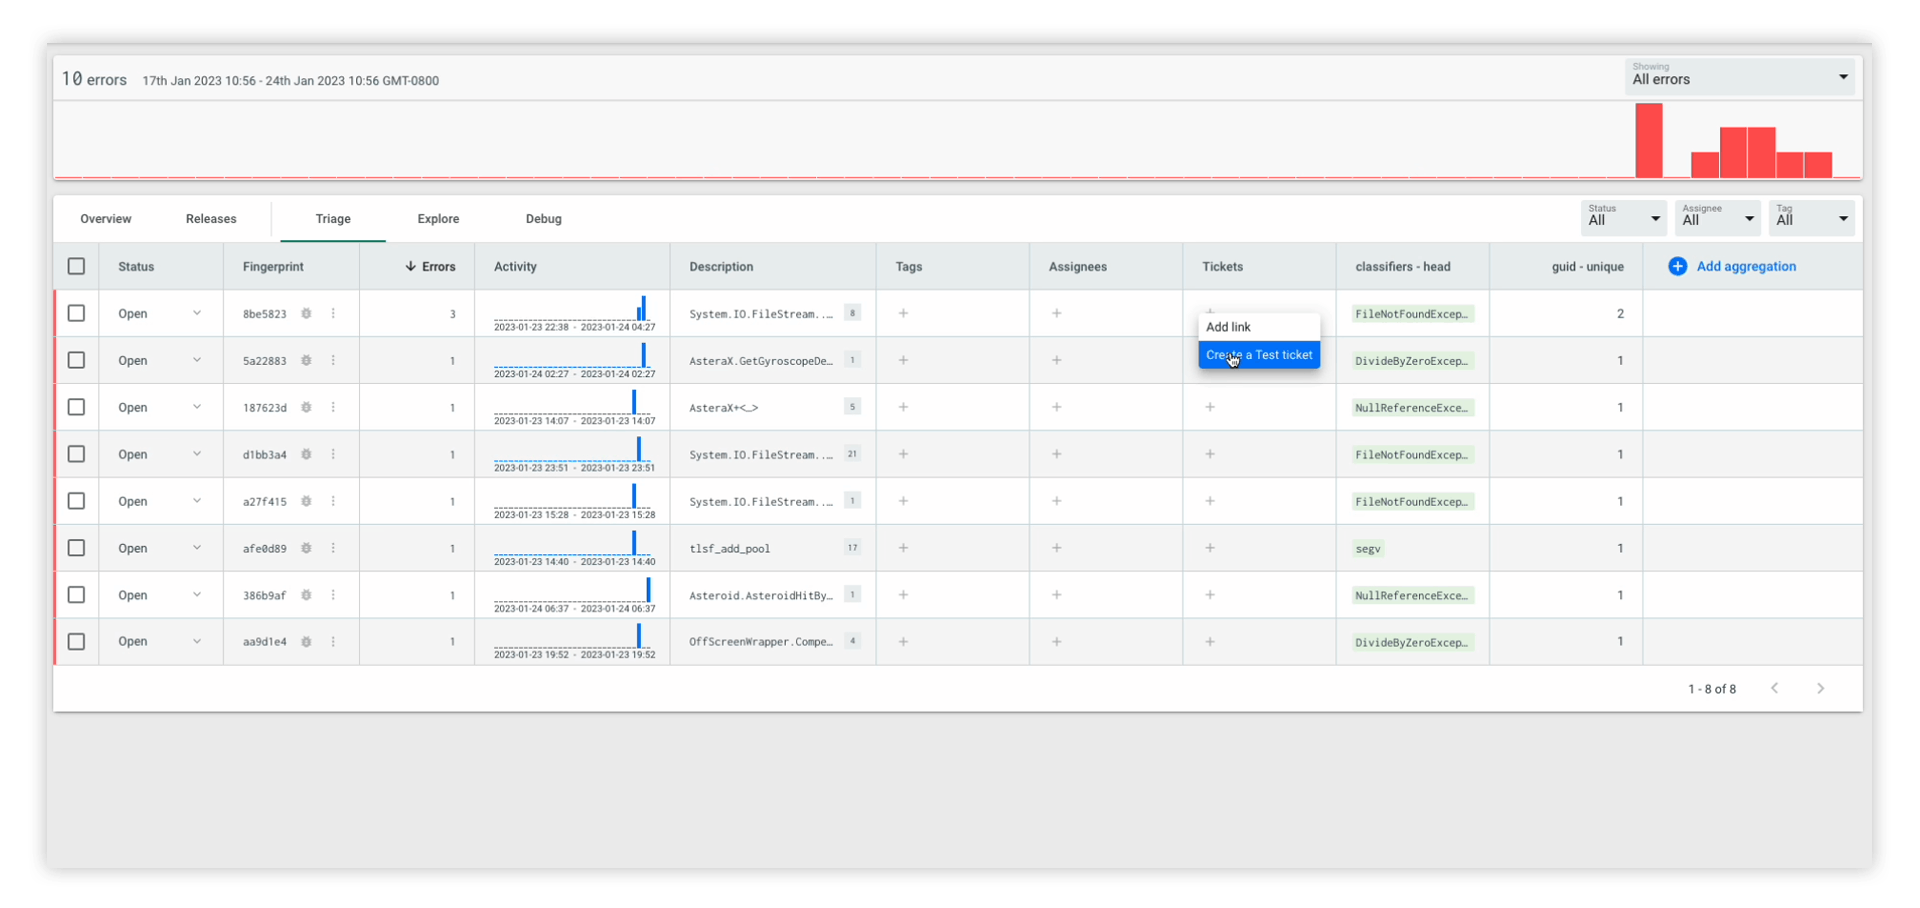
- To do so, first navigate to the ‘Triage’ tab of your chosen Backtrace project.

- Next, under the ‘Tickets’ column, click on the ‘+’ icon for the issue of interest.
- Select ‘Create a ticket’
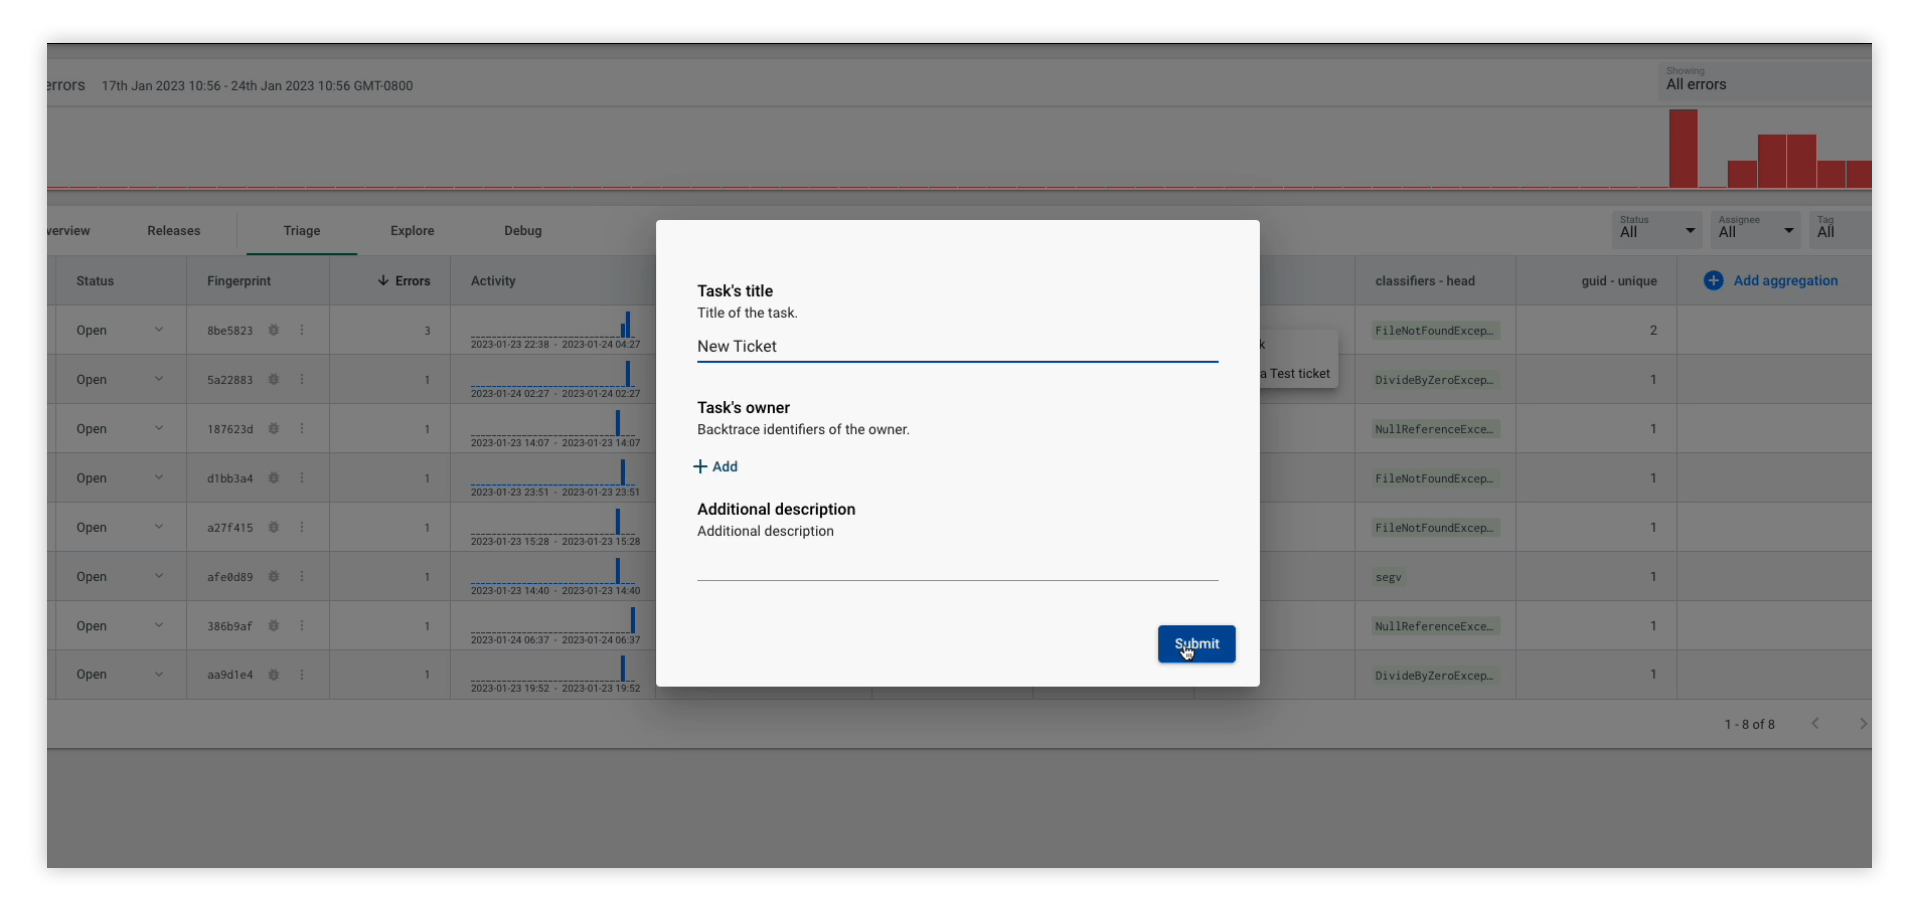
- Enter the ‘task title’ (and optionally, assign it to a task owner and add a task description) and click ‘Submit’
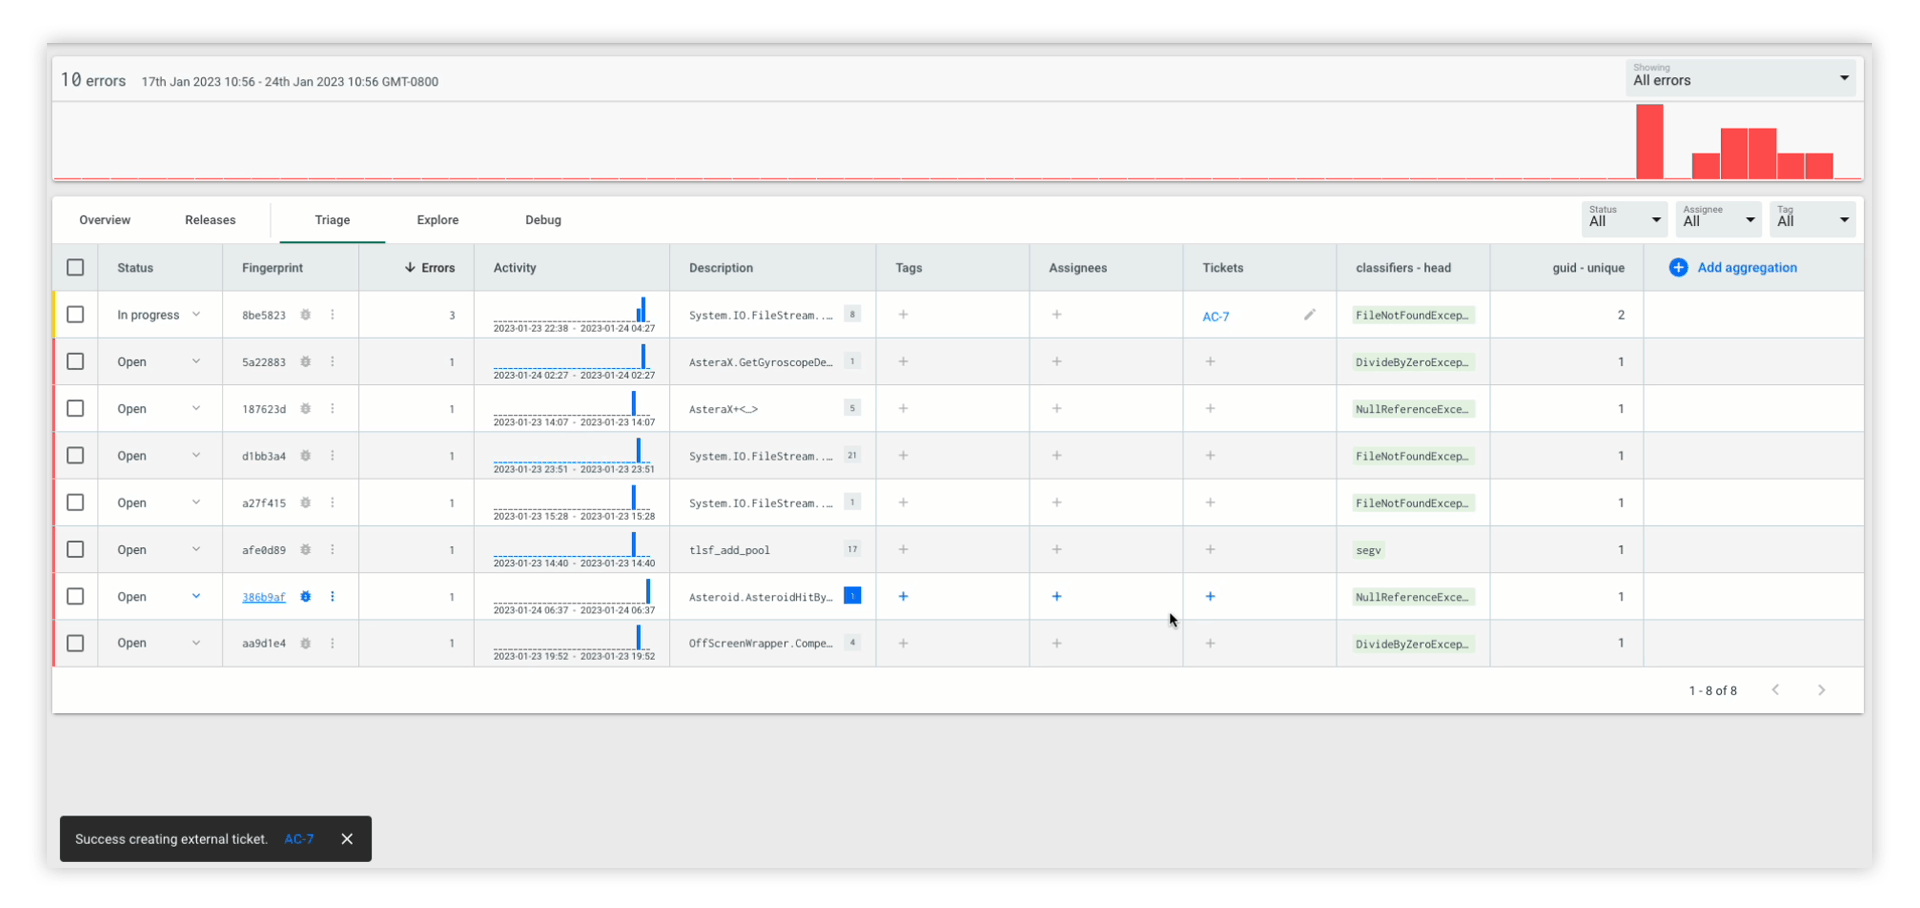
Once the ticket is created, you will notice that issue status changes to ‘In-progress’ from ‘Open’ and a Jira ticket is linked to the issue. While the issue is not assigned to anyone in this example, it is possible to assign it to a team member. When an issue is assigned to a team member, the name of the team member appears under the ‘Assignees’ column.
Advanced Options
You can use our advanced options to have more control over the message body. For example, you may provide important attributes to help you debug crashes like device model, platform, and version. Additionally, you may populate Jira custom fields, and automatically reopen tickets if there are regressions in later application versions with resolved until behavior.
Switch to Backtrace for your next project
If you have not used Backtrace yet or if you are using another tool, the powerful Jira and Backtrace integration is one more reason you should be using Backtrace in your next project. You may get started with a free trial of the Backtrace by signing up here.
Next: Improved Jira Server Integration
Learn more about how we have made it easier for you to integrate JIRA server in your backtrace project in our next blog.