
Backtrace Blog
For the latest developments from our engineering team, head over to the Engineering Blog at engineering.backtrace.io.
Backtrace Improvements and New Features in 2023: Jira Server Integration Walkthrough
In the previous blog, we outlined how we made it easier for you to integrate Jira Cloud with Backtrace. Just as we did with Jira Cloud, we have made the process easier to integrate your Jira Server instance with Backtrace. In this blog, we walk you through the process of integrating Jira Server with Backtrace.
Primarily, there are three types of authentications that Backtrace supports: OAuth 2.0, OAuth 1.0 and Basic. We will walk you through the process of setting each of these auth types below.
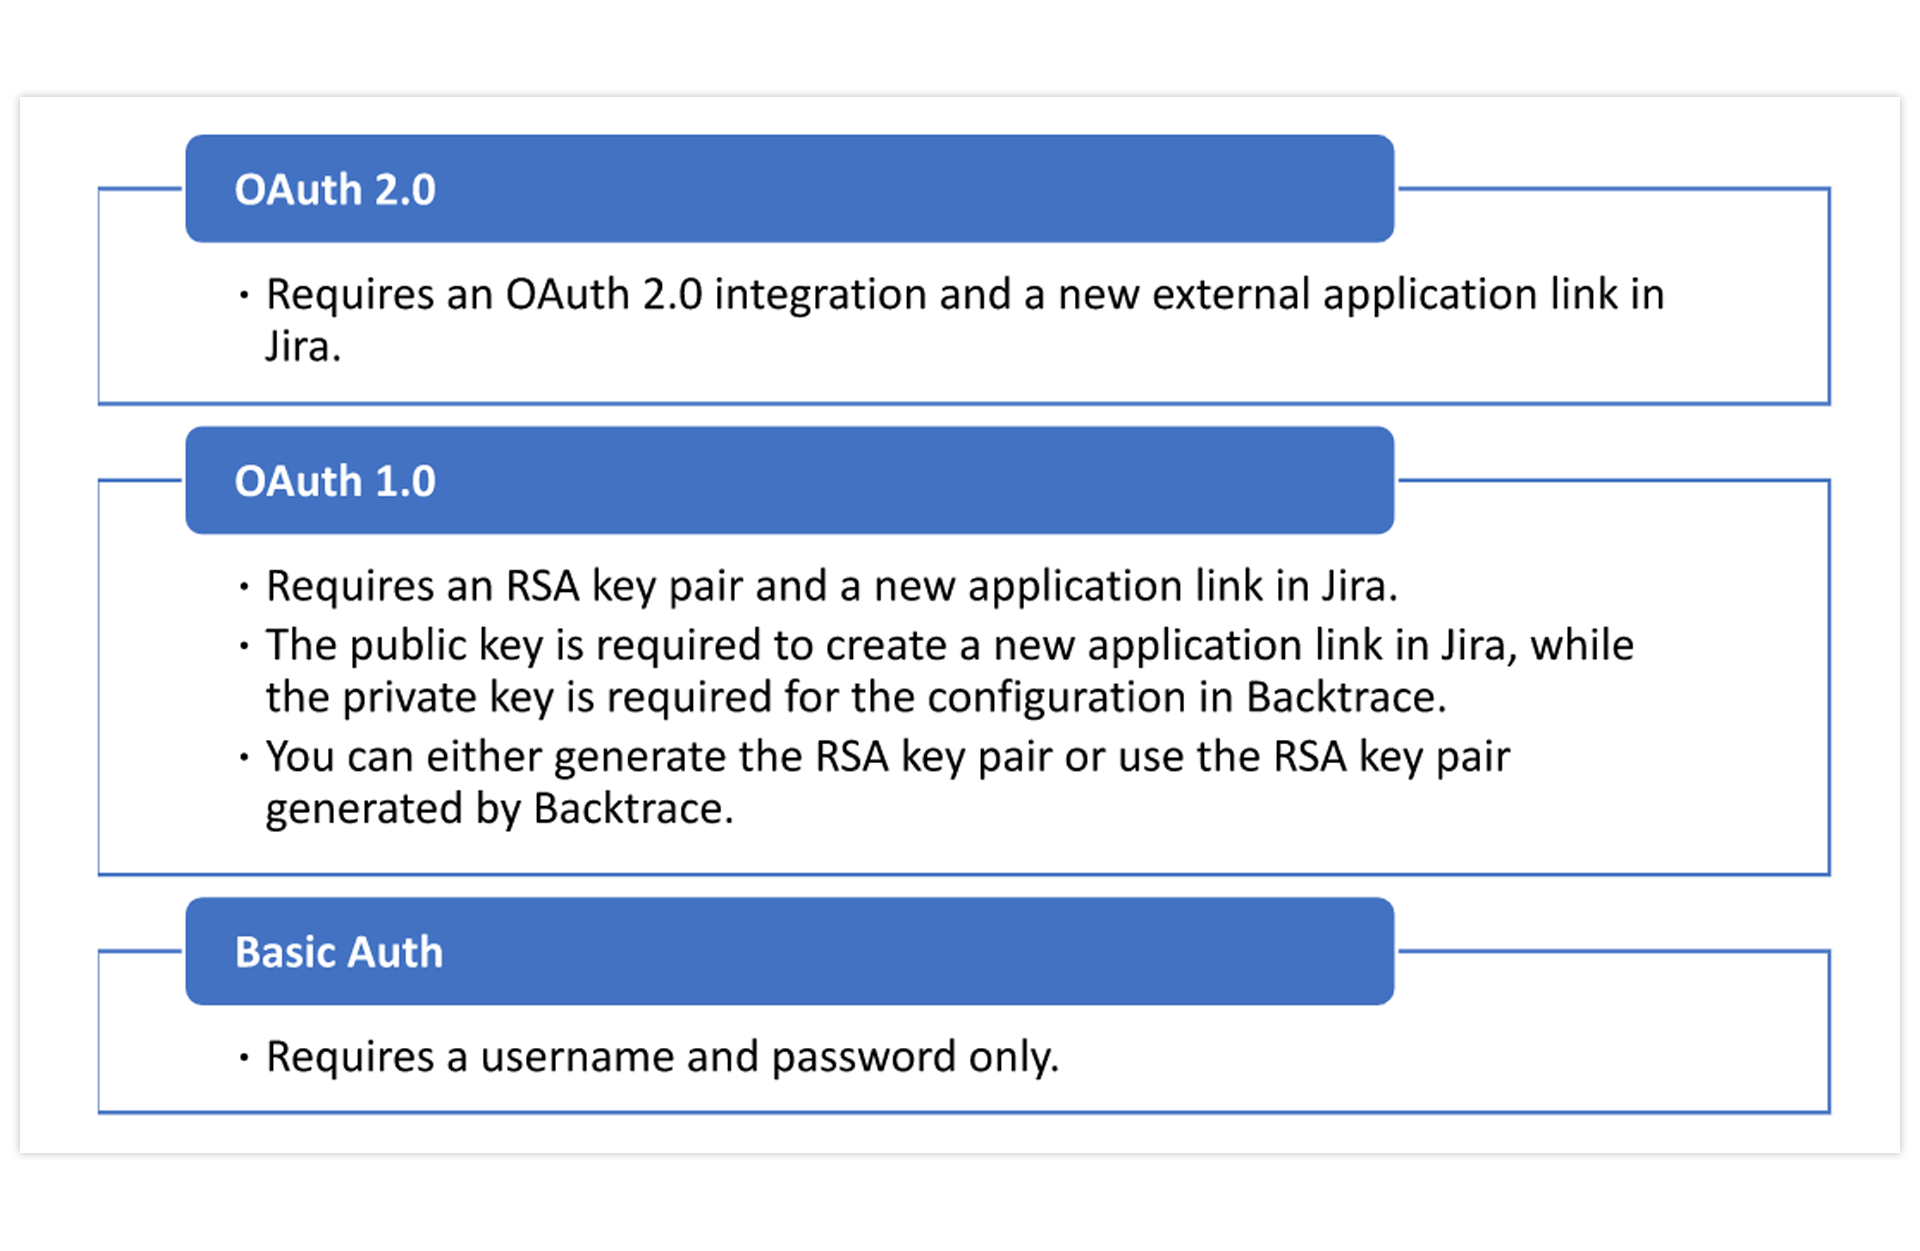
Set up Jira Server with OAuth 2.0
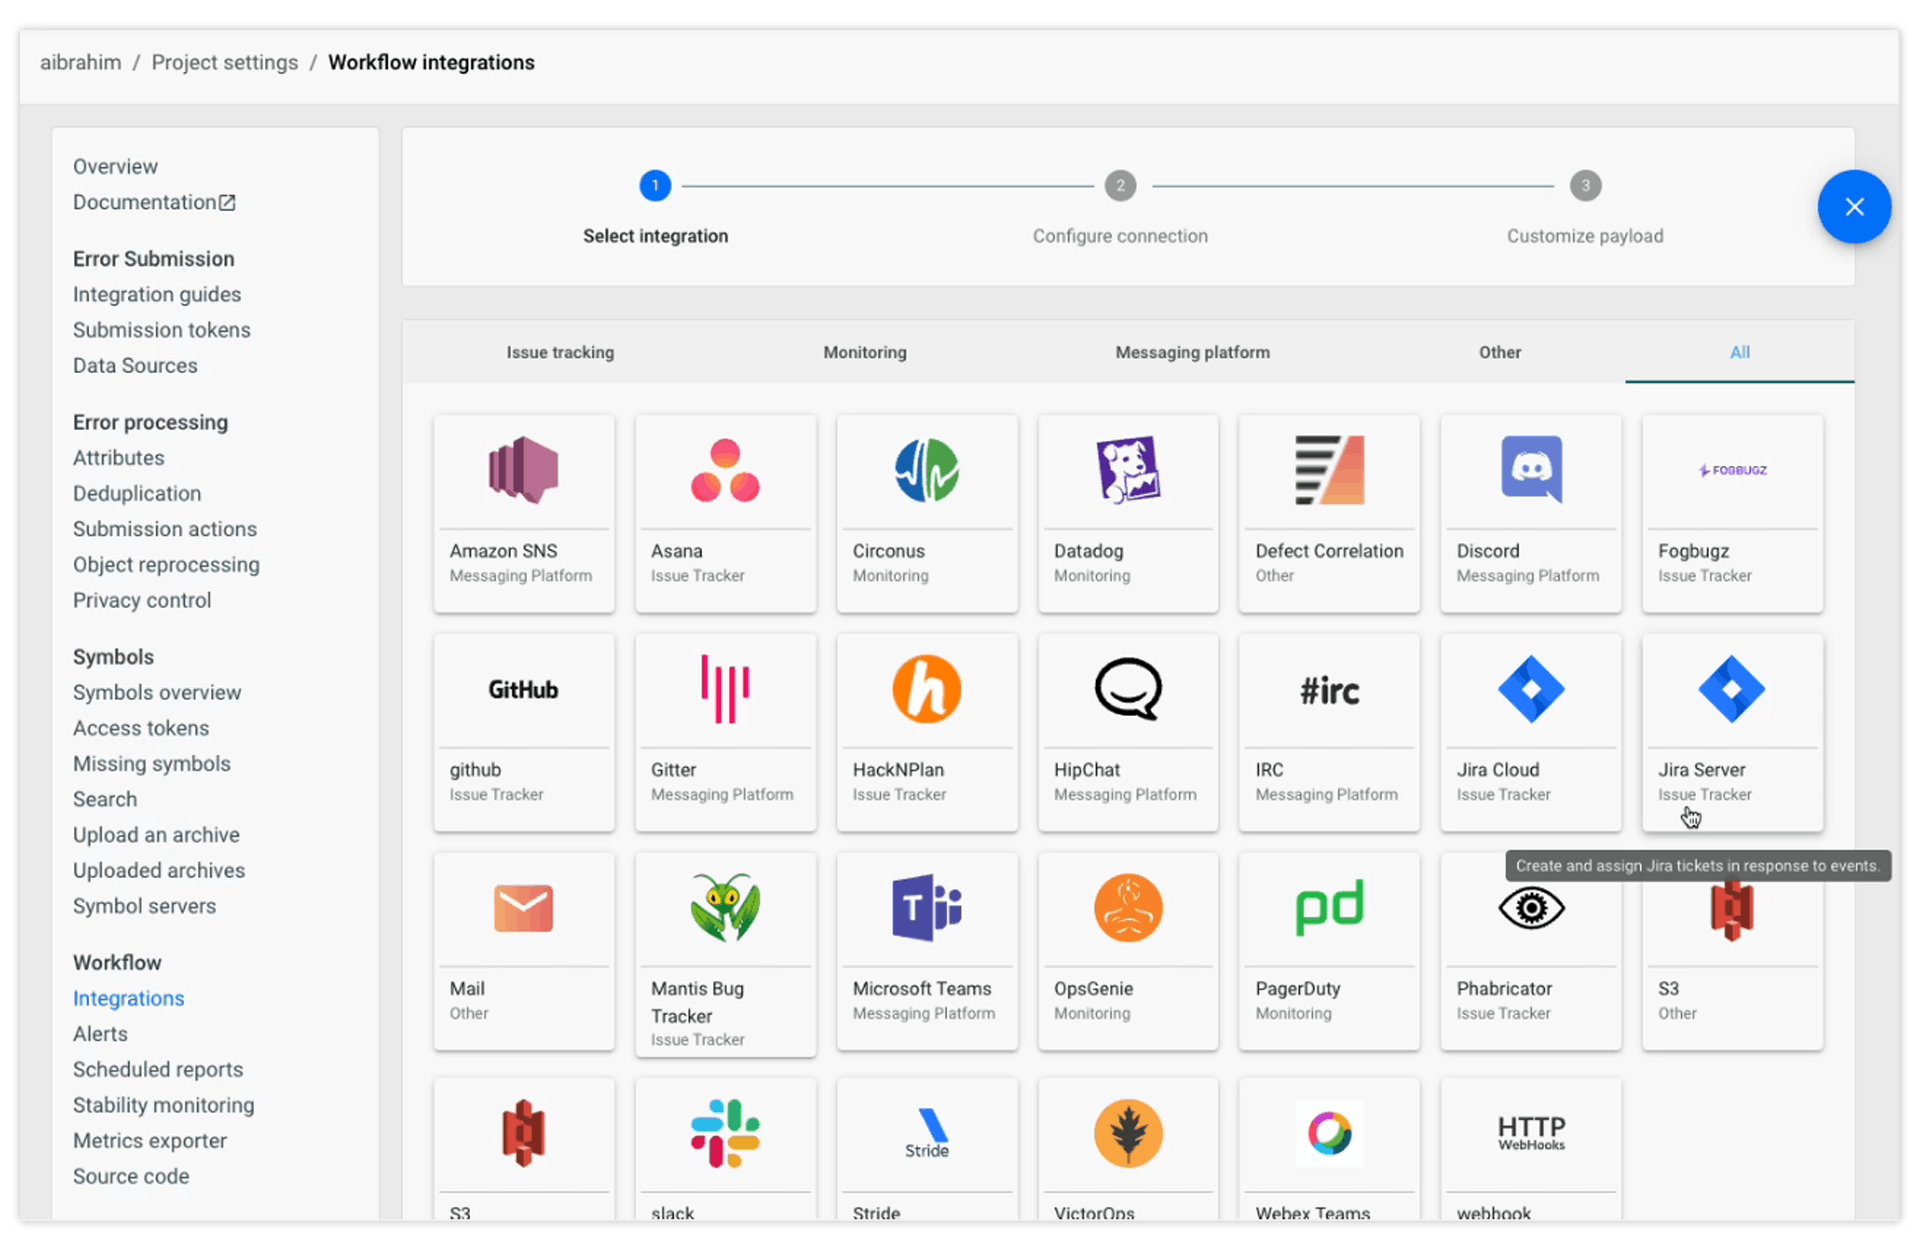
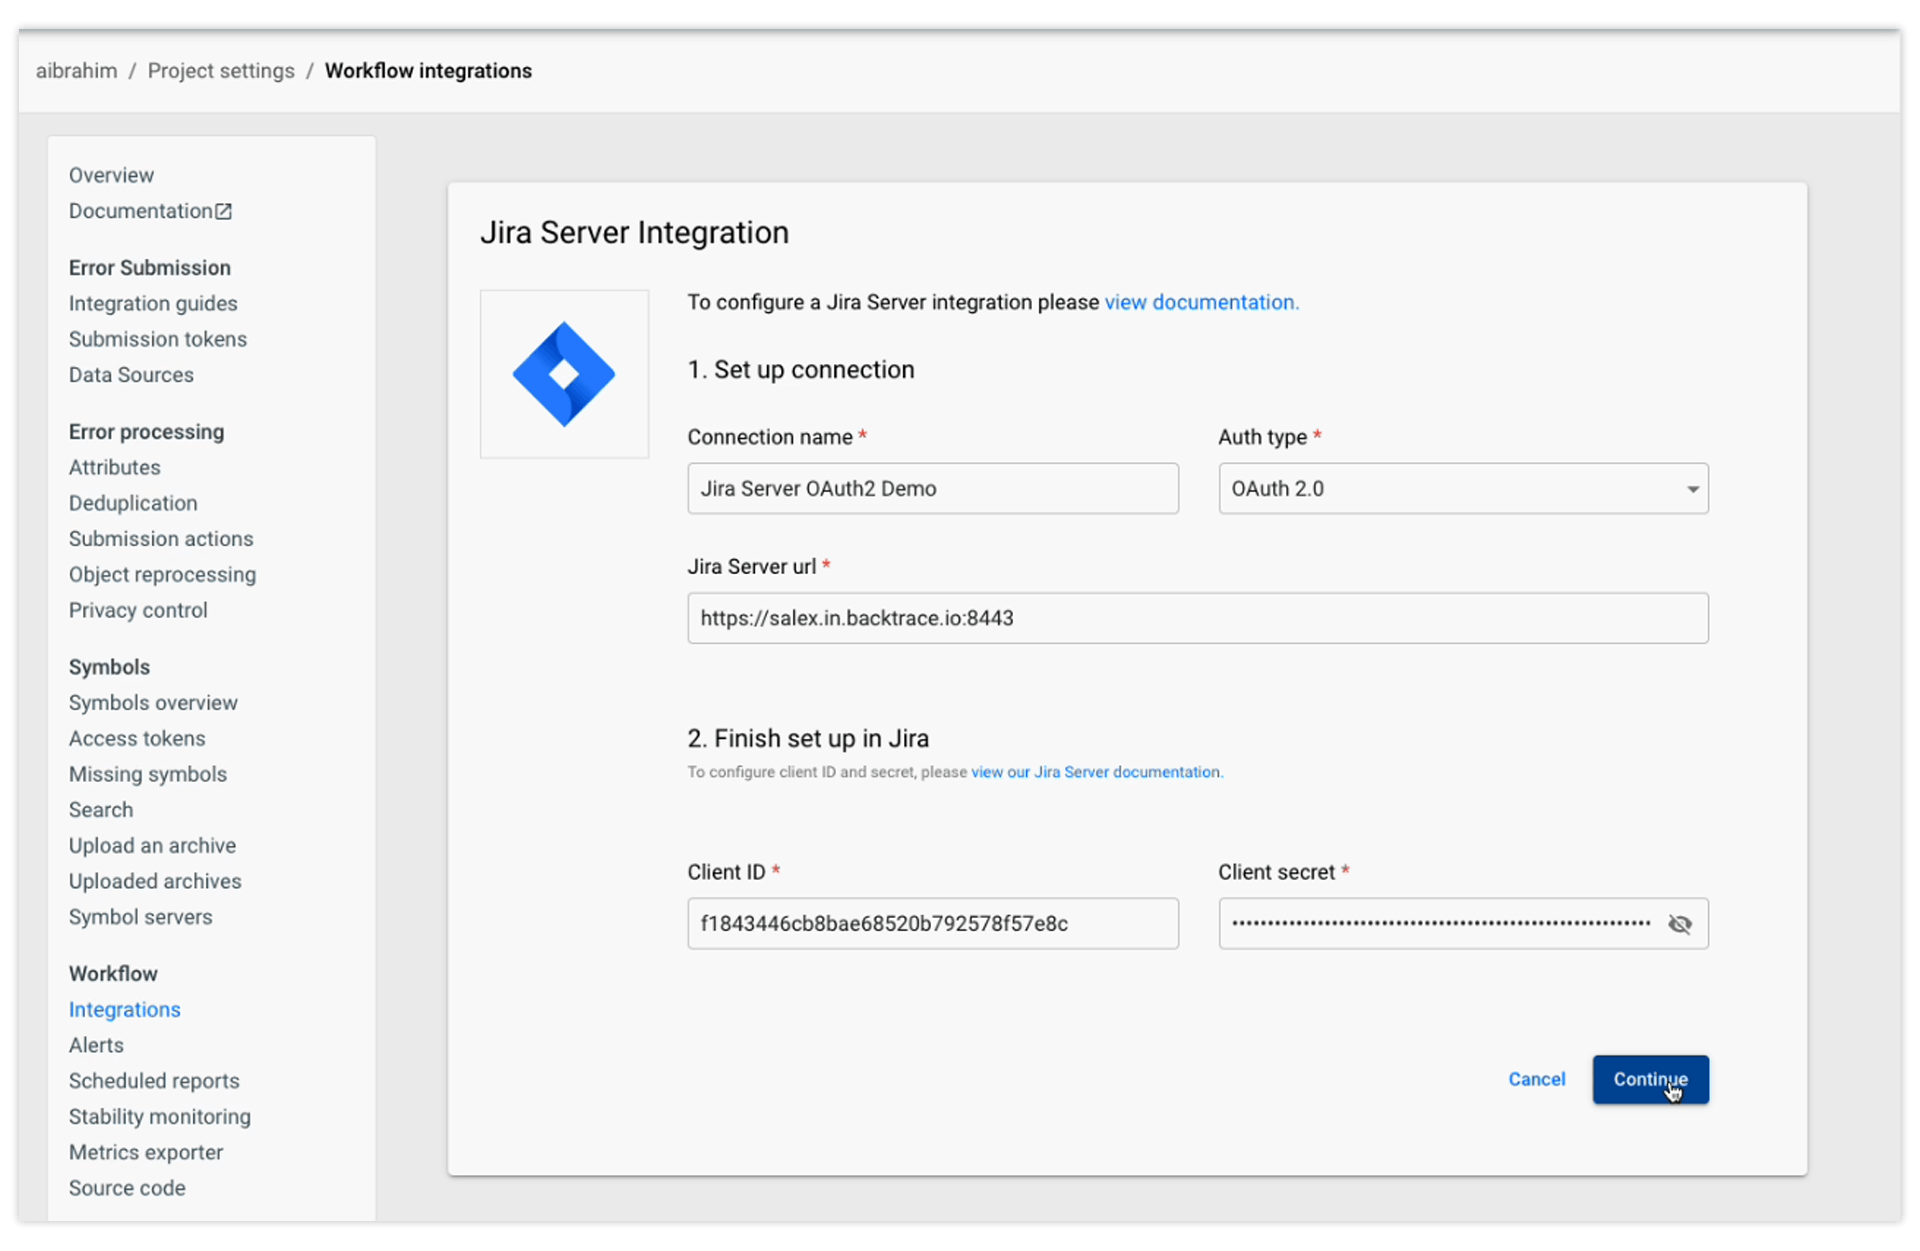
To start setting up an integration for Jira Server with Backtrace, navigate to the Integrations page (via Project Settings > under Workflow). Then Click +, then select Issue tracking > Jira Server.
Next, you will complete the following:
- Connection name: Enter a name to identify your integration.
- Jira Server url: Enter the URL for your Jira instance.
- Auth type: Select OAuth 2.0.
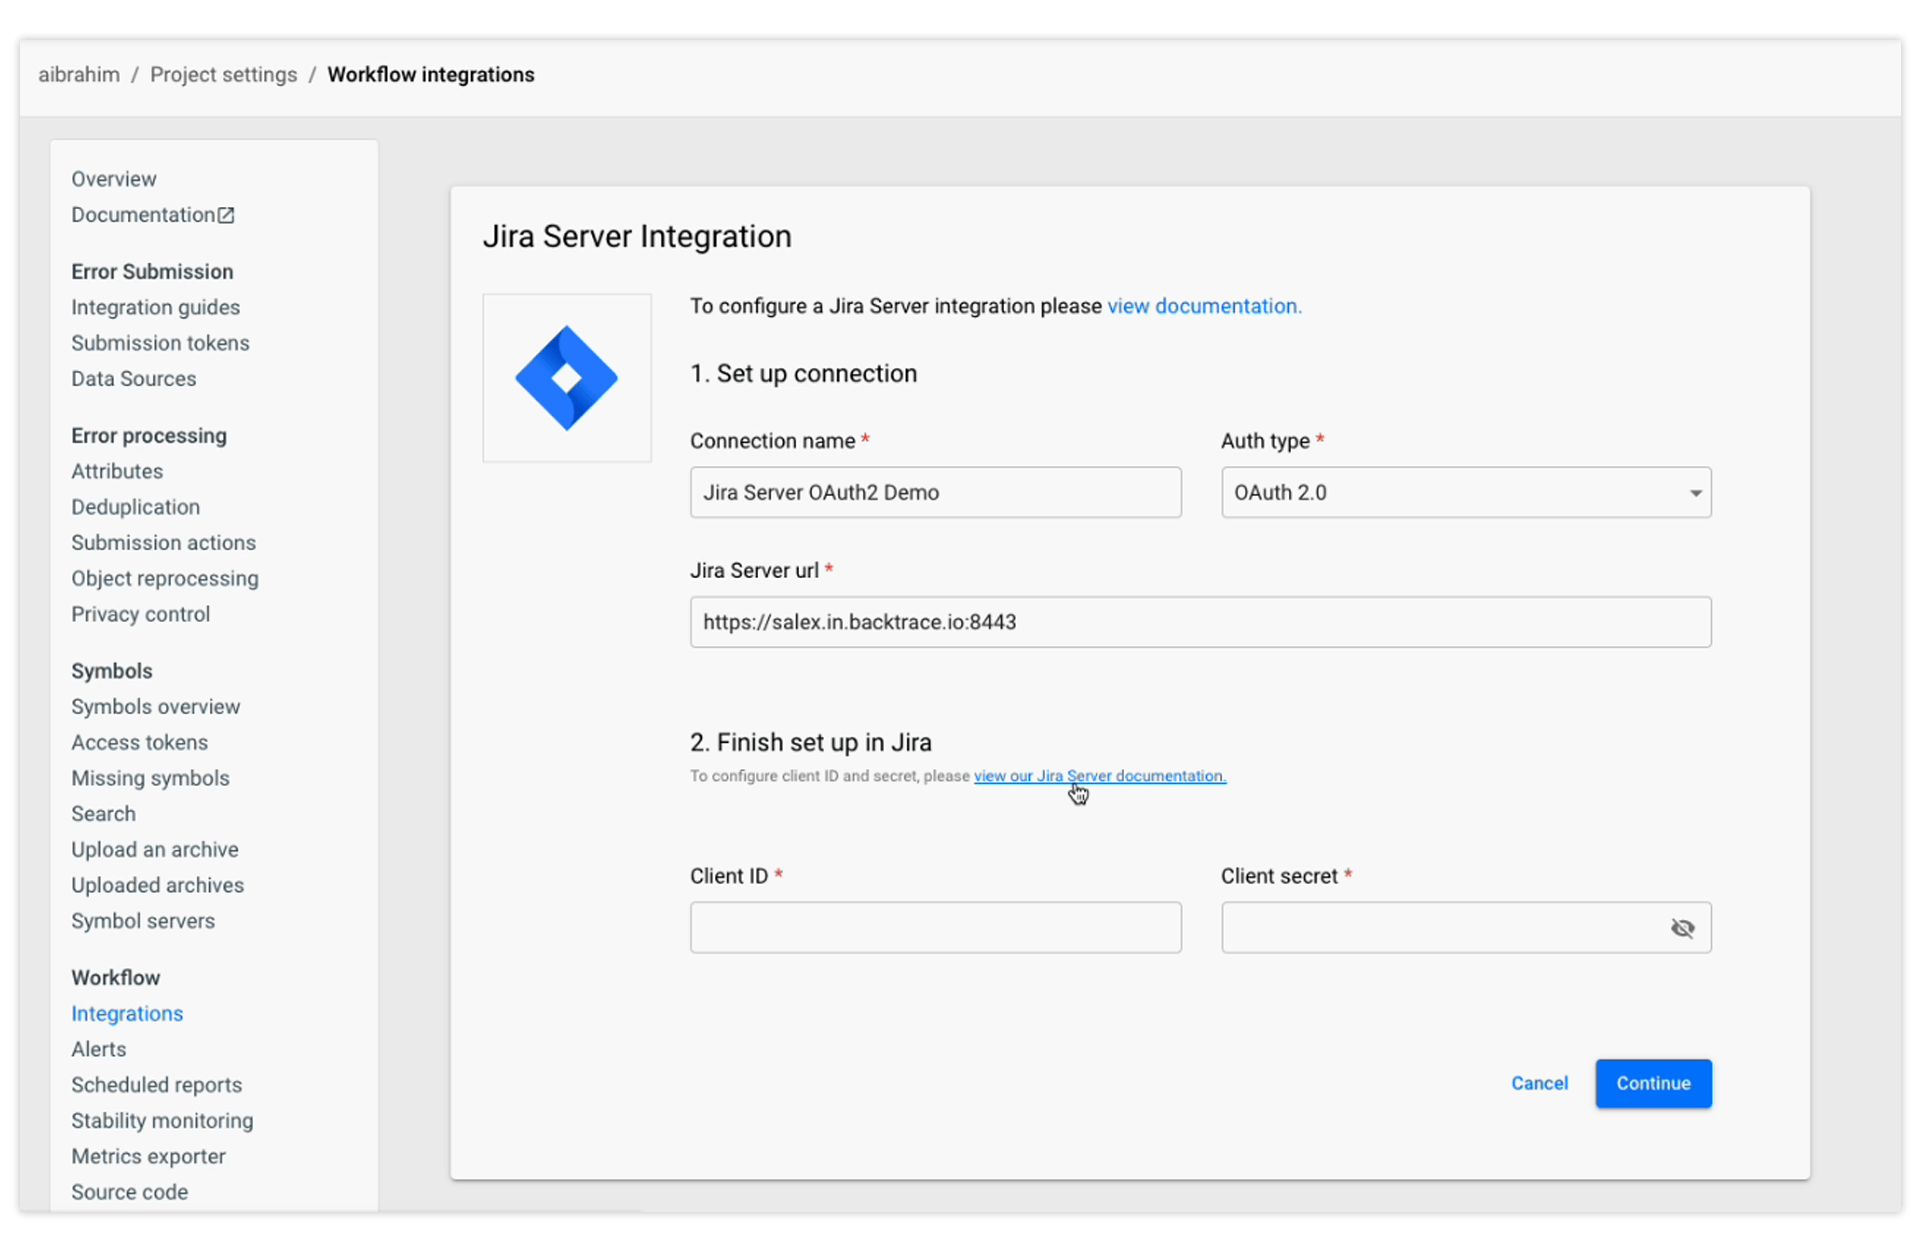
To complete the setup, you will now need a ‘Client ID’ and the ‘Client secret’ key.
1.1 Create an external application link in Jira
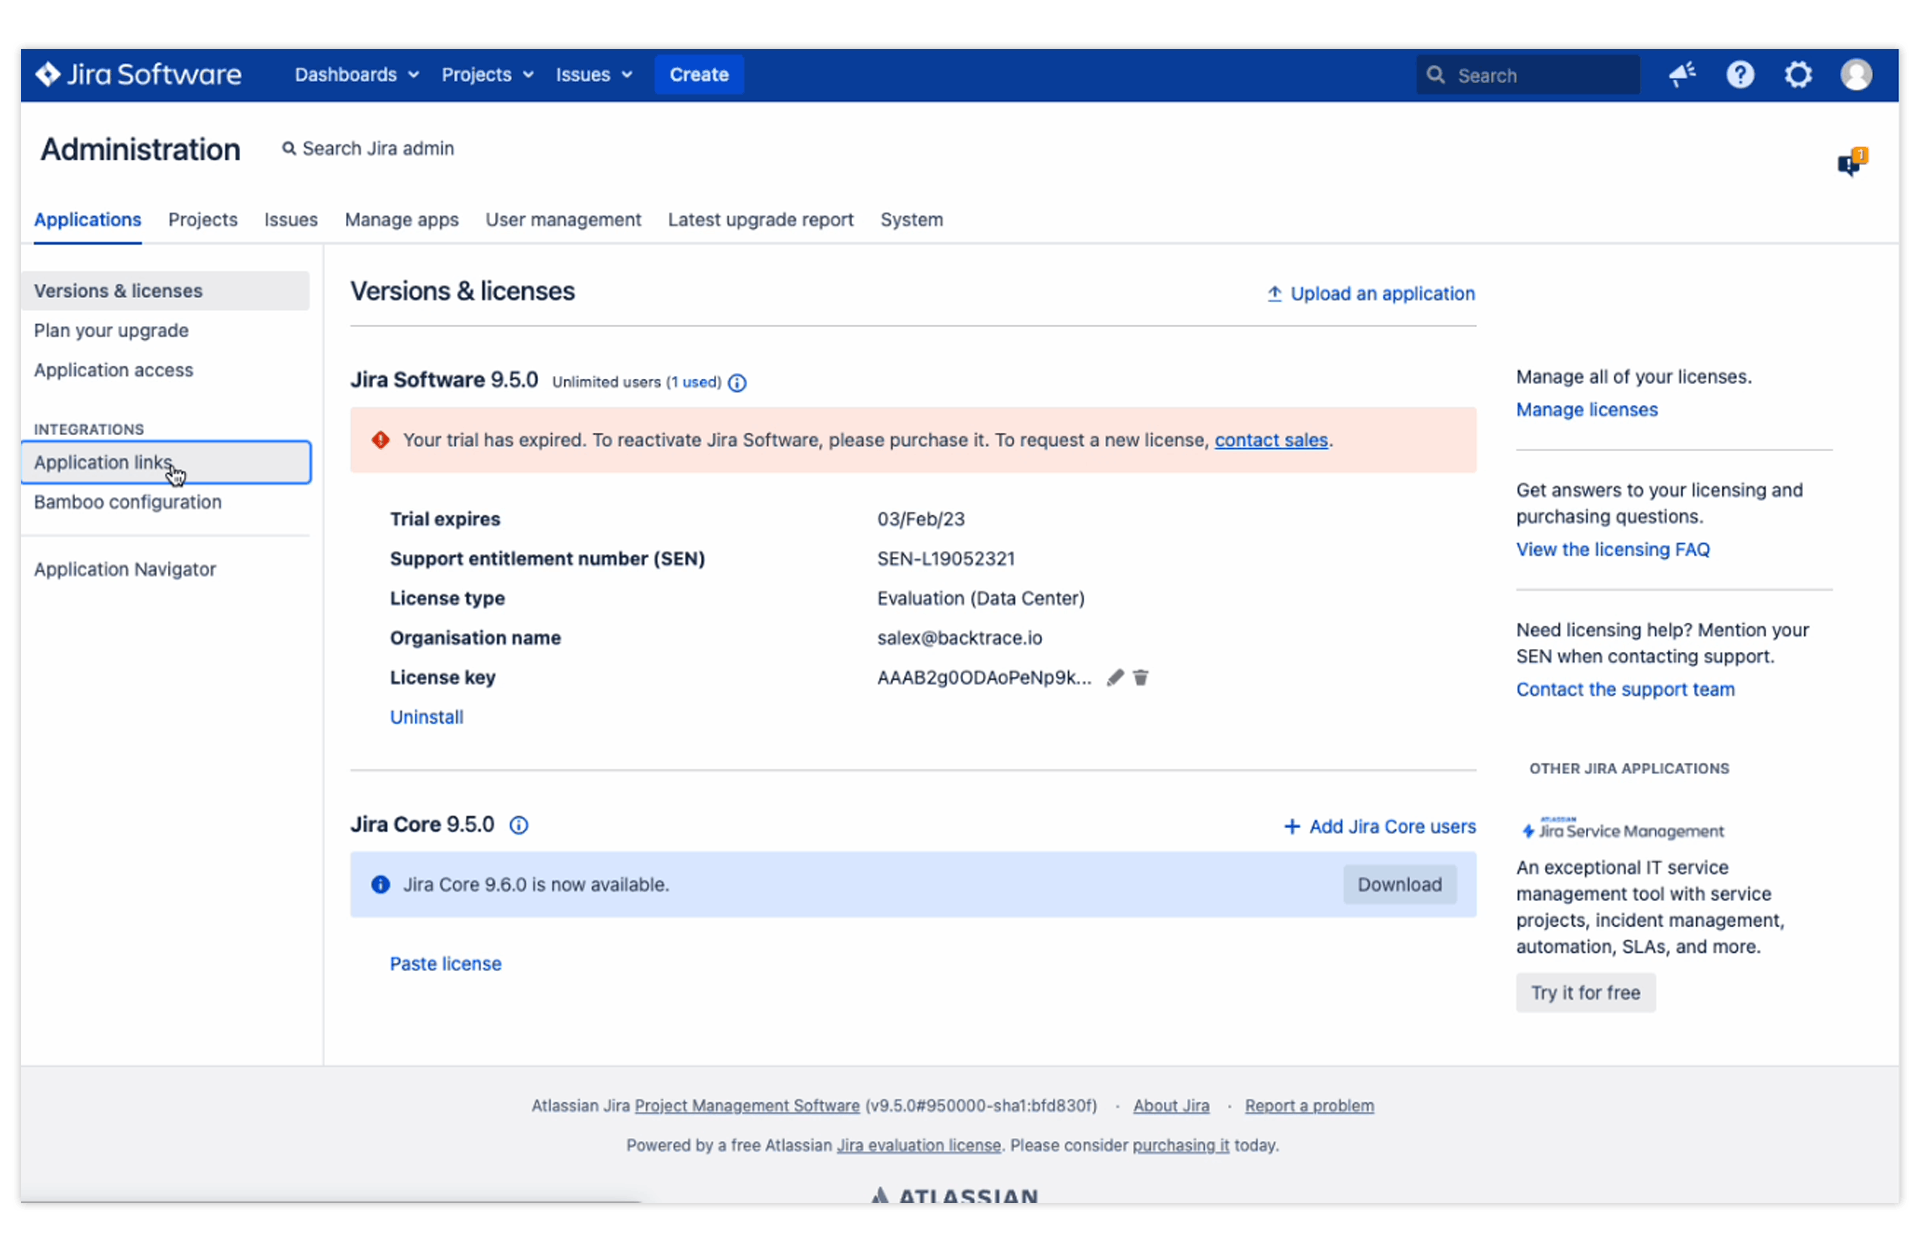
In Jira, go to Jira settings (cog icon) > Applications > Application links.
Click Create link.
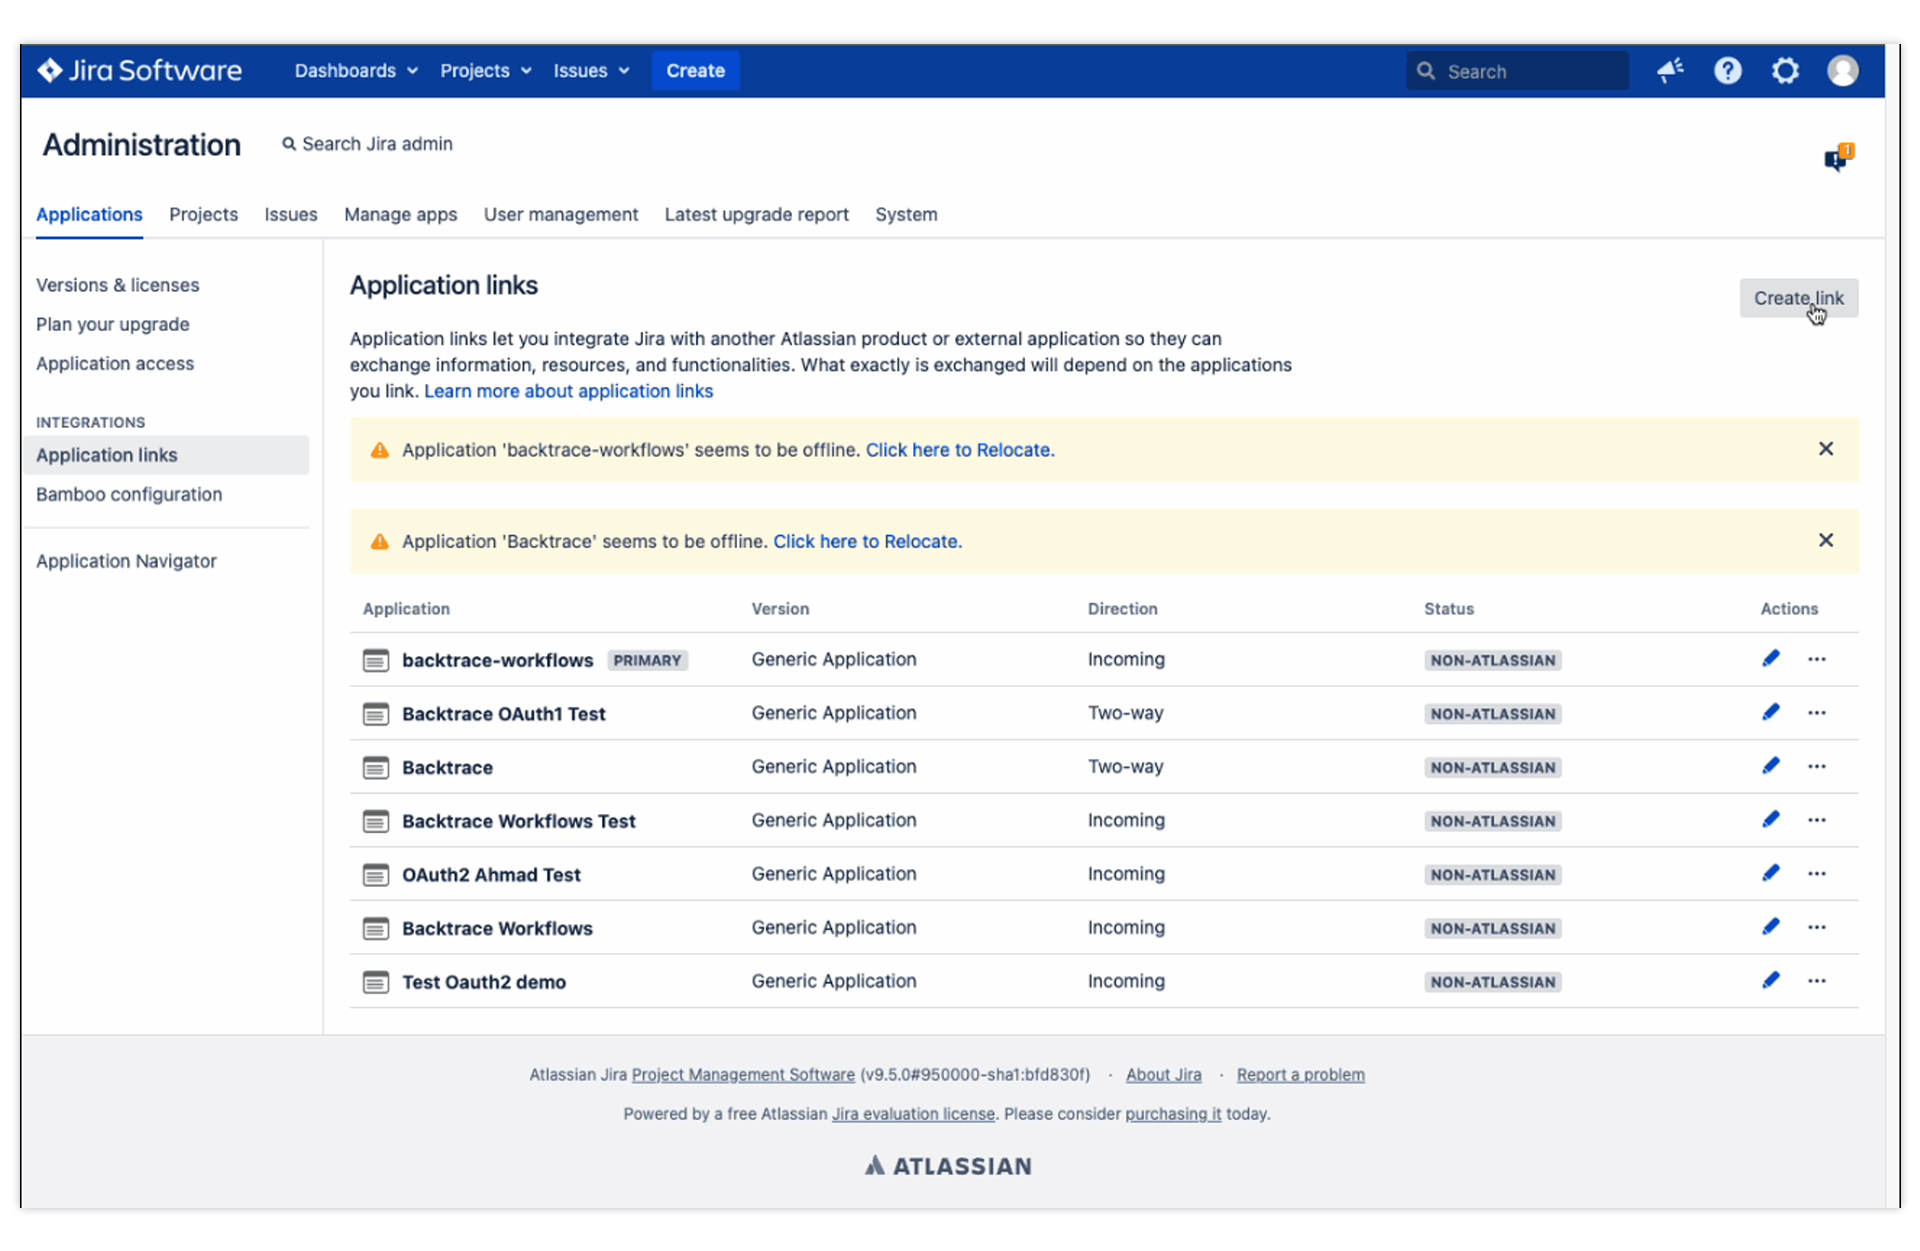
For Application type, select External application.
For Direction, select Incoming.

Click Continue.
In the form, enter the following:
Name: Backtrace
Redirect URL: https://_____________.backtrace.io/api/workflows/plugins/jira-server/external/oauth/2.0/callback - Make sure to replace the domain with the actual domain the Workflows service will be using.
Permission: Select Write.
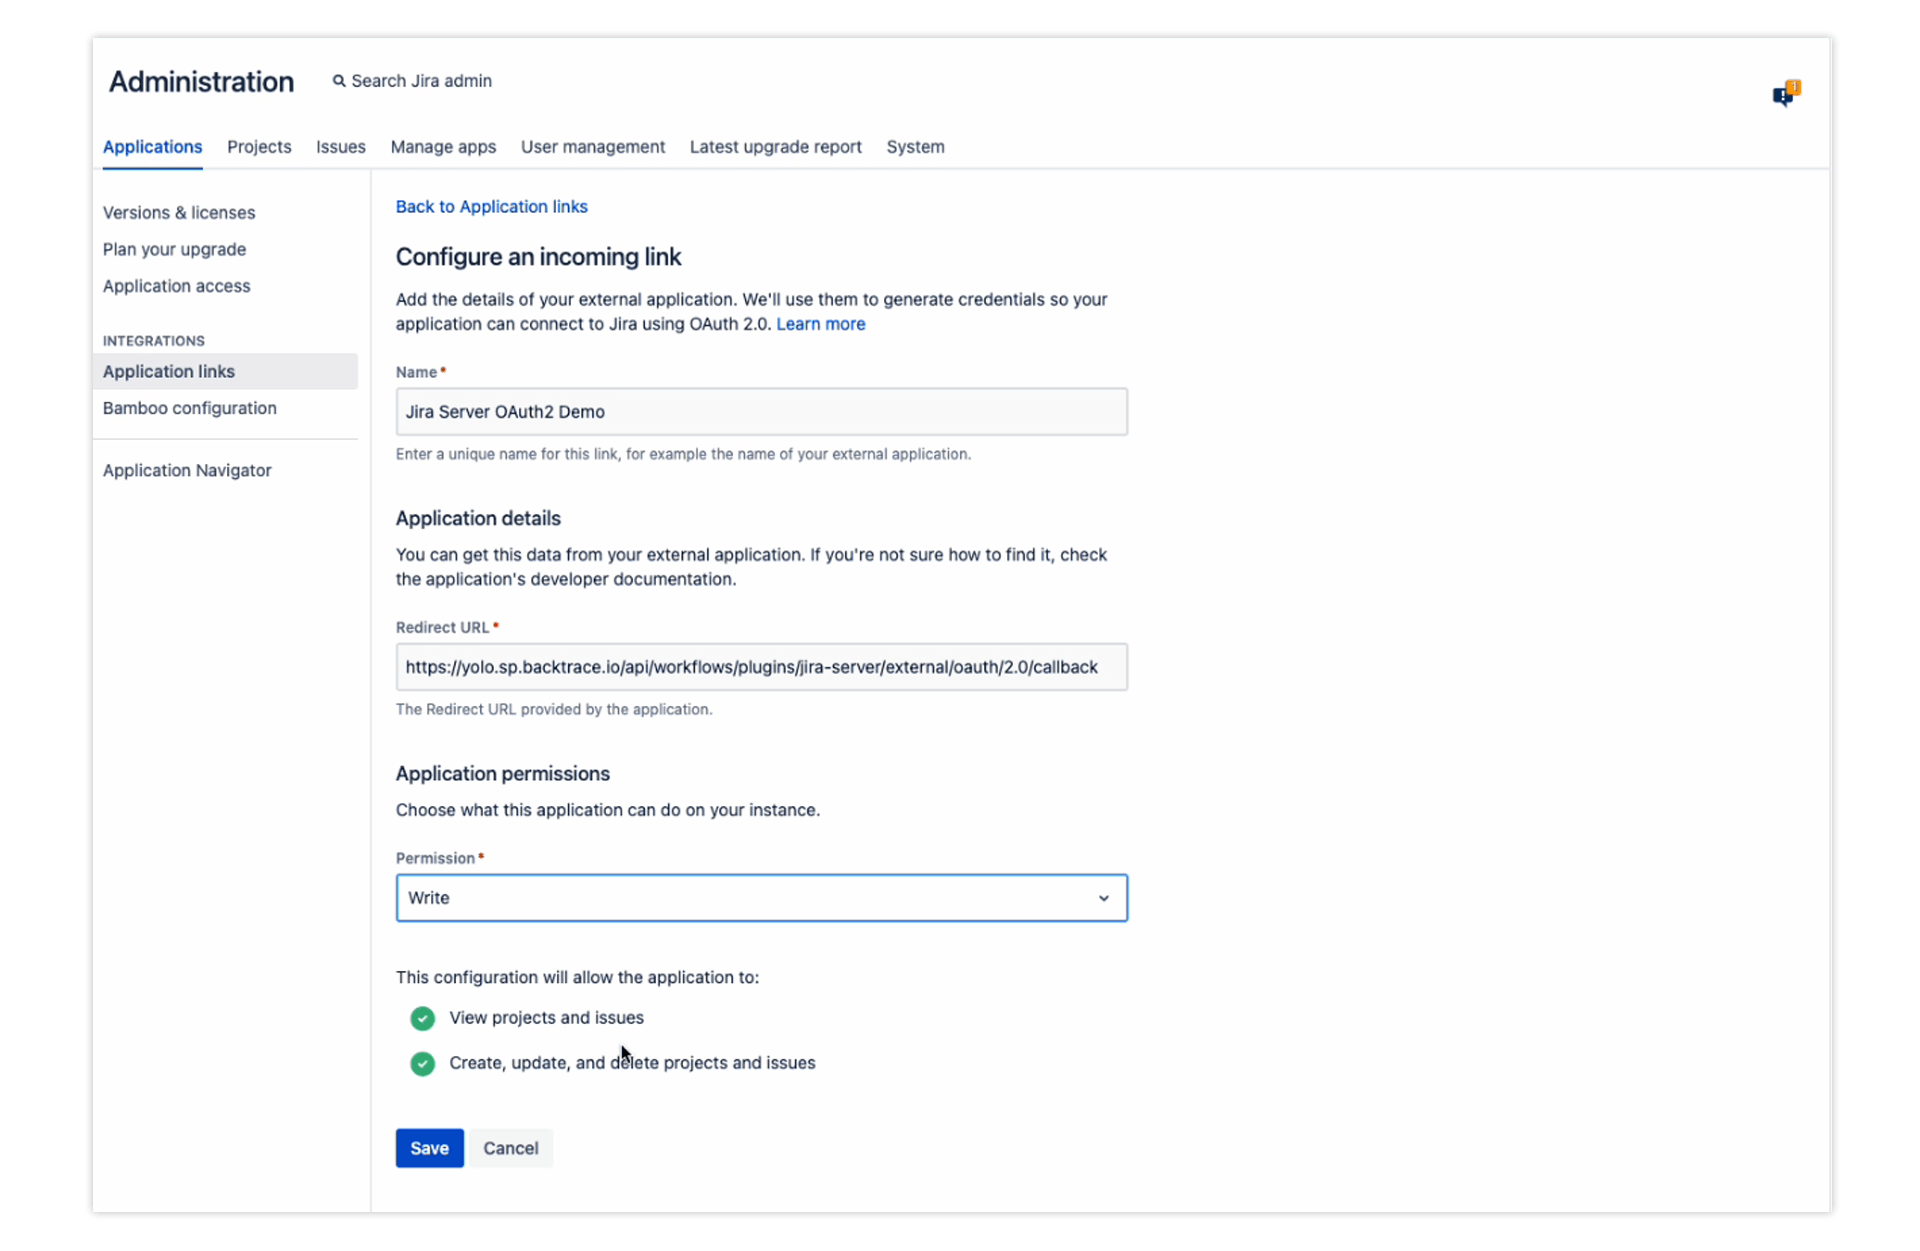
Click Save.
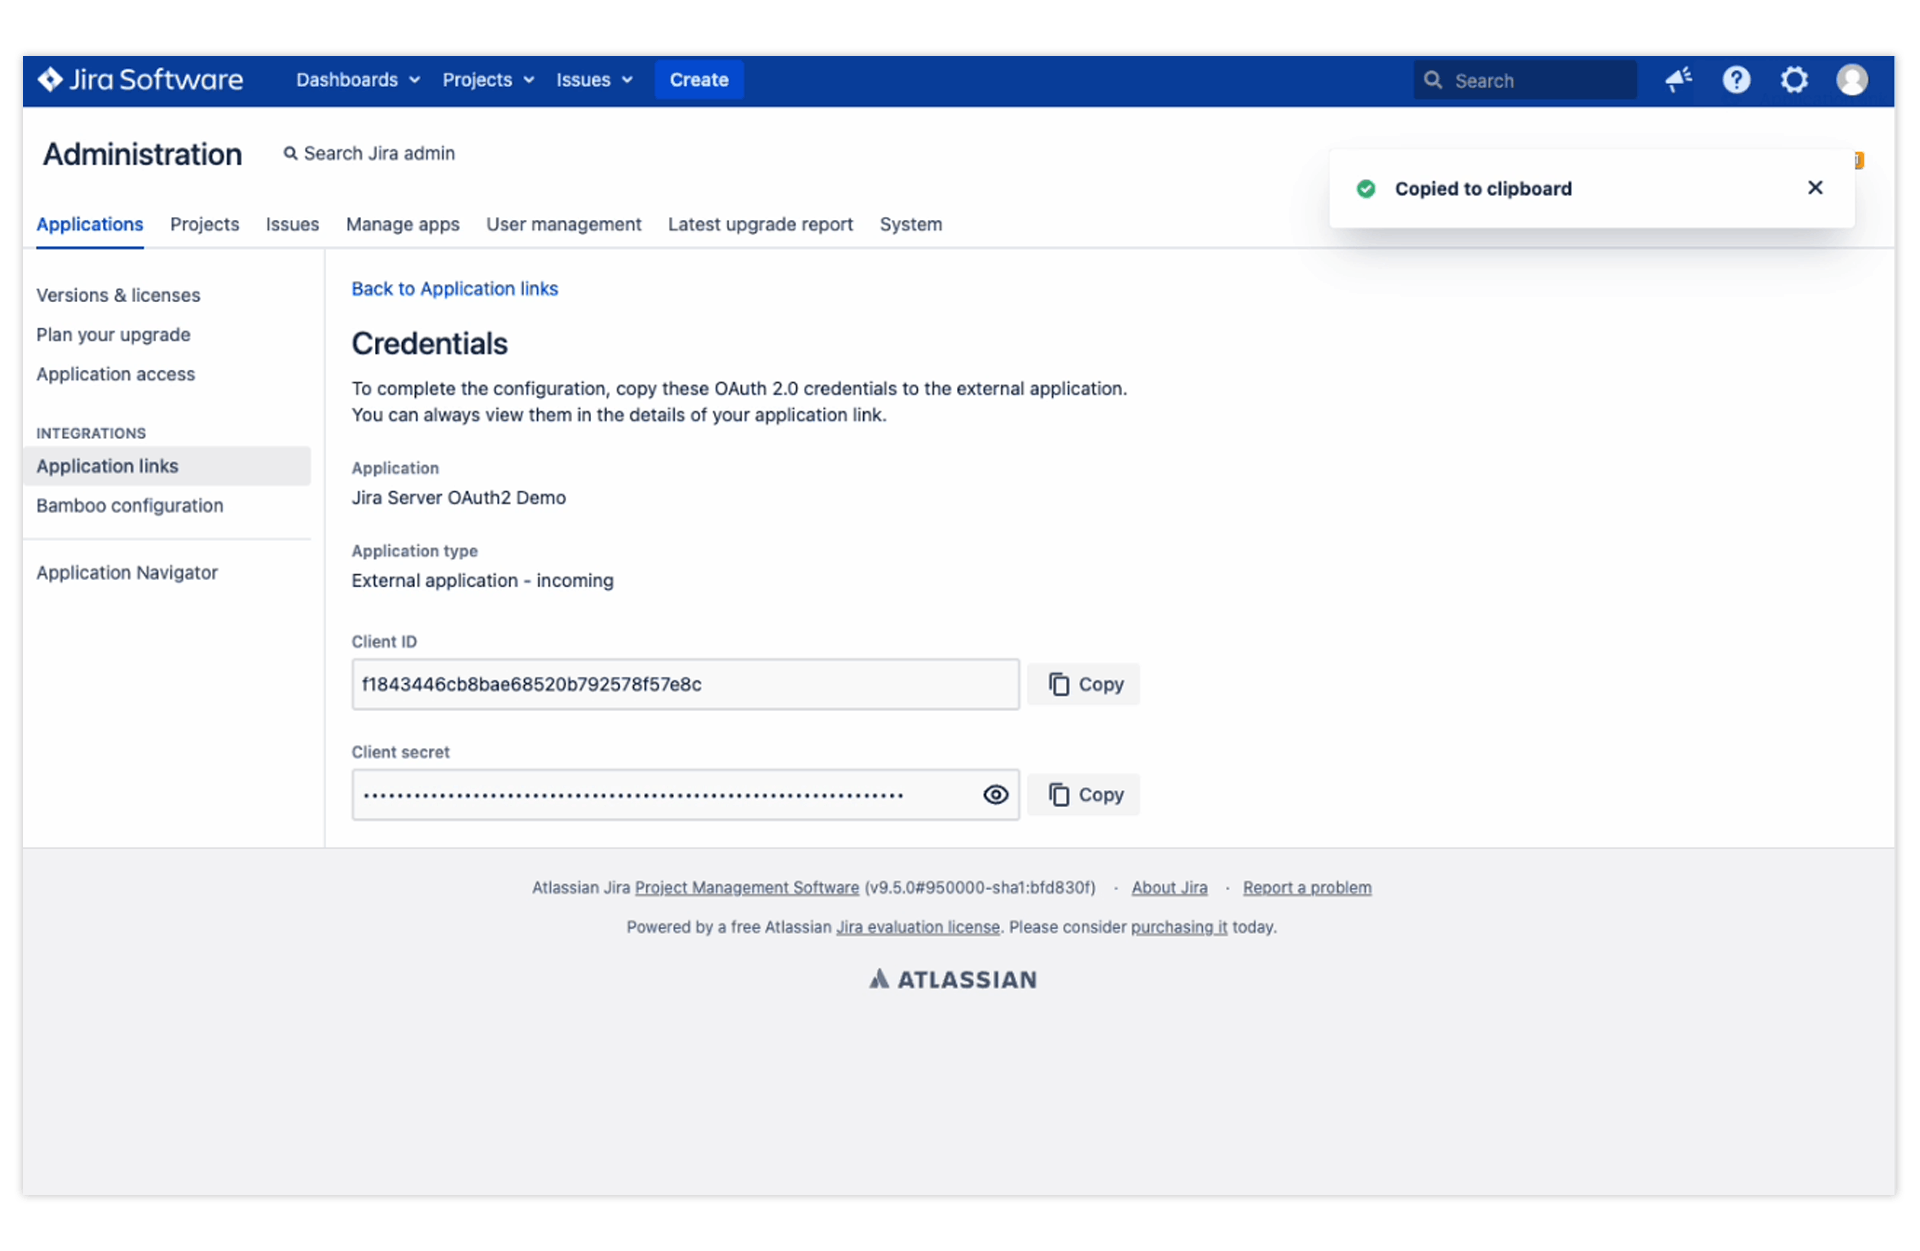
From the Credentials page, copy the Client ID and Client Secret.
1.2 Connect the Jira Server app with Backtrace
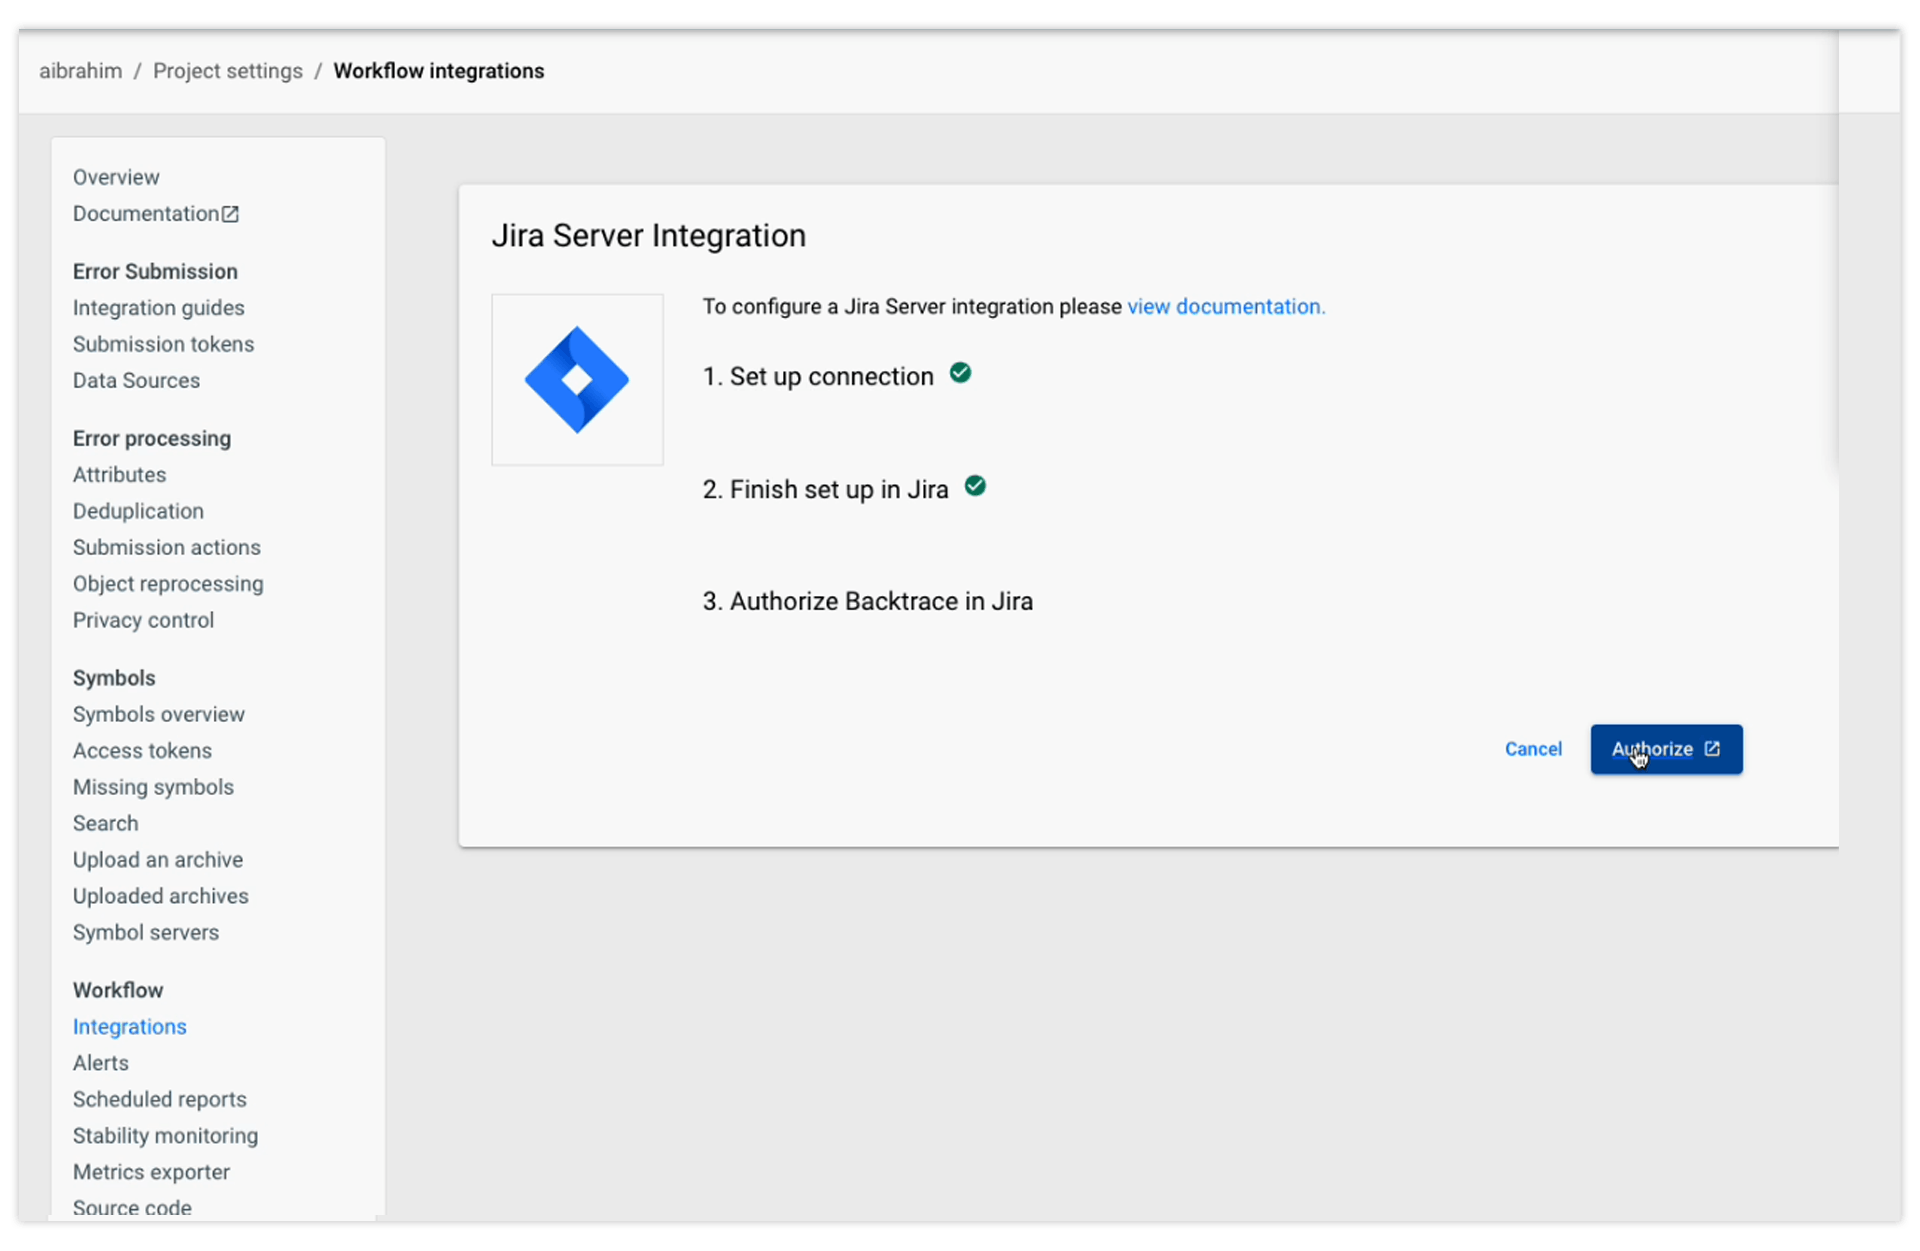
In Backtrace, go back to the setup for the Jira Server integration.
Enter the Client ID and Client Secret.
Click Continue to complete the setup in Jira.
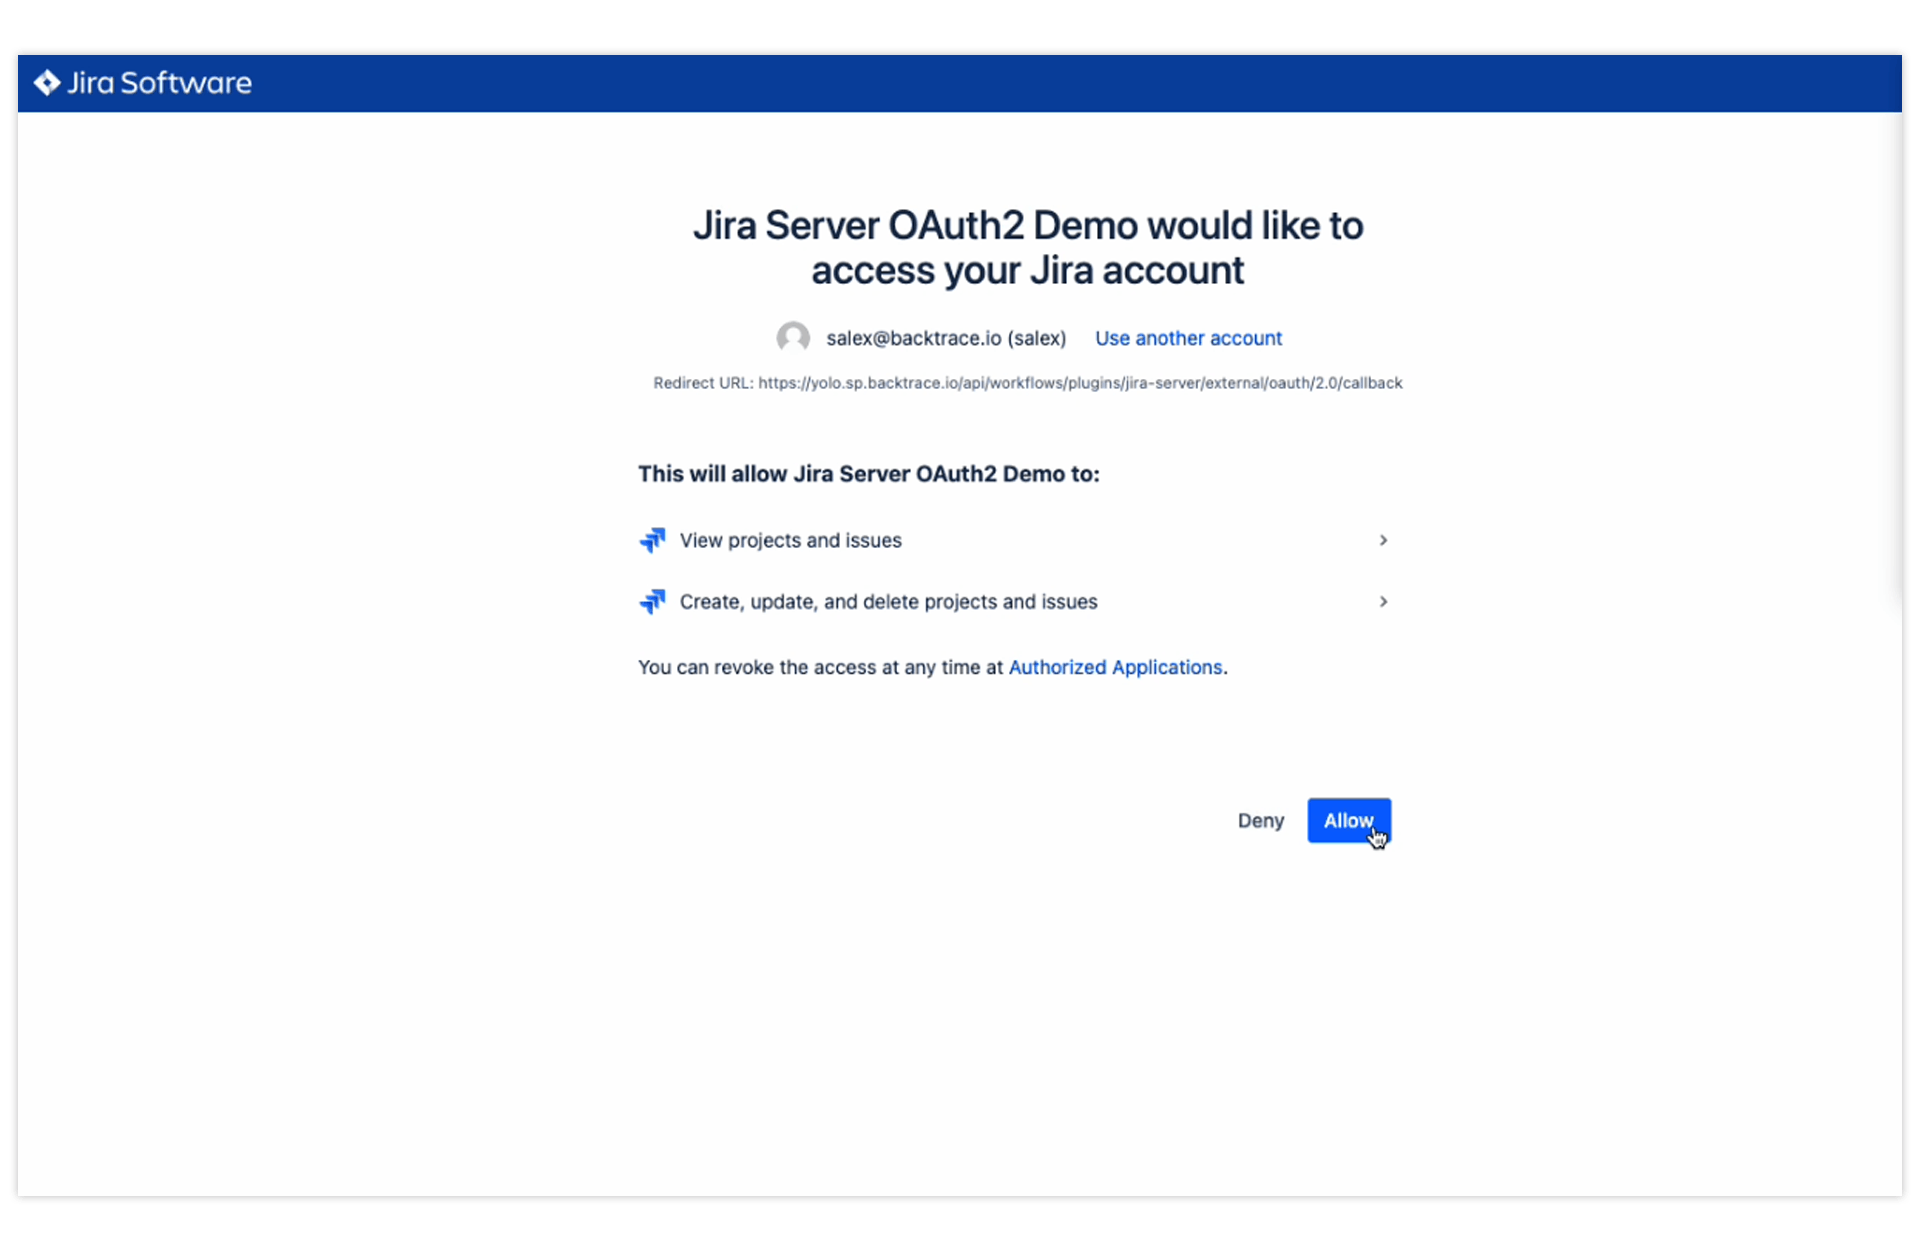
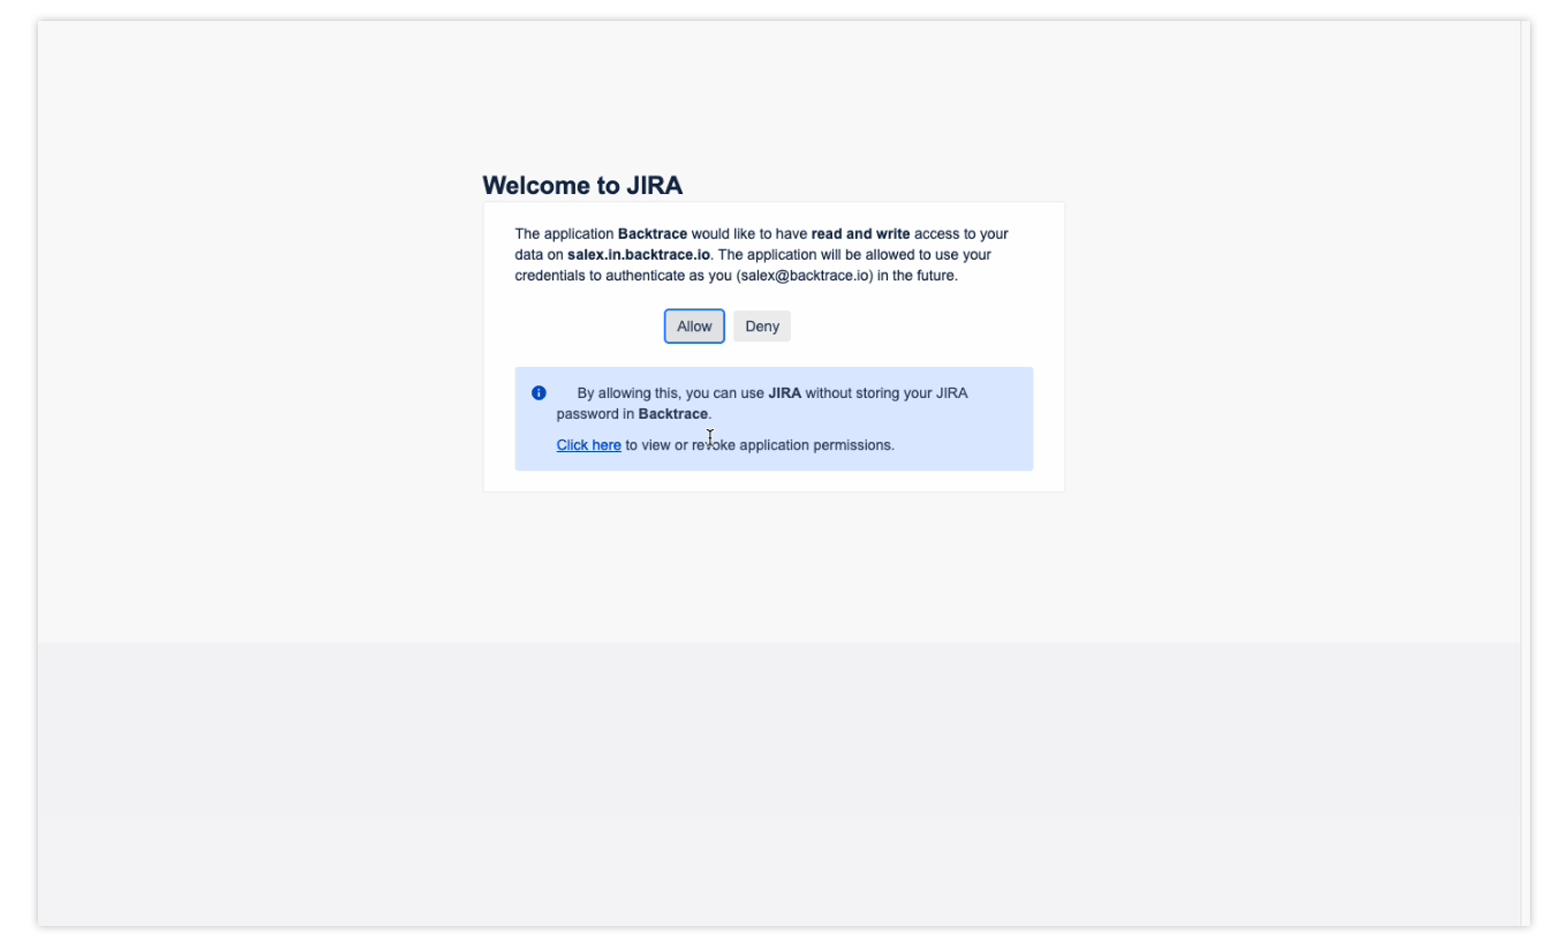
Click Authorize. You'll be redirected to your Jira Server instance.
Click Allow. You'll be redirected to Backtrace to configure the integration.
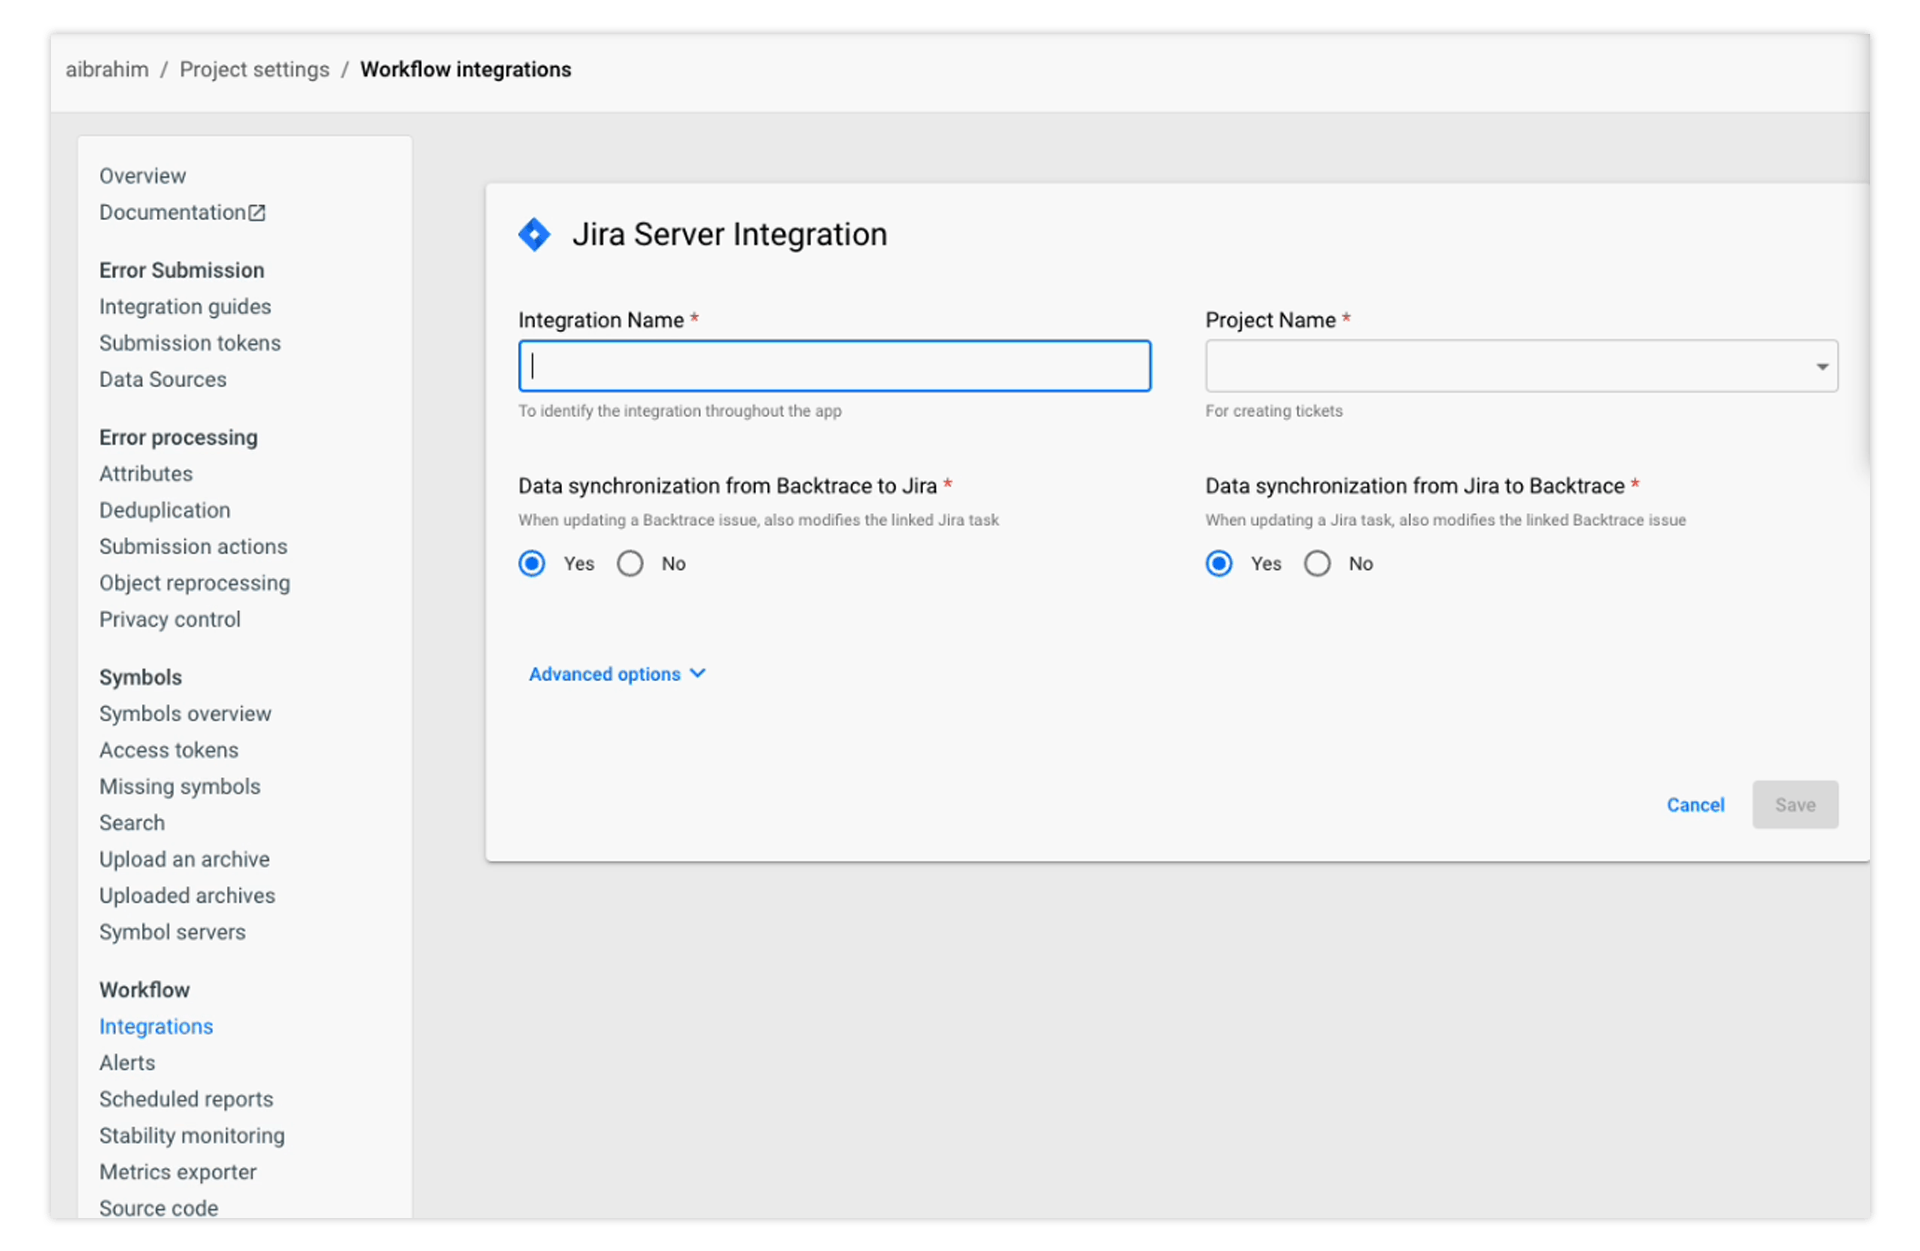
1.3 Complete the Integration
In the next screen, you will enter the Integration Name, select the Project Name, configure the rest of the settings as required and then click Save. The settings were explained in our previous blog about Jira Cloud here.
Set up Jira Server with OAuth 1.0
Like the initial steps performed earlier, go to Project settings > under Workflow > select Integrations. Click + and then select Issue tracking > Jira Server.
2.1 Multiple Jira Connections
If you already have an existing connection and want to create a new connection, you can create multiple Jira connections by clicking new connection.

2.2 Set up connection options
Complete the set-up options as follows:
- Connection name: Enter a name to identify your integration.
- Jira Server url: Enter the URL for your Jira instance.
- Auth type: Select OAuth 1.0.
2.3 Private RSA key
You can choose to have Backtrace generate a private RSA key or alternatively, you can provide your own key pair.
2.3.1 Generate own private RSA key-pair
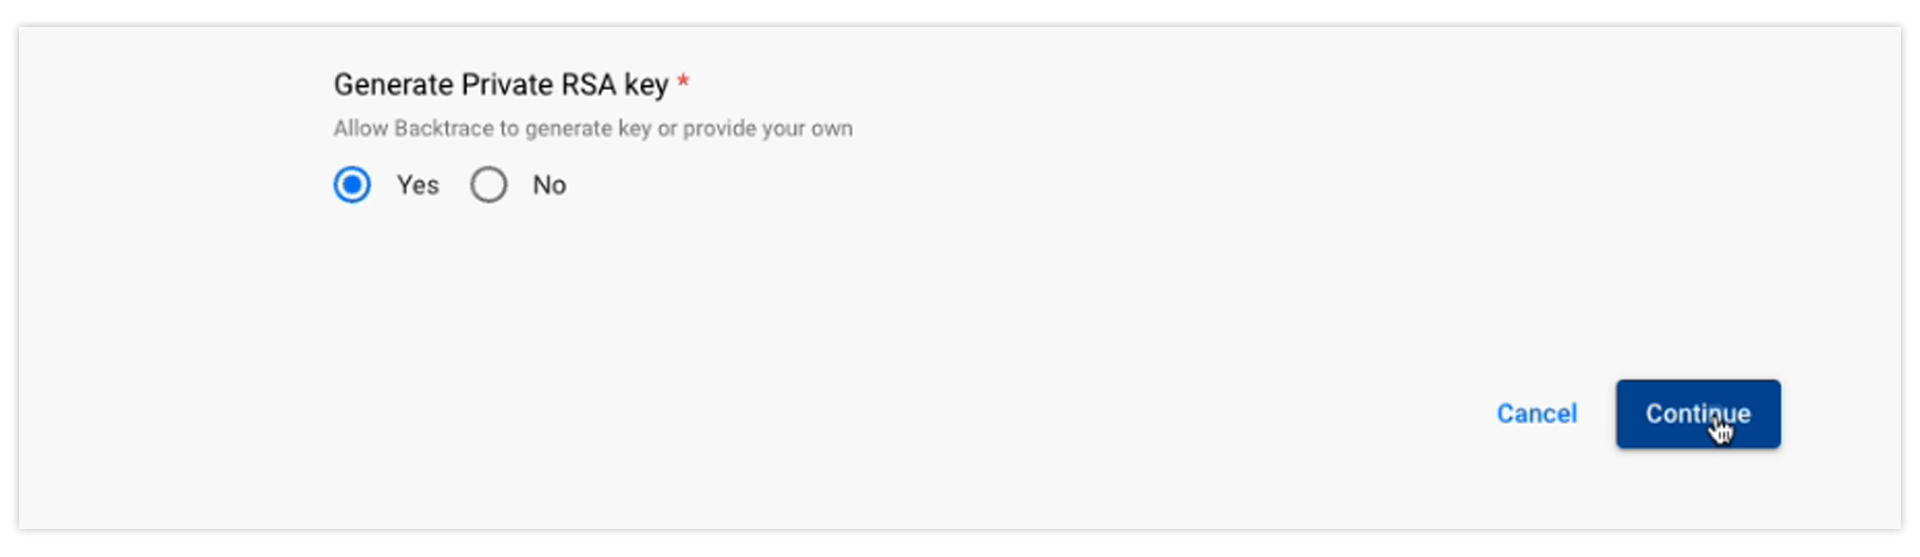
If you want to provide your own RSA key pair, under Generate Private RSA key, select No.
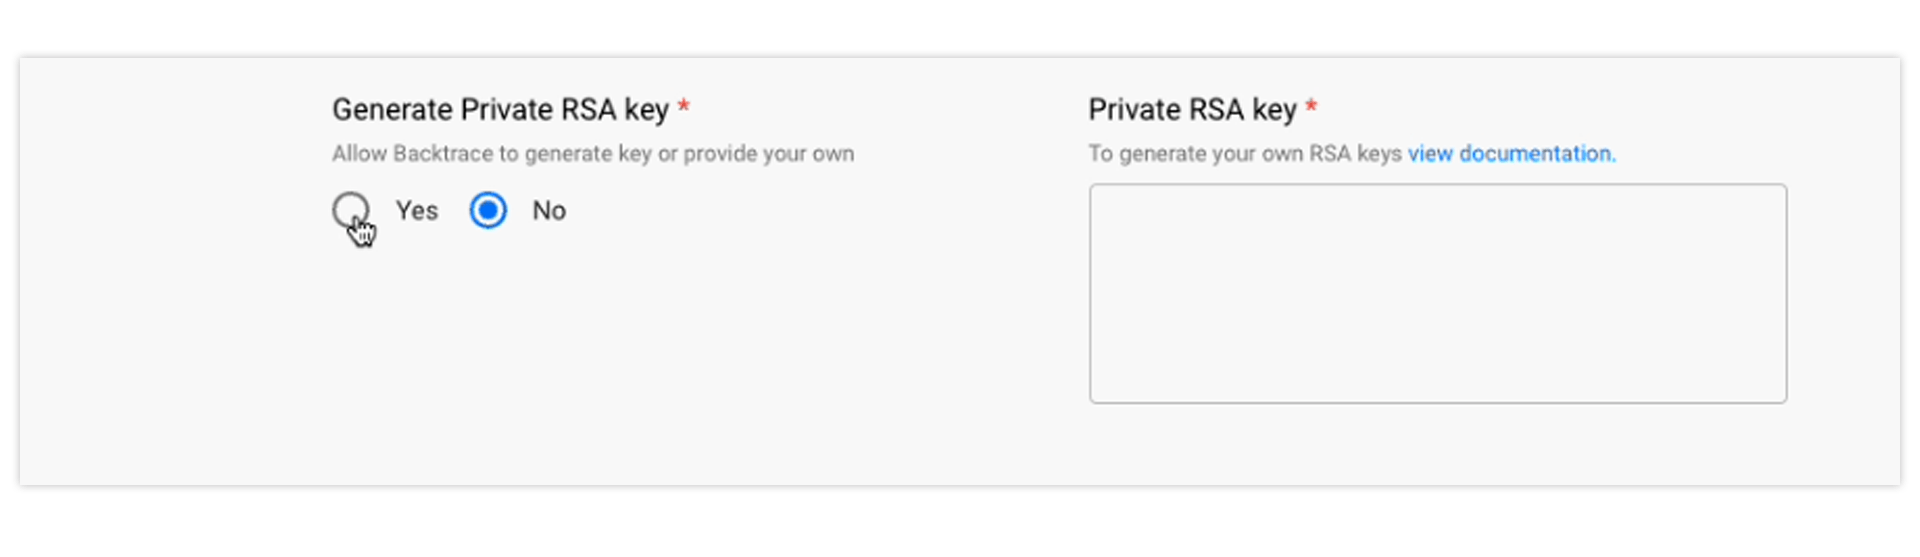
In the Private RSA key field, enter the private key from the jira_privatekey.pem file and Click Continue. You may refer to the documentation to learn how to generate your own RSA keys.
2.3.2 Allow Backtrace to generate RSA key
To allow Backtrace to generate the RSA key, select Yes under Generate Private RSA key and click Continue.
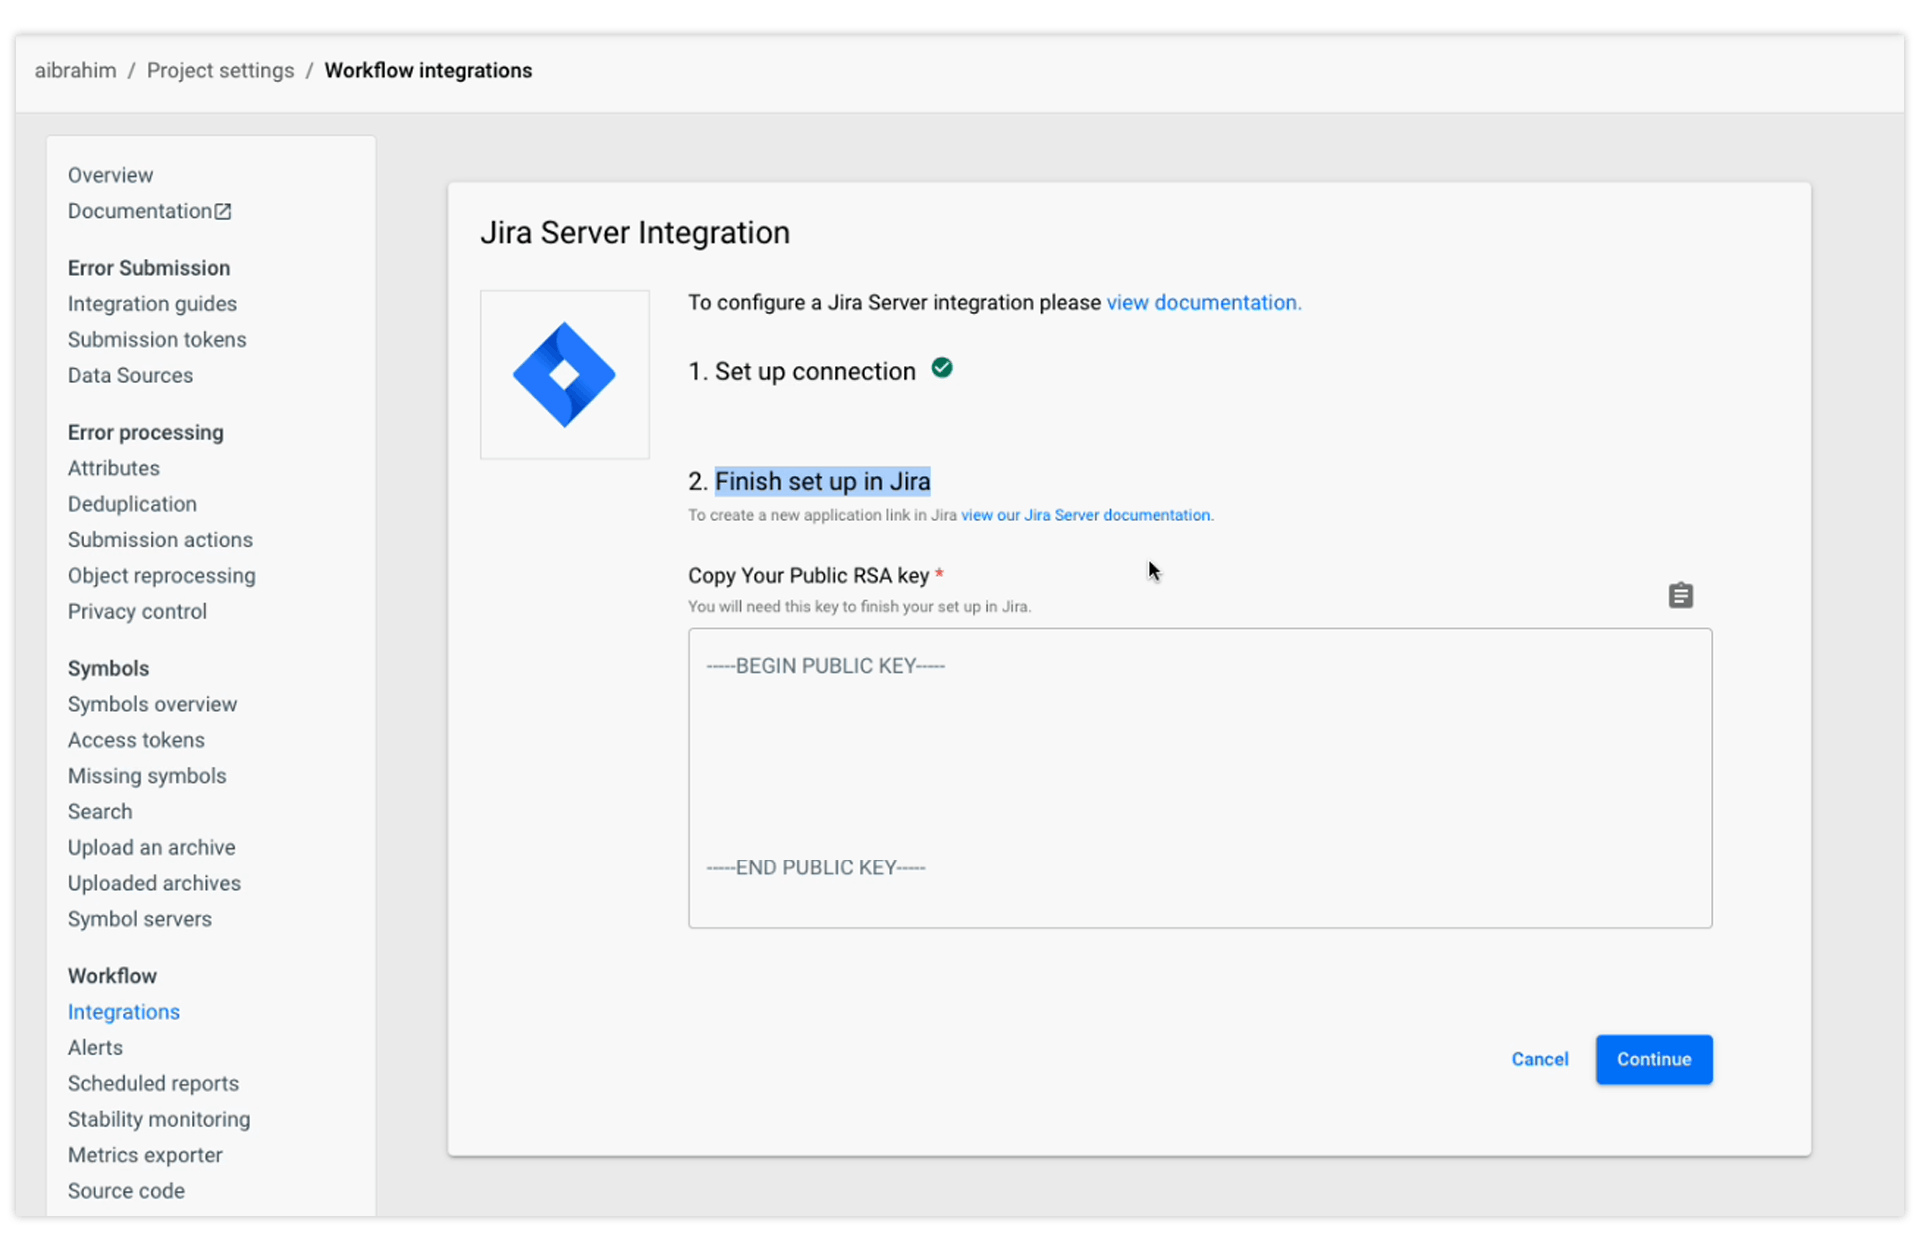
Next, you will copy the public RSA key for later use in the steps to follow (under step 2.4 below).

2.4 Create an application link in Jira
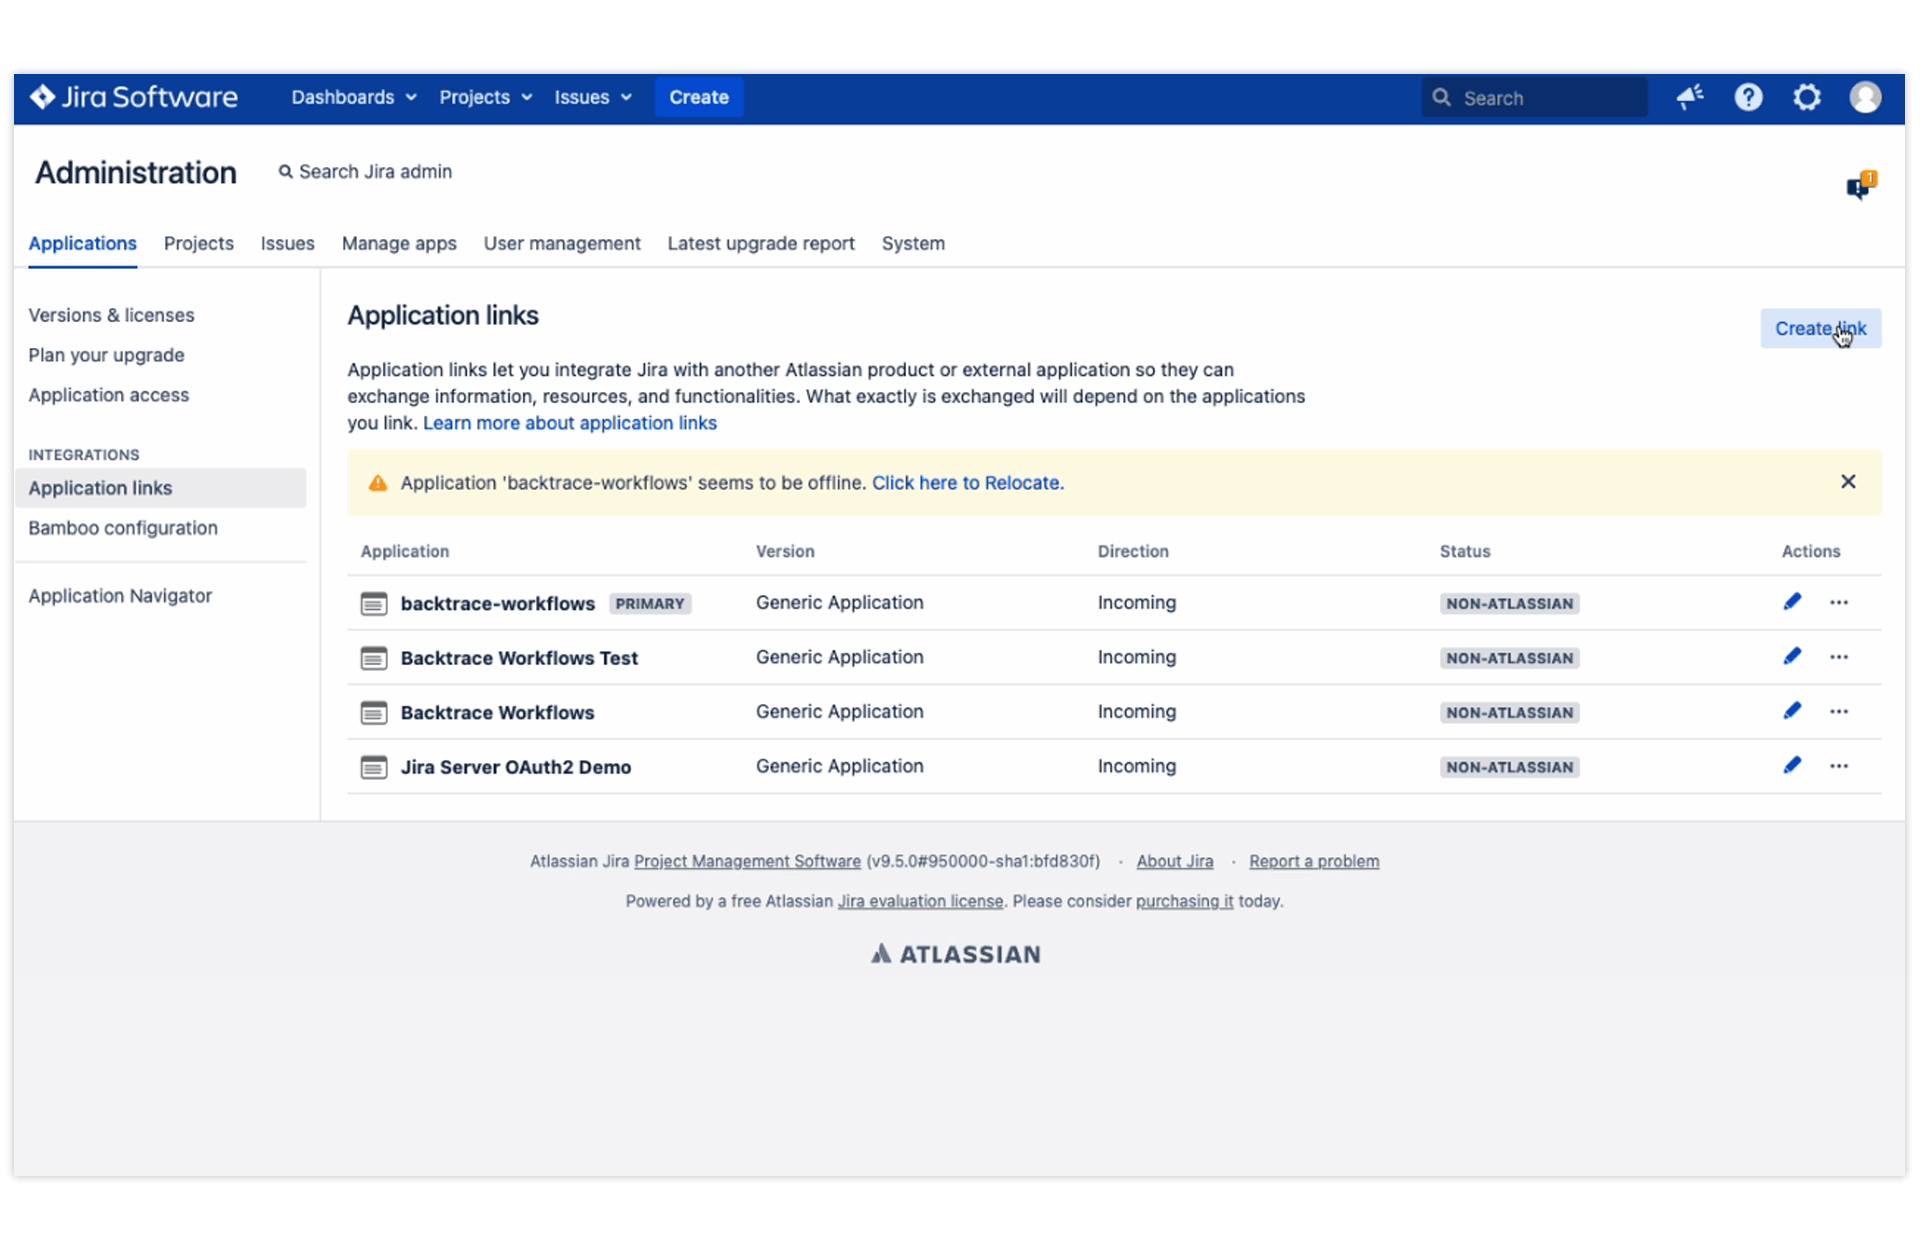
In Jira, navigate to Jira settings (cog icon) > Applications > Application links.
Click Create link.
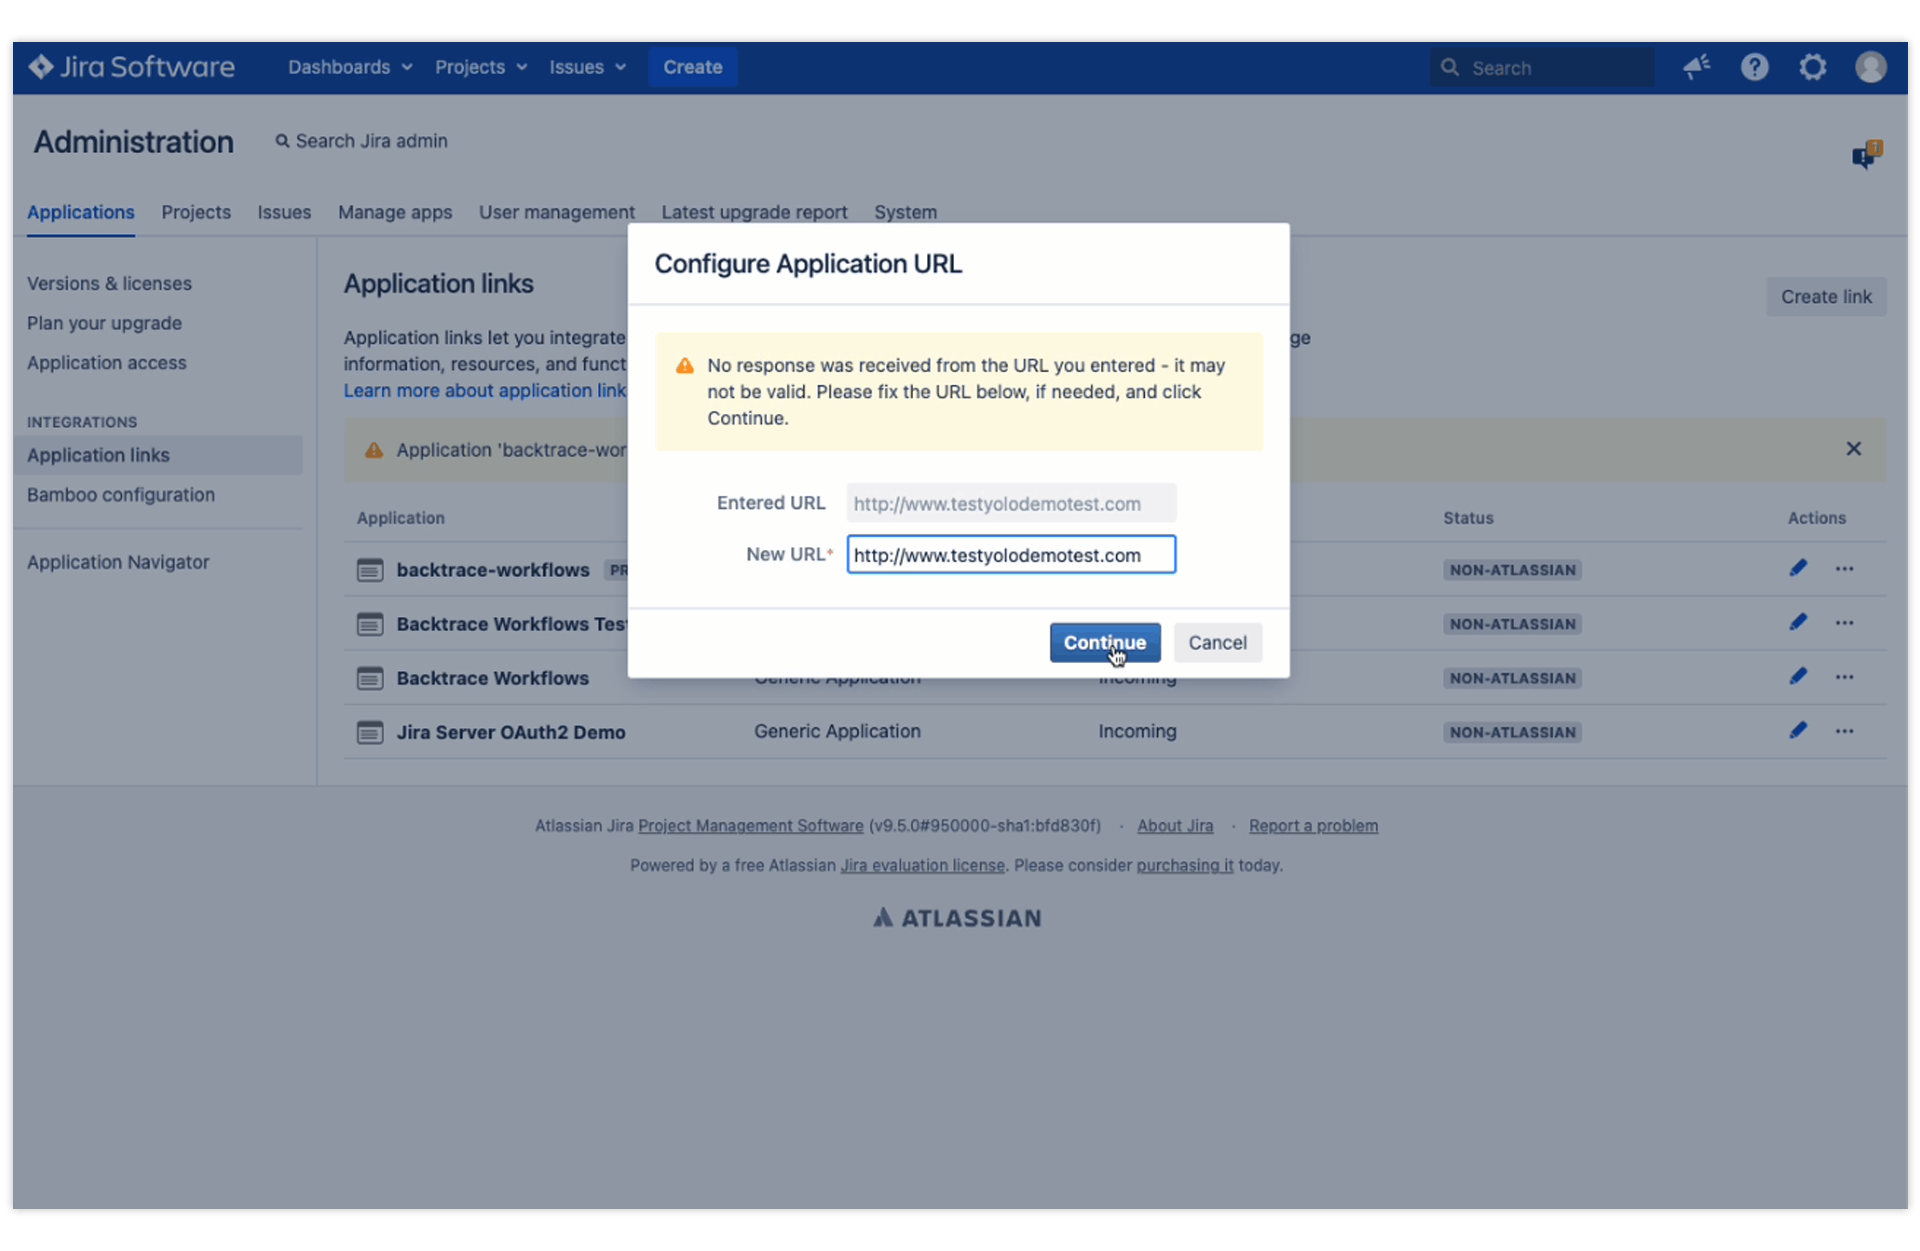
For Application type, select Atlassian product.
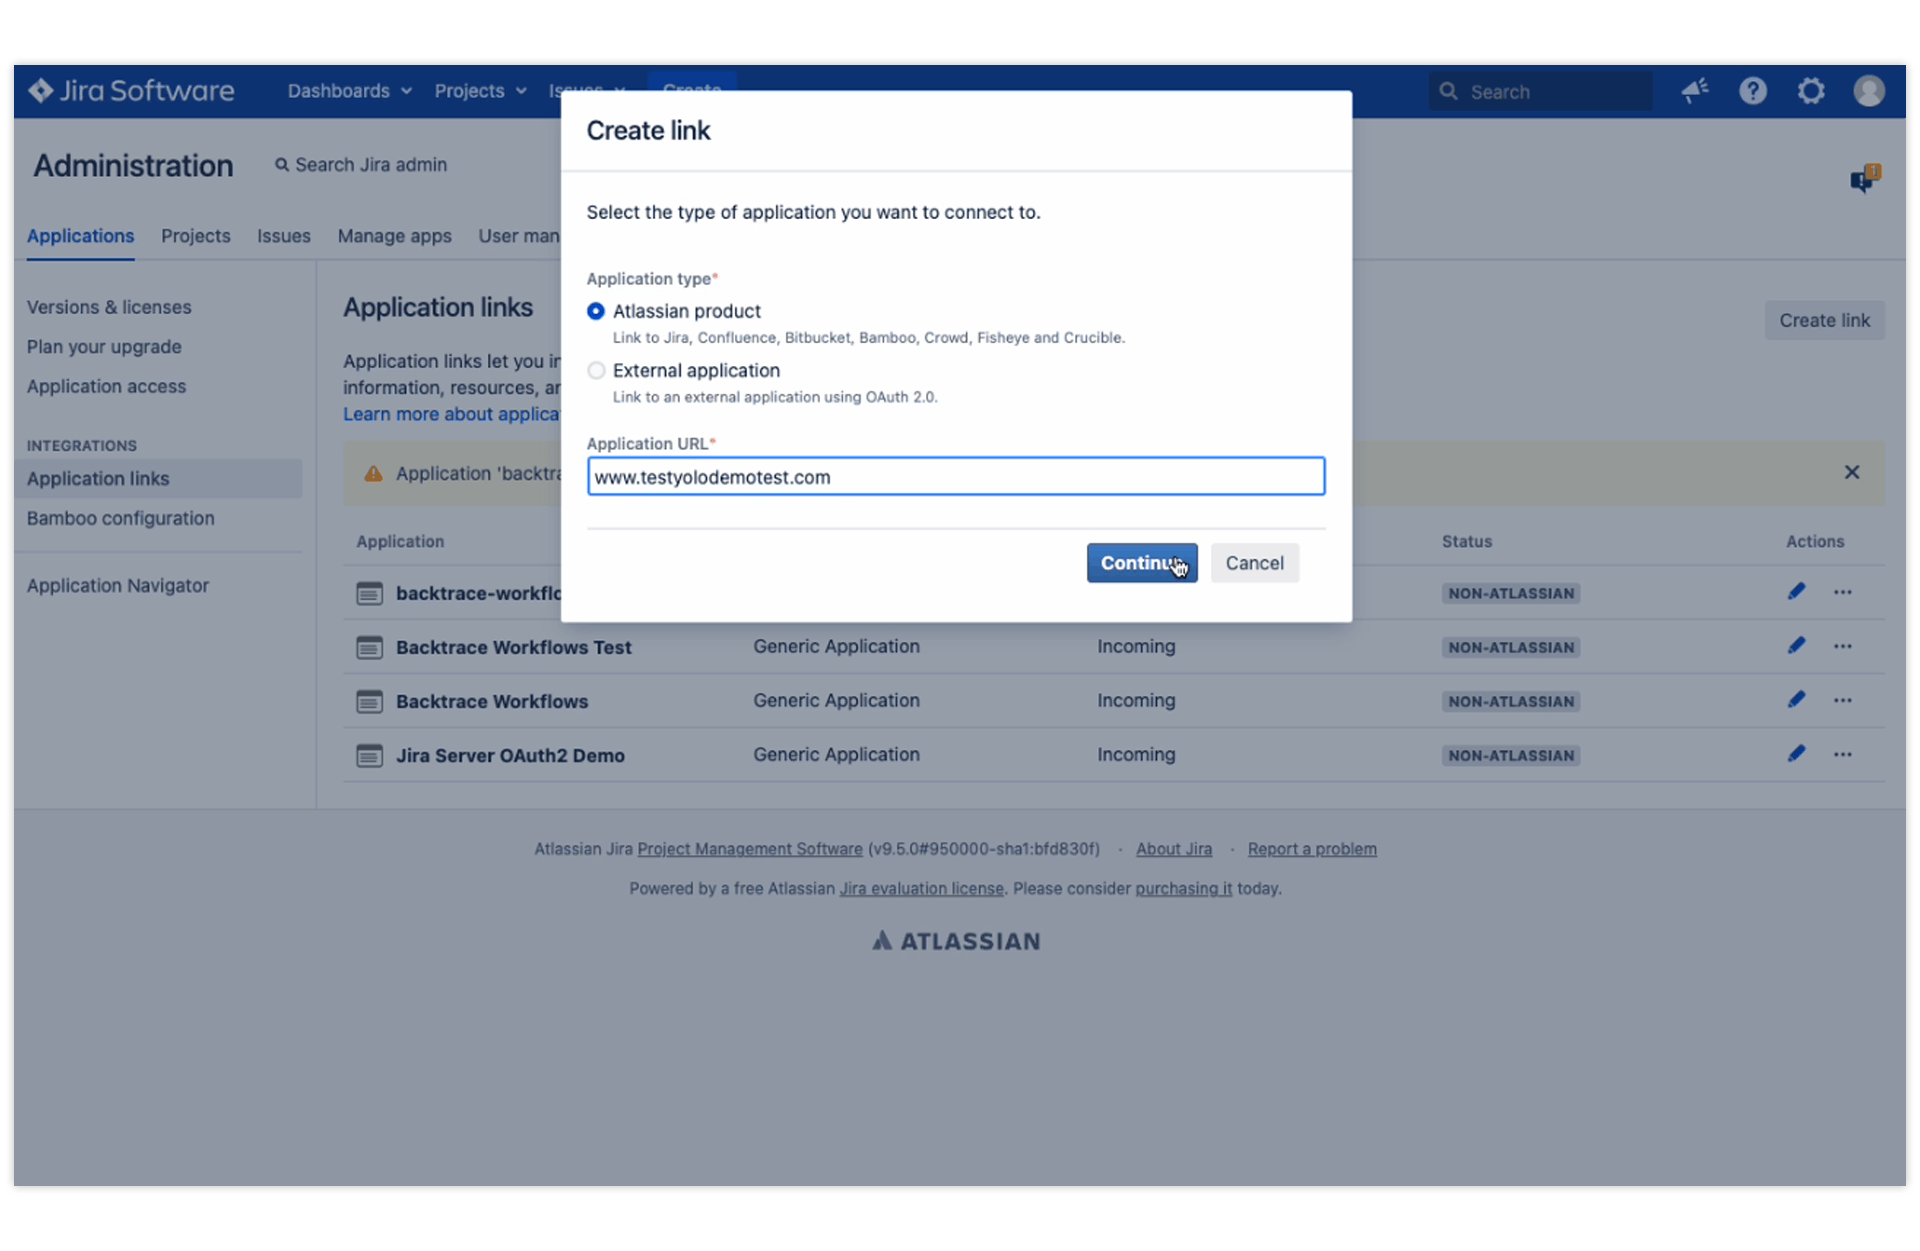
Enter an application URL, then click Continue. If you see a warning that the URL is invalid, ignore it and click Continue again.
Under the Link applications form, enter the following:
- Application Name: Jira Server OAuth1 Demo
- Application Type: Generic Application
- Service Provider Name: Backtrace
- Consumer Key: BacktraceIO
- Shared Secret: Backtrace
- Request Token URL: https://backtrace.io/
- Access Token URL: https://backtrace.io/
- Authorize URL: https://backtrace.io/
- Create Incoming Link: No
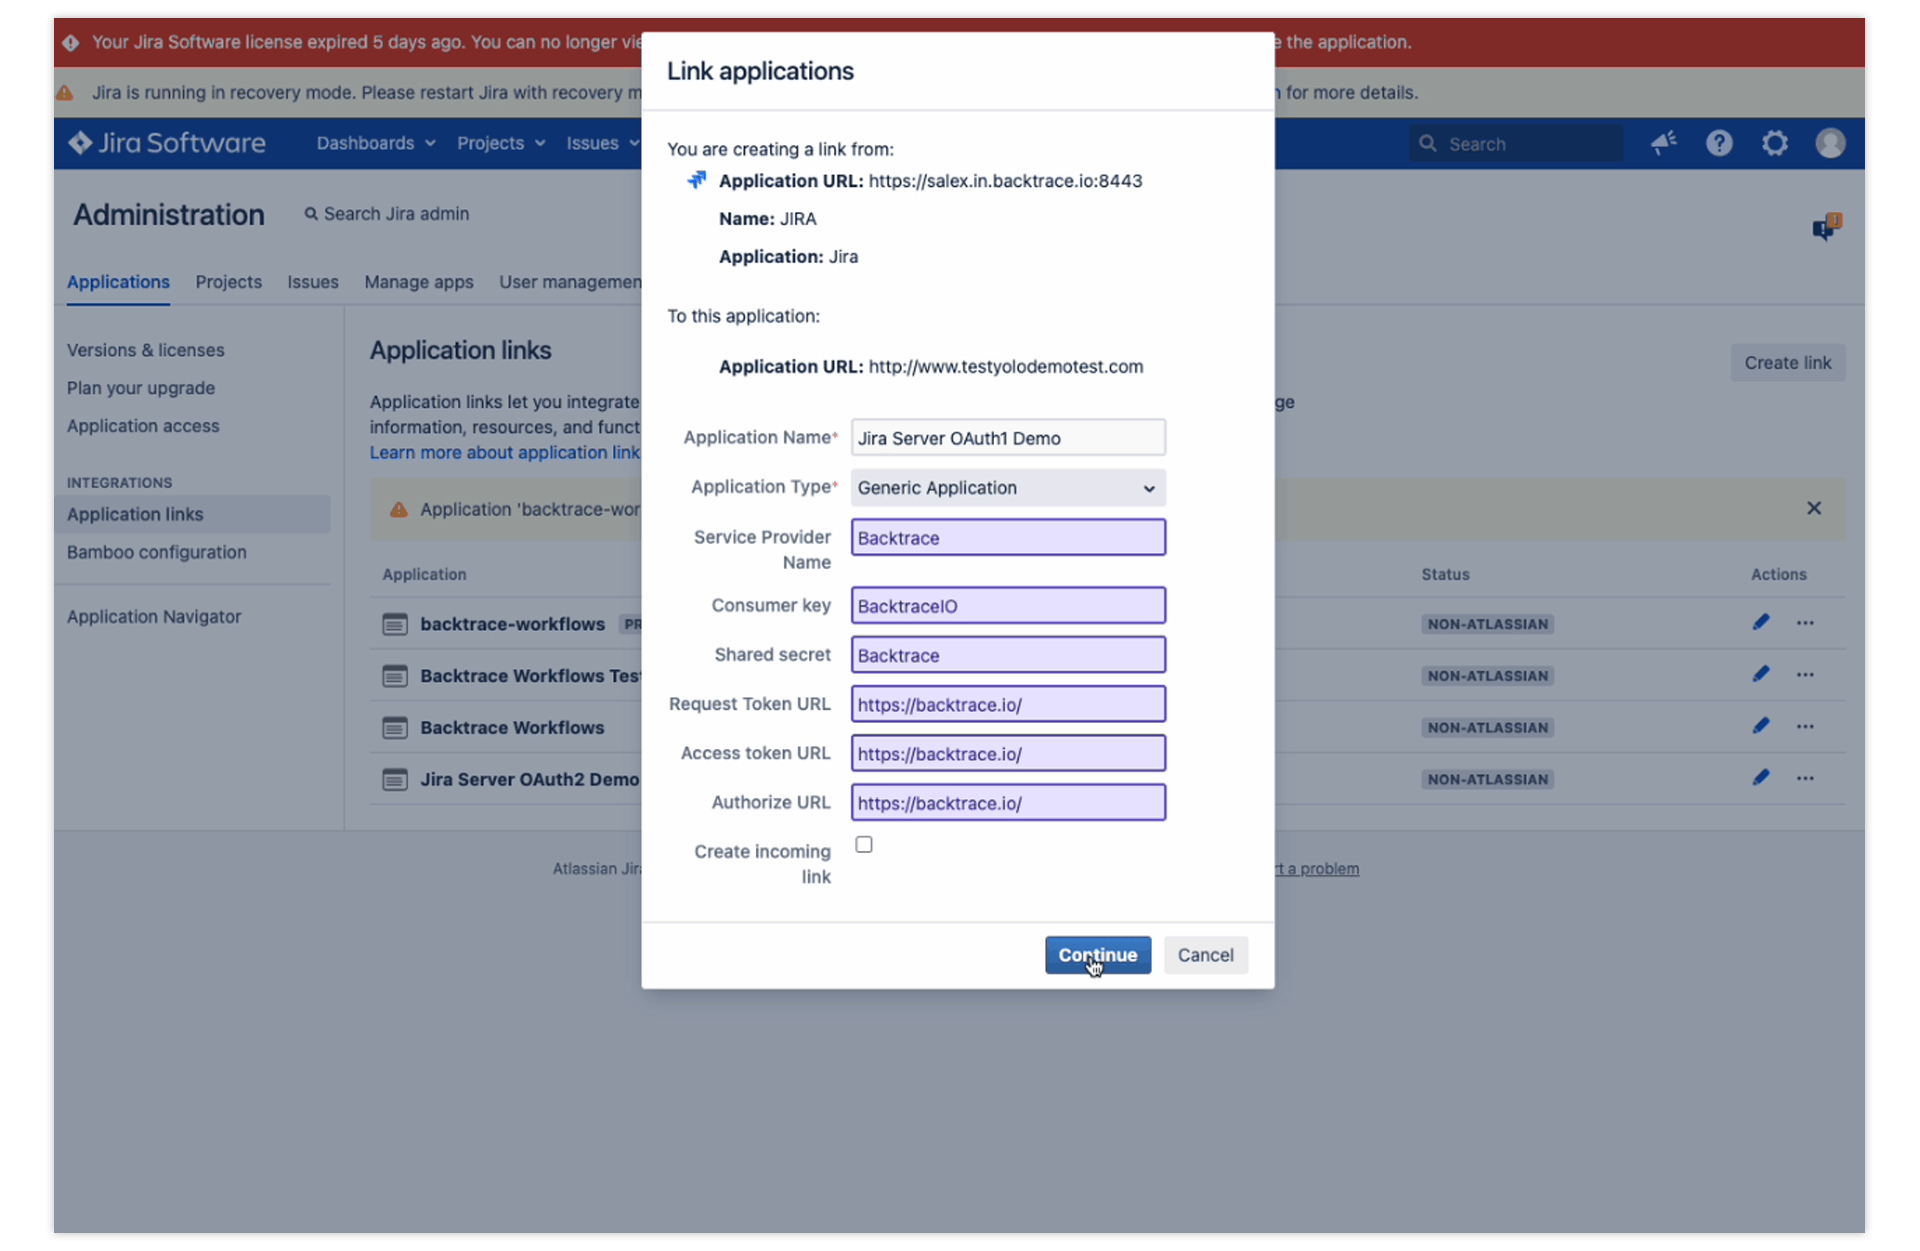
Click Continue.
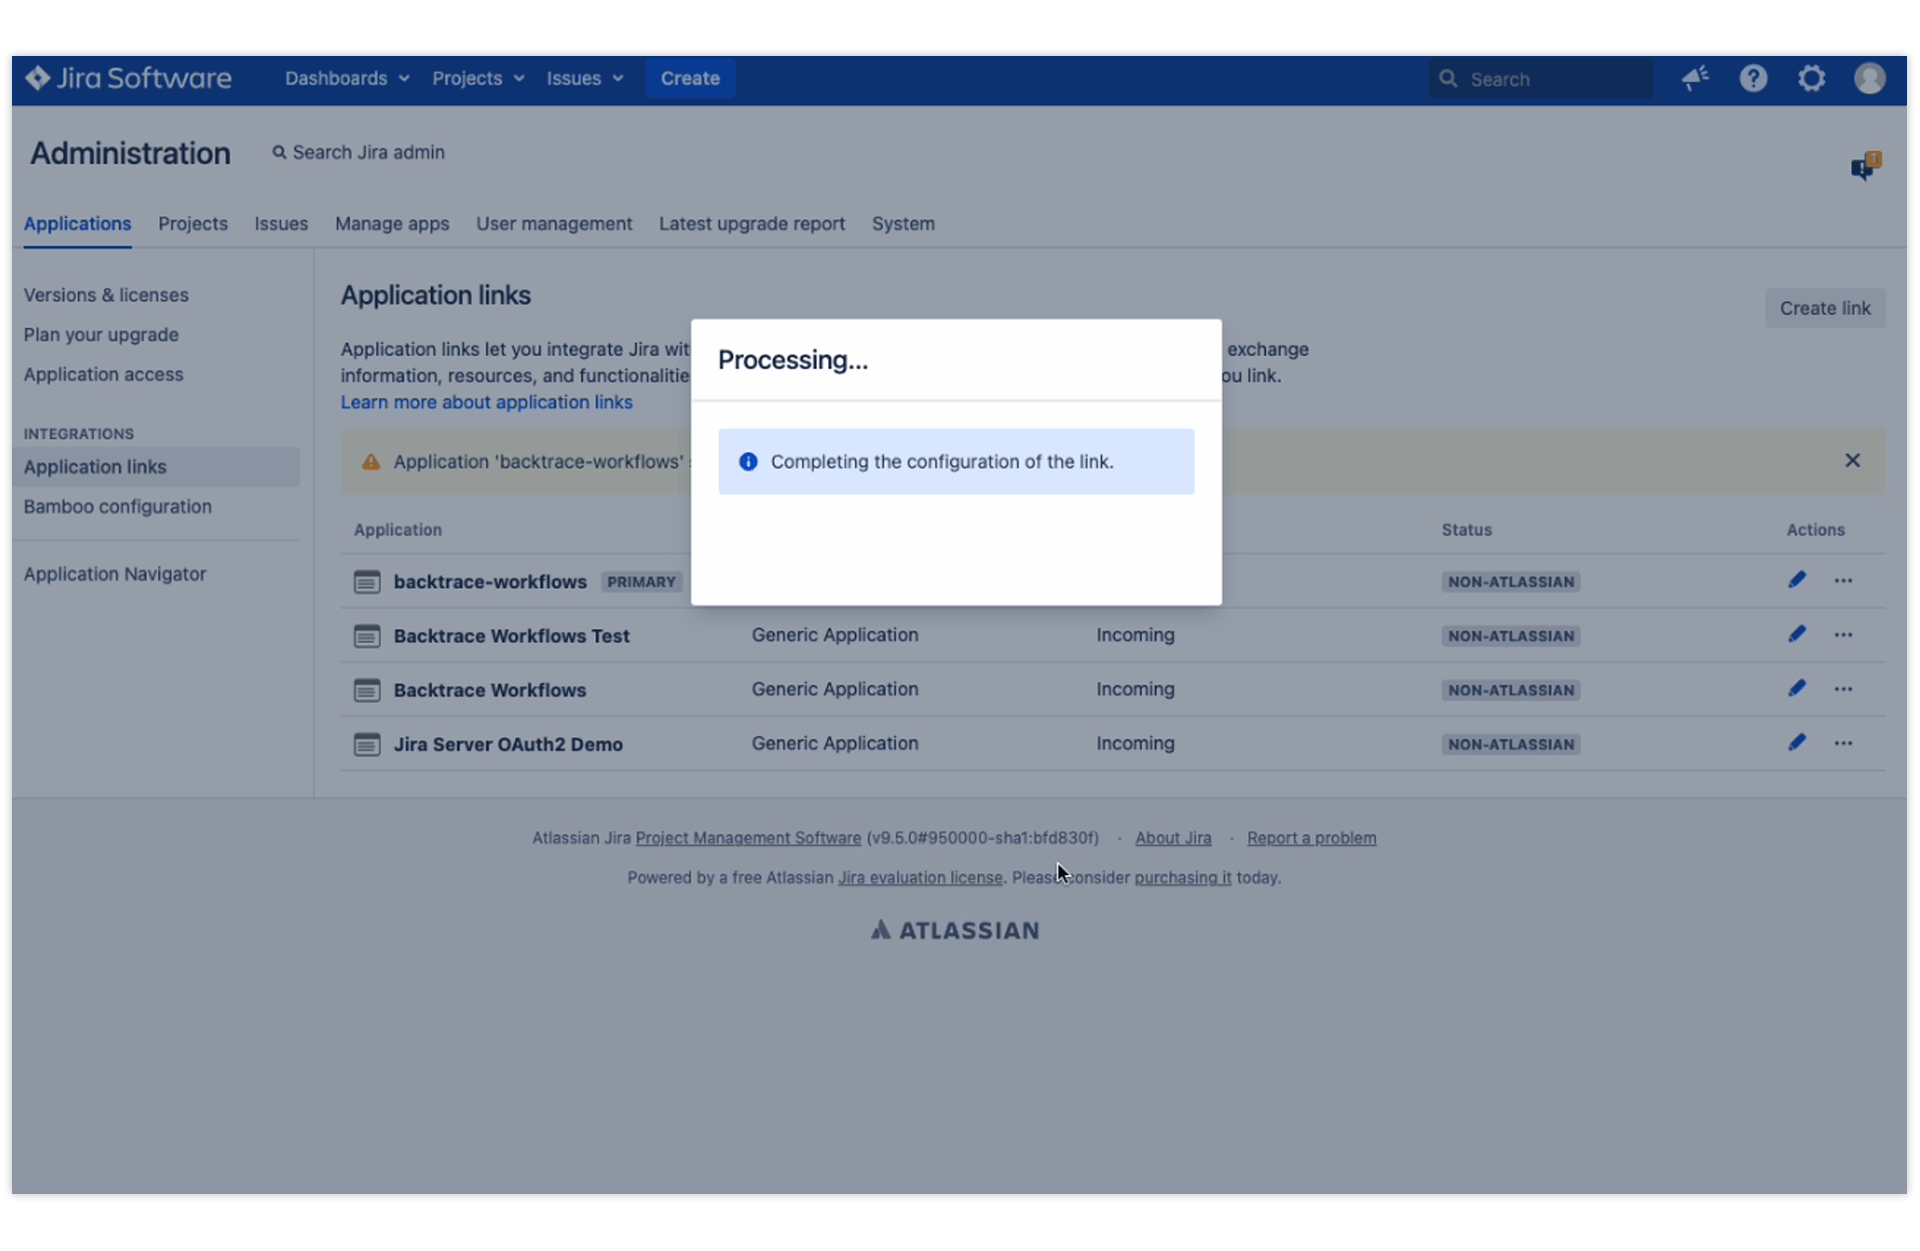
The page might take a couple of seconds to process.
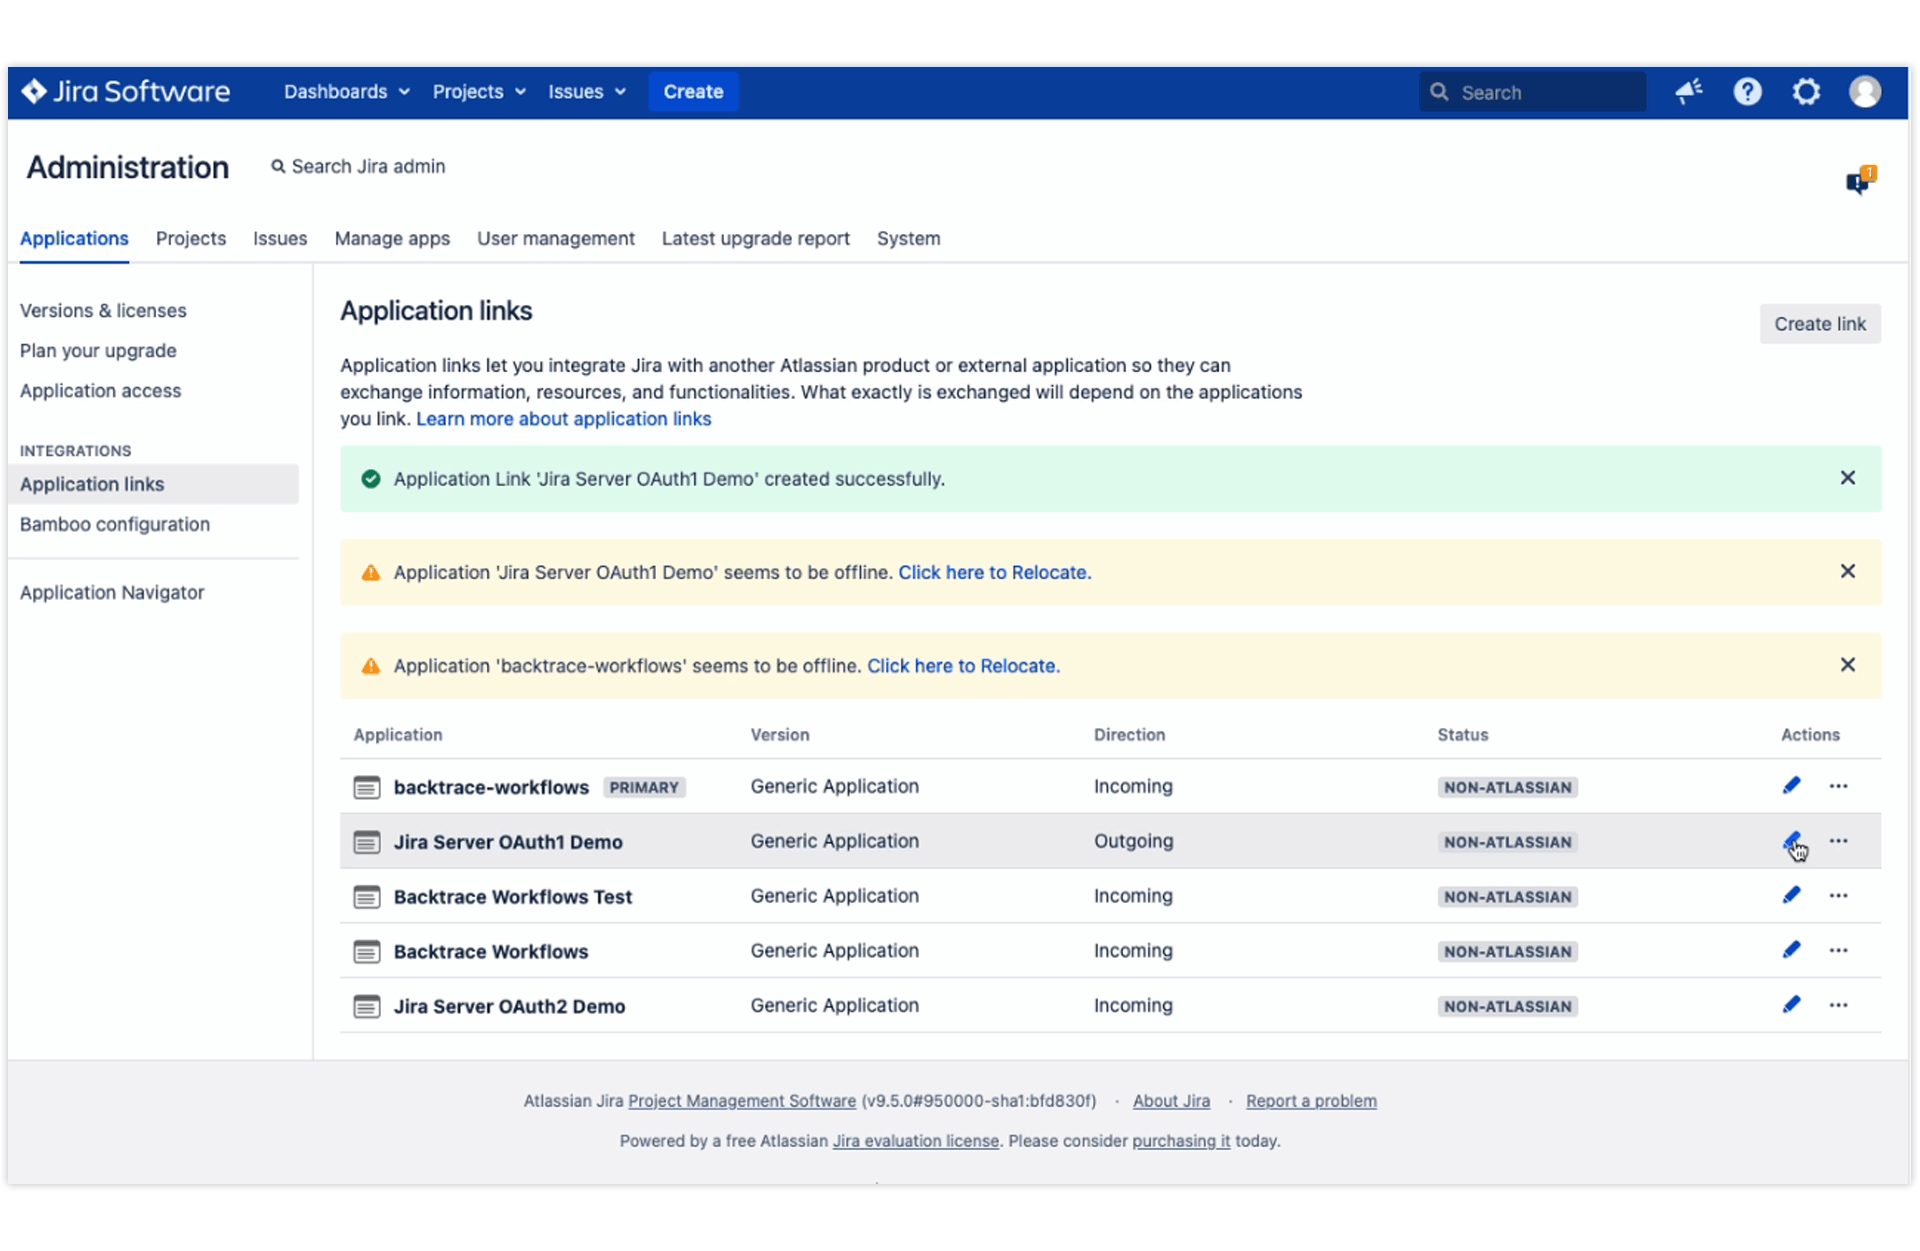
On the Application links page, you'll see an application called Jira Server OAuth1 Demo. Next, from the Actions column under the Jira Server OAuth1 Demo application row, click the blue crayon icon.
Next, in the Configure Backtrace dialog, select Incoming Authentication.
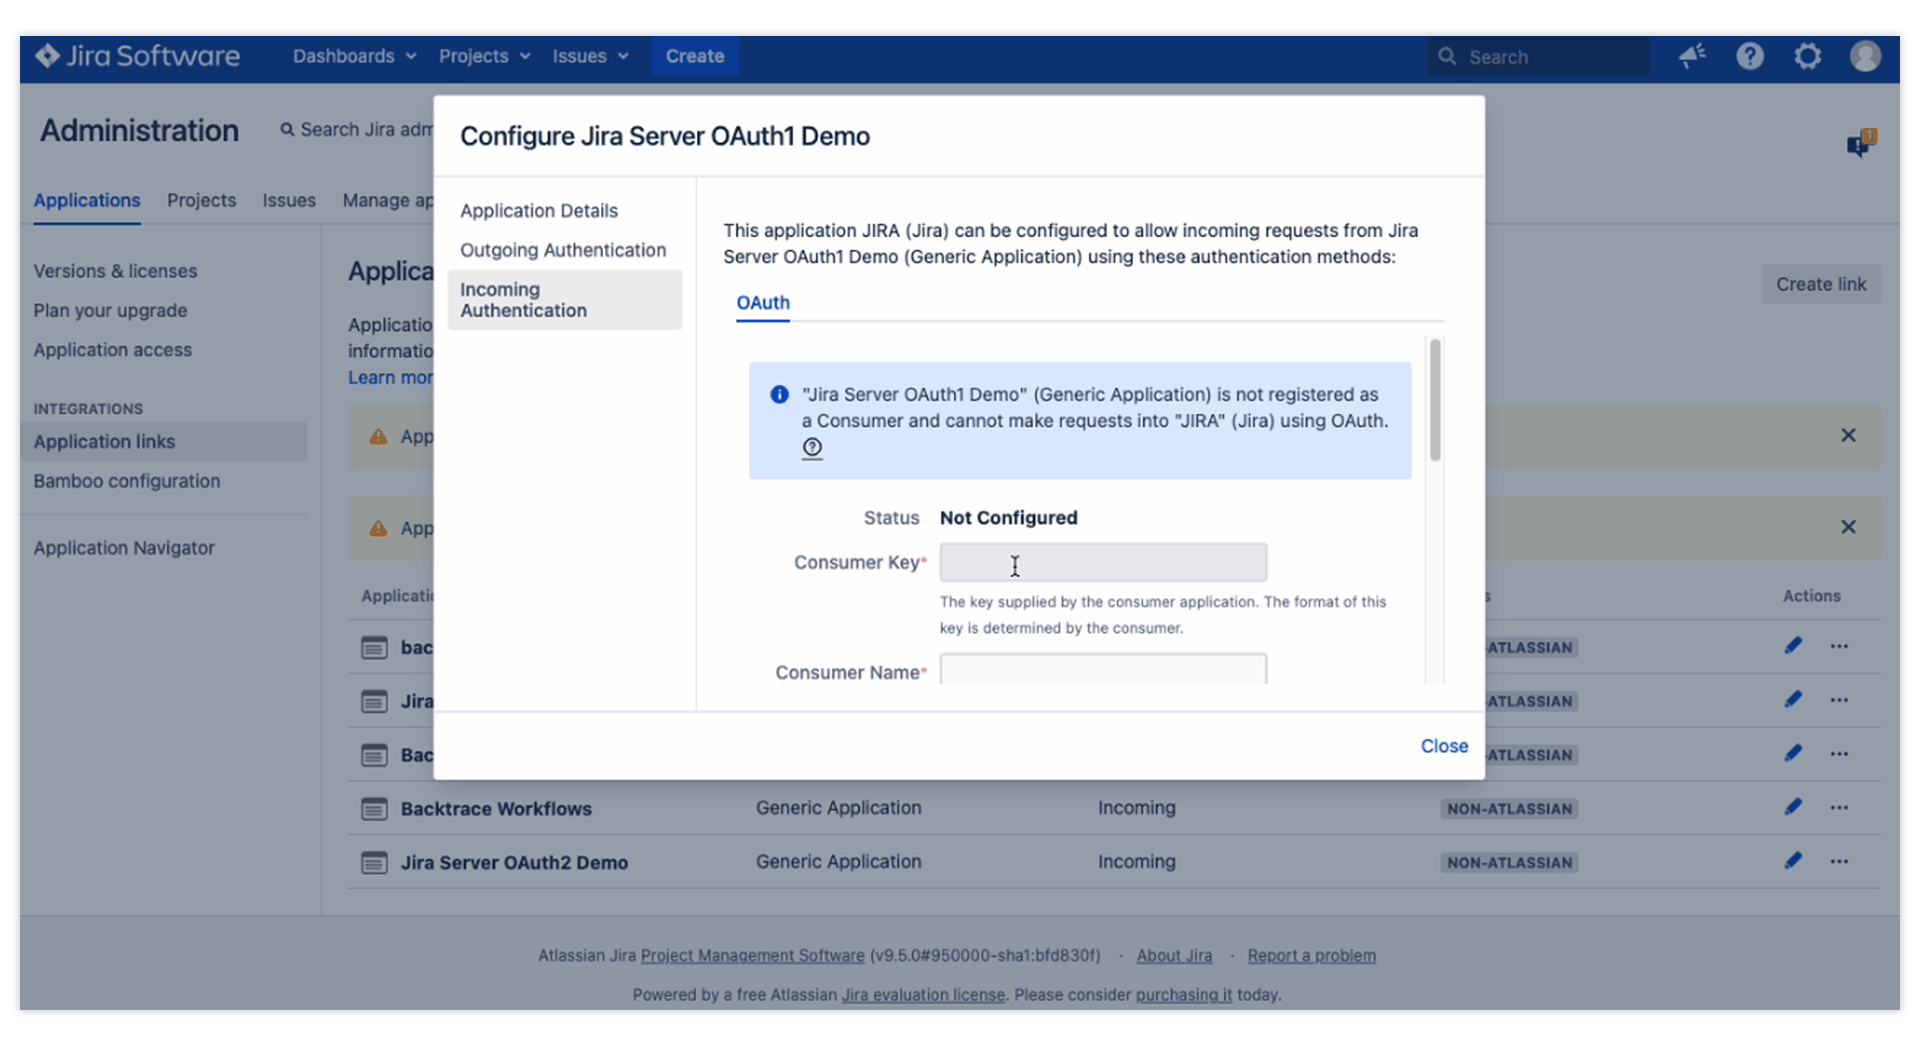
Under OAuth tab, enter the following:
- Consumer Key: BacktraceIO
- Consumer Name: Backtrace
- Public Key: The public key that you copied from Backtrace (from step 2.3.2 above) or the public key from the jira_publickey.pem file that you generated (from step 2.3.1 above).
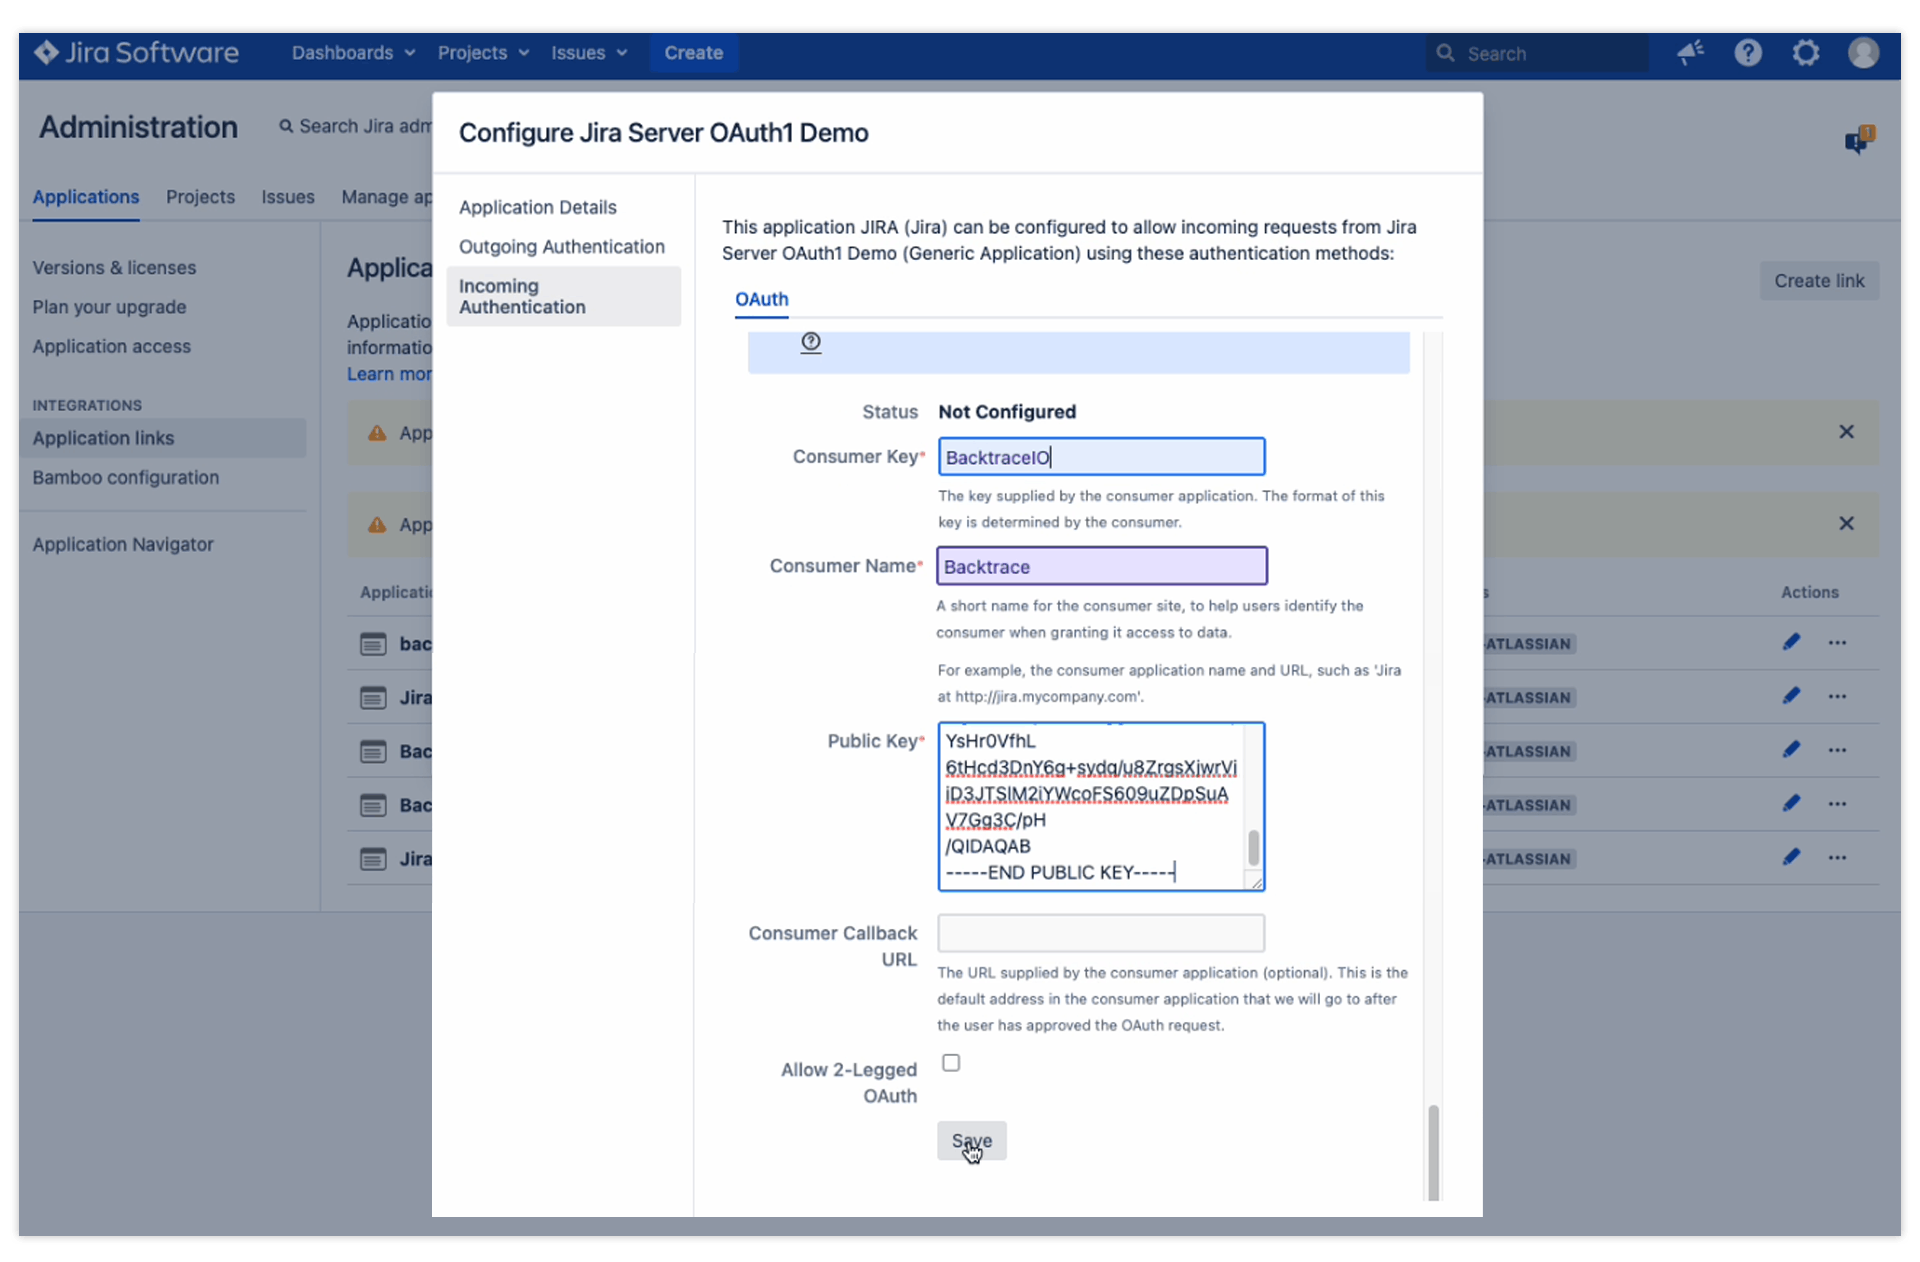
Click Save, then Close.
2.5 Connect the Jira Server app with Backtrace
In Backtrace, go back to the setup for the Jira Server integration page.
Click Continue to complete the setup in Jira.
Click Authorize. You'll be redirected to your Jira Server instance.
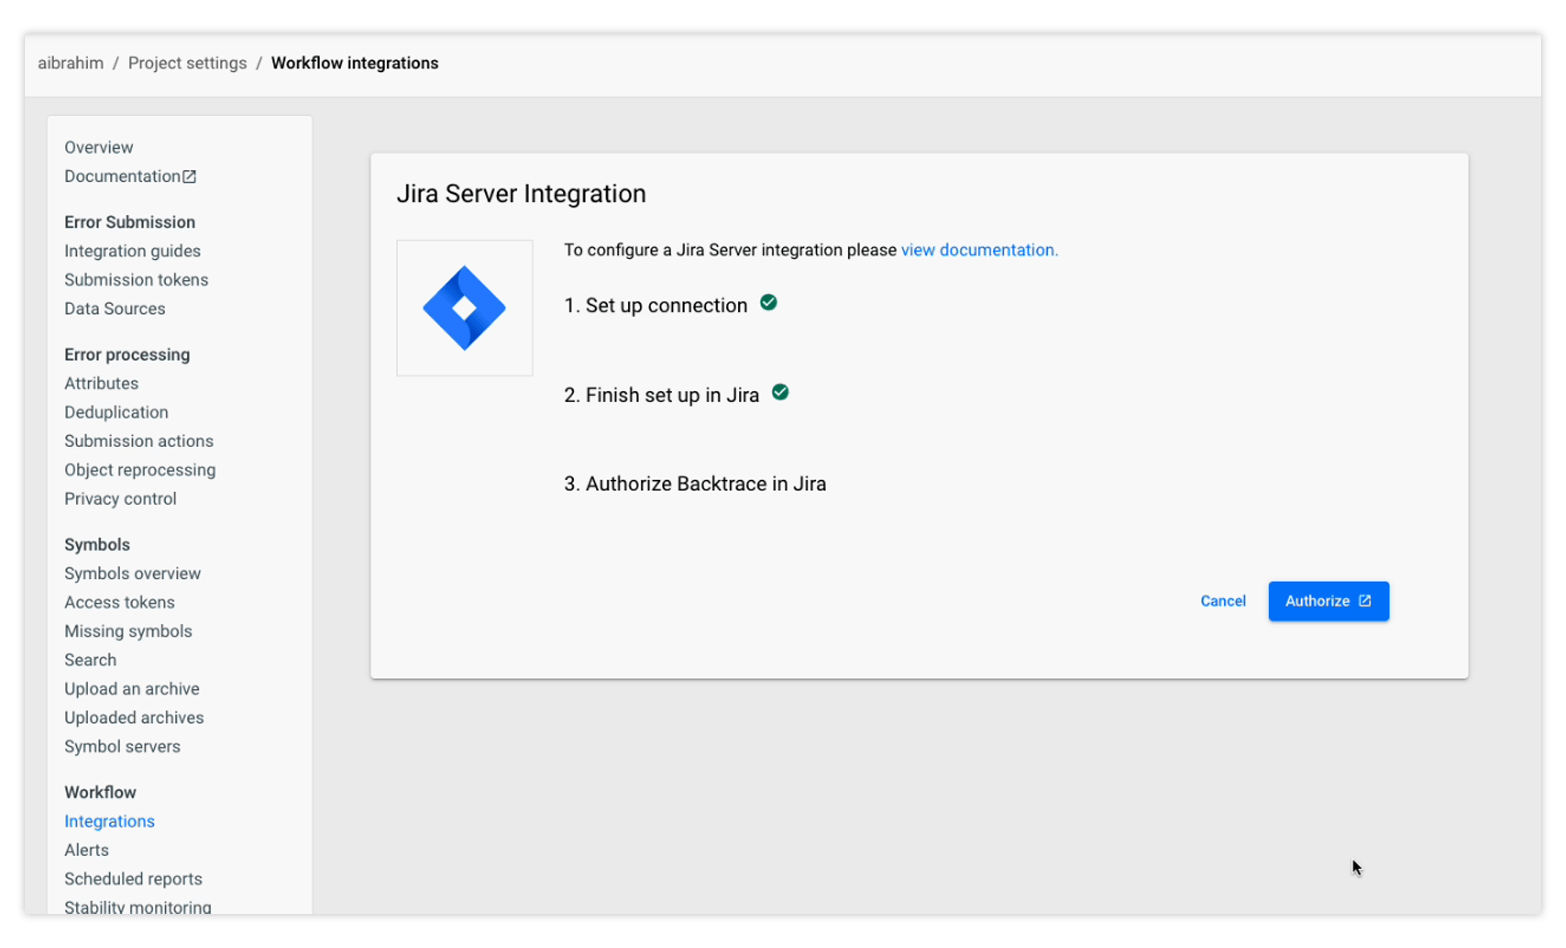
Click Allow.
You'll now be redirected to Backtrace to configure the integration. You may follow the steps necessary to complete the integration by referring to Step 1.3 above.
Set up Jira Server with Basic Auth
Go to Project settings > under Workflow > select Integrations. Then Click +, and select Jira Server (under Issue Tracking)
Next, complete the following:
- Connection name: Enter a name to identify your integration.
- Jira Server url: Enter the URL for your Jira instance.
- Auth type: Select Basic Auth.
Enter the Username and Password for your Jira instance.
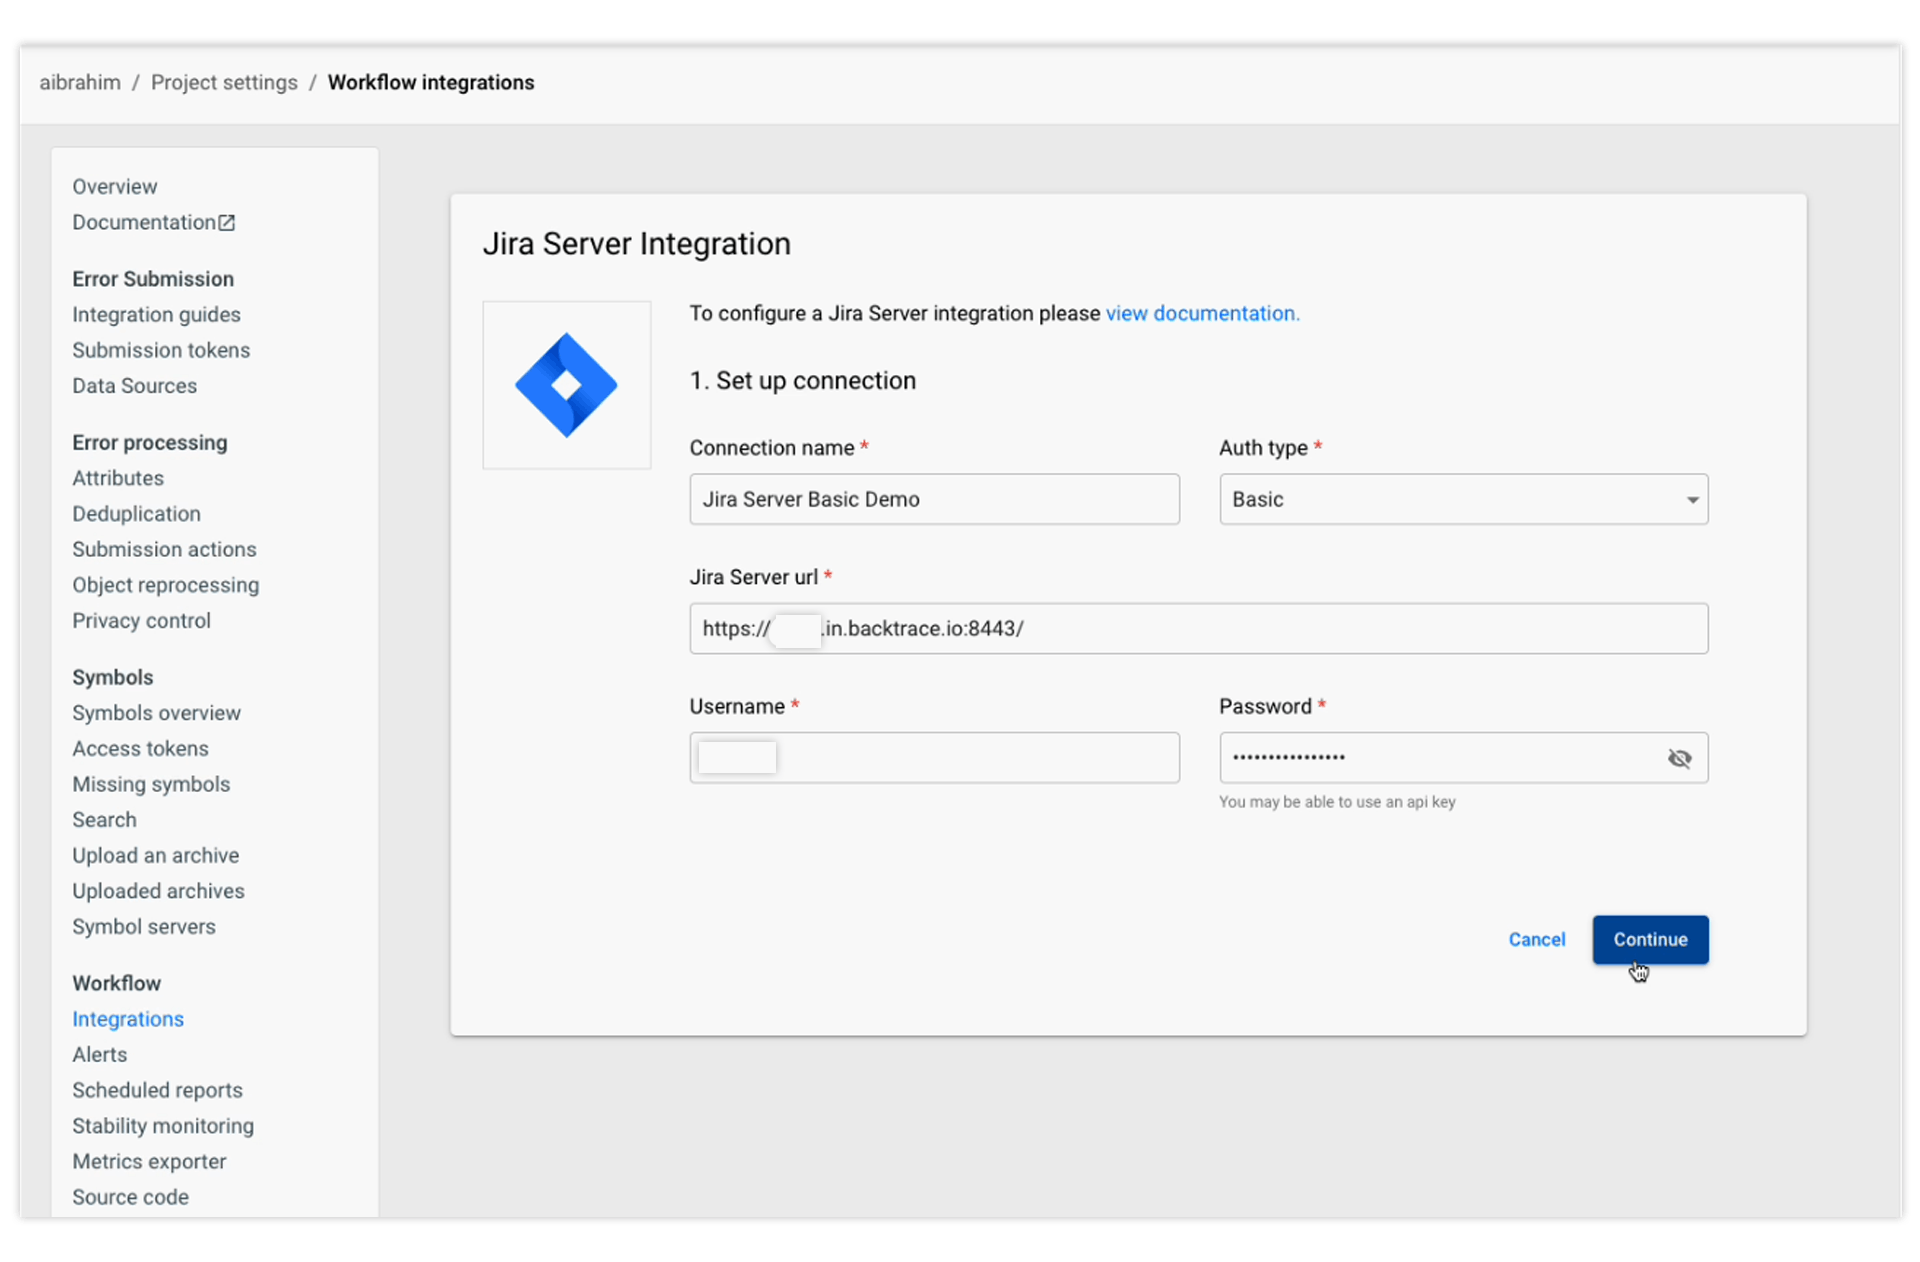
Click Continue to configure the integration. You may complete the integration steps by following Step 1.3 above.
Future Migration to Jira Cloud
As the support for Atlassian Server products ends on February 15, 2024, you may want to consider moving to Jira Cloud. Please refer to our previous blog on how we have made it easier for you to integrate Backtrace with Jira Cloud.
Next: Issue-Based Alerts
Learn more about how we have made it easier for you to create issue-based alerts and how to configure them in our next blog.